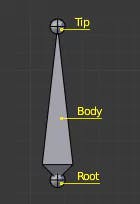
Let's check structure of standard Blender Bone

Blender Bendy Bone Rig
- Place bone
- Select bone > Go to Data Object Properties > Expand Viewport Display > Activate [B-Bone, Names, Shapes, Bone Colors, In Front, Axies]
- Name the bone

- Activate Bone Edit Mode > Bone Properties > Bendy Bones > Increase Segment
- Scroll down and Set Absolute to both Start and End Handle & Select body_root as a custom bone for Start Handle and body_tip for End Handle

- Go to pose mode and try to move and rotate the body_tip, You can rotate but you can not move the body_tip
- Select Tip and Unparent with
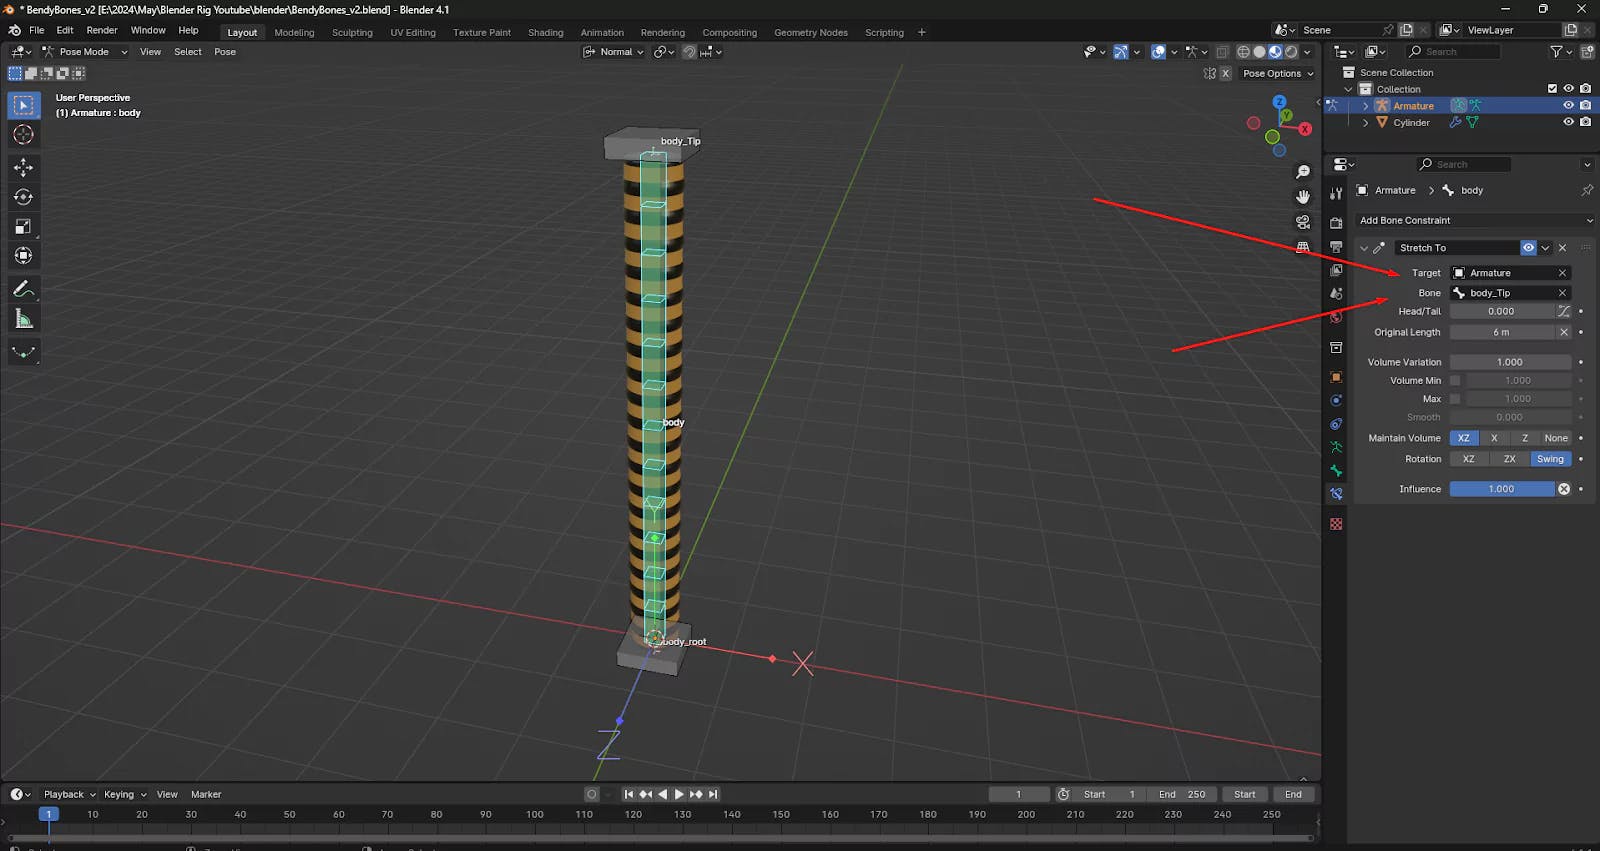
Alt + P - Select the body, go to bone constraints properties > Add Stretch to > The target should be the armature, And the bone should be the body tip, Here we have selected the body tip because the root is already connected to the body bones

Note: Any time there are any discrepancies regarding the position of the stretch bone we can simply click the clear mark on the original length value Insert the stretch-to-bone constraint
- Now try to reposition the body_tip and try to rotate the body_tip bone too and you can see everything is working perfectly
Add a controller to control the bone-bending orientation
- Select the bone and go to edit mode
- Select the top and bottom controller bone then press
Shift + the S key from the keyboard, from the pop-up menu Select the cursor to Selected this will ensure that the 3D cursor points at the Middle of the two selected bones - Now add an armature bone here This will be our controller bone for the bending properties of the body
- Go to the pose mode and select the tip bone now go to the bone constraint properties and add the damped track constraint, Select armature as the target and the newly created controller bone for the bone,
If the body bones are displaced at this step, just change the value of track axis to the opposite axis is the common solution
- Check the result by moving the bend_controller bone that we have just created
- Repeat the same step for the body root controller
- Check the bone structure again try to move all the bones and check the result
Bind with mesh
Before binding the bones with the mesh make sure to select all the controller bones, go to bone properties uncheck the deform By holding the alt key from the keyboard, keep in mind if you don't press and hold the alt key the result will be just for one bone even you selected all the bones, This will ensure whenever you are going to bind bones with the mesh the deformed bones will not affect the weight painting of the object or mesh.


