How to Fetch Files from GitHub with REST API in SvelteKit

In this guide, we will walk through accessing a sitemap.xml file from a GitHub repository using the GitHub REST API.
The goal is to integrate this API call into a SvelteKit application, which has its own repository, allowing us to fetch and display the contents of the file.
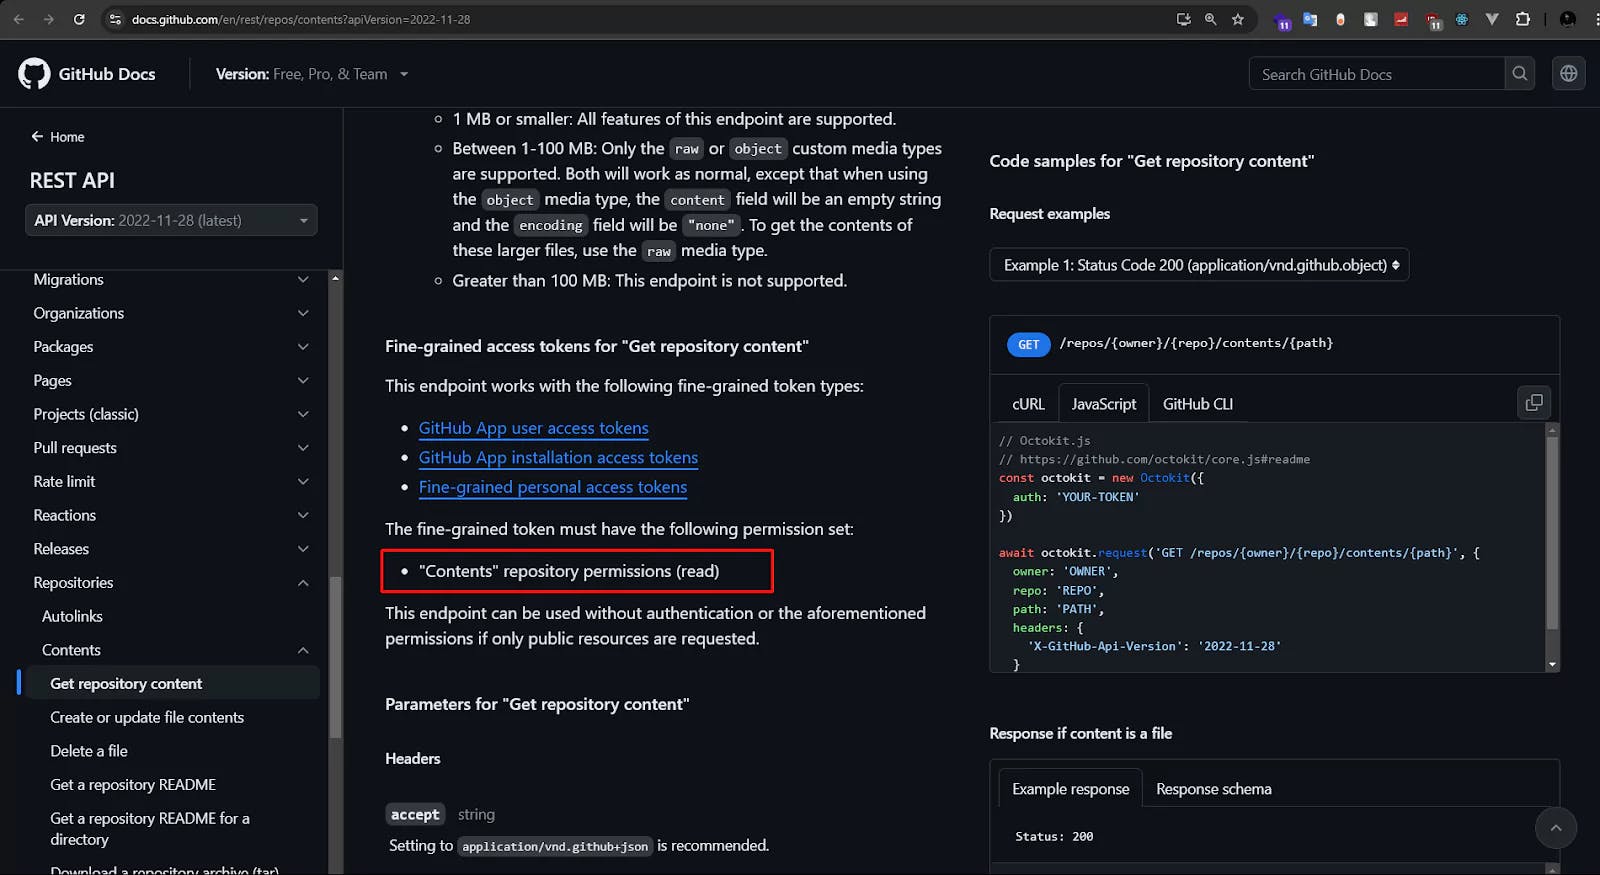
GitHub repository details: (GIT_ACCESS_TOKEN, GIT_REPO_NAME, GIT_REPO_OWNER, GIT_FILE_PATH).API call from a SvelteKit application.If you visit this URL GITHUB REST API READ FILE, you will notice we can call the following endpoint:
https://api.github.com/repos/${repoOwner}/${repoName}/contents/${filePath}
This endpoint allows us to retrieve the contents of the file located at filePath within the specified repository (repoName), owned by repoOwner.

Also, we need a couple of pieces of information to be able to call the API endpoint successfully.
The GitHub documentation also mentions that the fine-grained token must have the following permission set:
"Contents" repository permissions (read)
GitHub repository detailsNavigate to Profile / Settings / Developer Settings / Fine Grained Tokens / Generate New Token.
You can follow the following steps to obtain all the required information from git:
<YOUR-TOKEN> : Which we can obtain from Developer Settings in GitHub.
Settings.

Developer Settings.

Personal access Tokens, then Fine-grained tokens, and then Generate new token.

Contents permission set to Read-only.

GIT_REPO_NAME, GIT_REPO_OWNER, GIT_FILE_PATH).

API call from a SvelteKit application.Create a directory or folder (ex - sitemap.xml).
Create a +server.js file inside the directory.
Let’s write a Basic API Response:
export async function GET() {
  const sitemap = "Hello";
  return new Response(sitemap);
}
At this point, you can run the server and get the
APIresponse on the route that you have just created.
Now let’s create a .env file and store all the collected information from GitHub.

Now import those environment variables:
import {
  GIT_ACCESS_TOKEN,
  GIT_REPO_NAME,
  GIT_REPO_OWNER,
  GIT_FILE_PATH,
} from "$env/static/private";
Let’s use those variables and keep writing the code:
import {
  GIT_ACCESS_TOKEN,
  GIT_REPO_NAME,
  GIT_REPO_OWNER,
  GIT_FILE_PATH,
} from "$env/static/private";

export async function GET() {
  const repoOwner = GIT_REPO_OWNER;
  const repoName = GIT_REPO_NAME;
  const filePath = GIT_FILE_PATH;
  const accessToken = GIT_ACCESS_TOKEN;

  const response = await fetch(
    `https://api.github.com/repos/${repoOwner}/${repoName}/contents/${filePath}`,
    {
      headers: {
        Accept: "application/vnd.github.v3.raw",
        "X-GitHub-Api-Version": "2022-11-28",
        Authorization: accessToken ? `Bearer ${accessToken}` : undefined,
      },
    }
  );

  const sitemap = await response.text();
  return new Response(sitemap);
}
At this point, you will receive the response as text:

Let’s check if the response is okay and also add headers info to keep receiving the response in xml format:
if (!response.ok) {
  throw error(500, "Failed to fetch sitemap");
}

const sitemap = await response.text();
return new Response(sitemap, {
  headers: { "Content-Type": "application/xml" },
});
Now if you check the response on the browser, you can have something like this:


Getting the "Invalid wkhtmltopdf version" error in Frappe or ERPNext? Learn how to fix broken PDFs, install the patched Qt version, and switch to headless Chrome for pixel-perfect modern CSS and custom font support.

Learn how to quickly expose a localhost server to your local network on Windows using netsh portproxy. A step-by-step guide to accessing local apps from any device.

Learn how to enhance your Frappe Desk UI by adding a custom, dynamic top bar. Follow this beginner-friendly, step-by-step tutorial to display user profiles, statuses, and more!