OBS Studio Input Overlay Guide Step-by-Step Install Tips for Keyboard and Mouse Input Display


In this blog post, I will show you how to add an input overlay of keyboard and mouse keys pressed by the user to your recorded video or live stream.
1. Download and Install OBS Studio:
2. Download the Input Overlay Plugin:
Input Overlay plugin's resource page: https://obsproject.com/forum/resources/input-overlay.552/.

Download the
plugin installer&preset zip folder
install the plugin. input-overlay-presets.zip folder.
Remember the location of the
input-history-windows.htmlfile, as we'll need it later.
3. Configure OBS Studio:
Sources panel, click the + button and select Browser

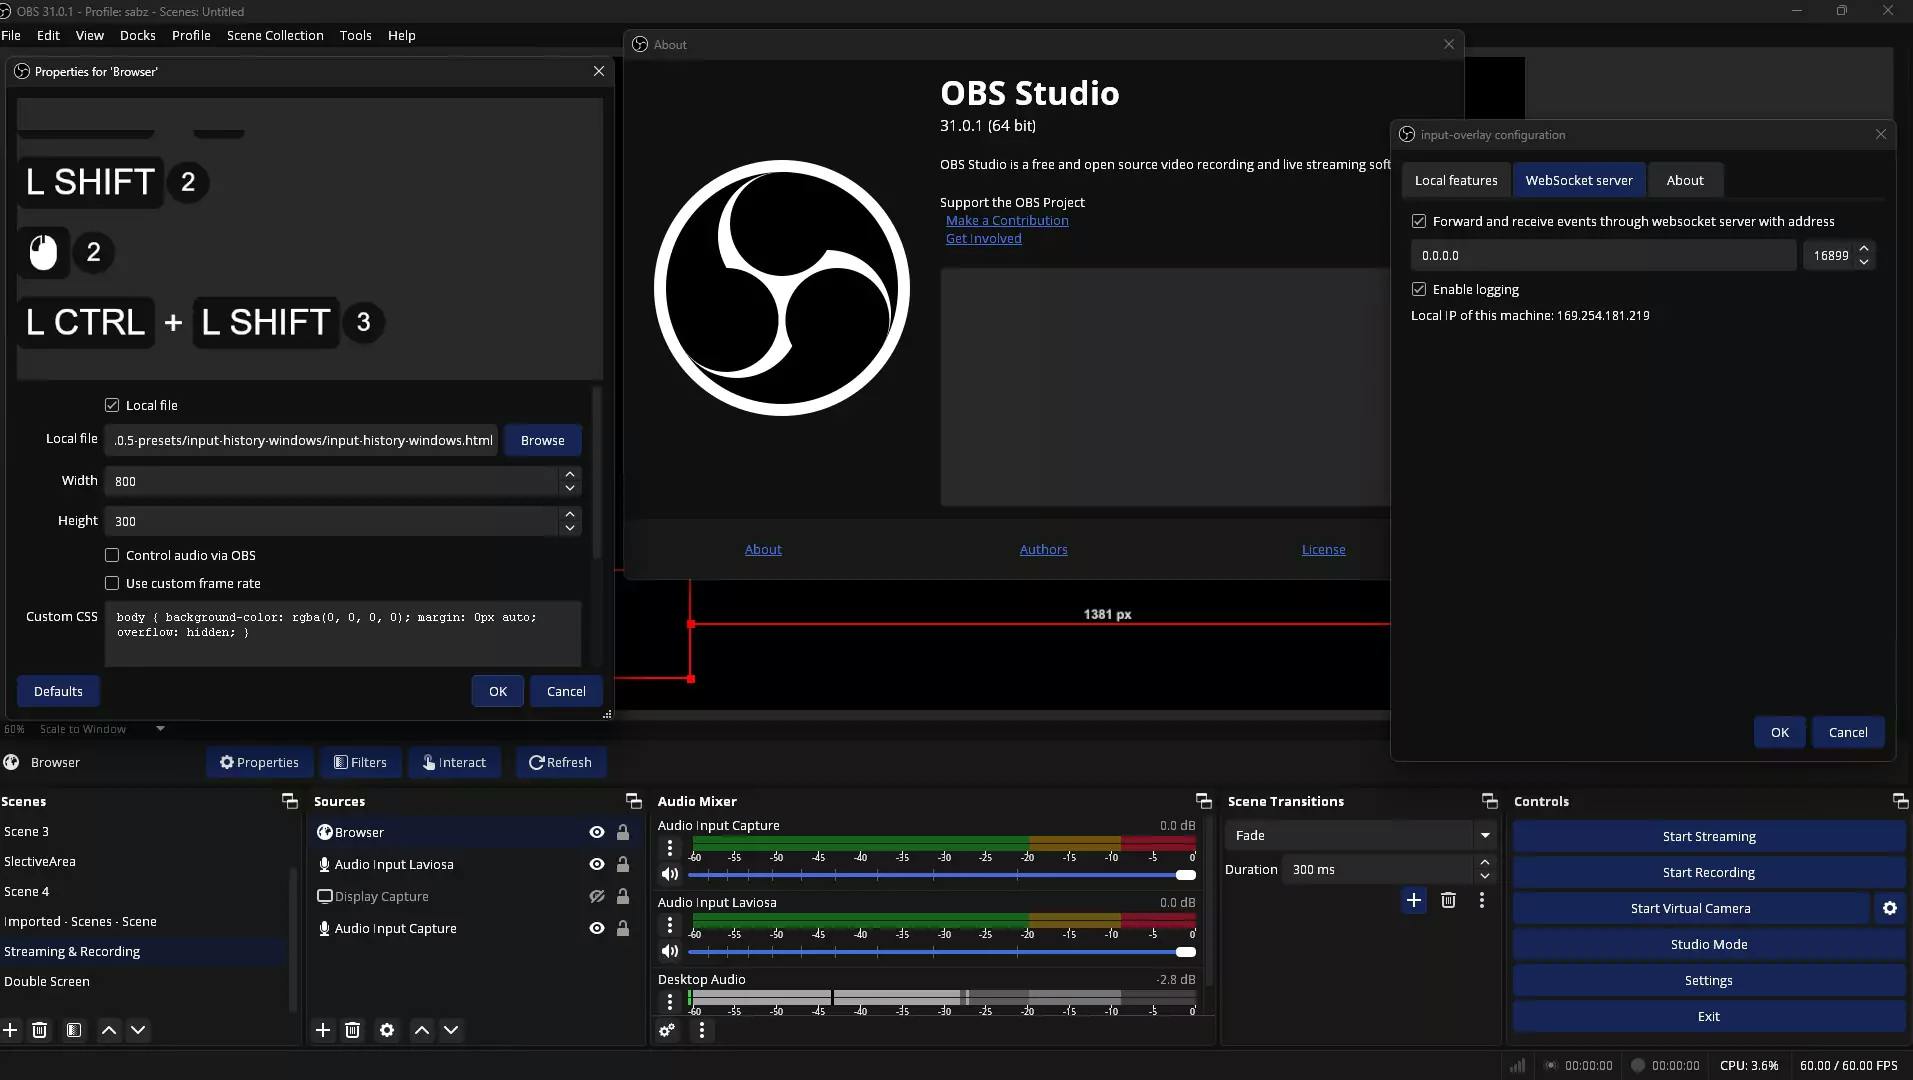
browser source properties:Local File option. input-history-windows.html file from the unzipped presets folder.

full configuration

4. Adjust Input Overlay Settings:
Tools > Input-overlay settings
Enable the necessary settings, such as displaying keyboard and mouse inputs, and customize the appearance as desired.
5. Restart OBS Studio:
Close and reopen OBS Studio. You might be prompted for administrator permissions during the restart. 