How to Add a Dynamic Custom Top Bar in Frappe Desk (Step-by-Step)
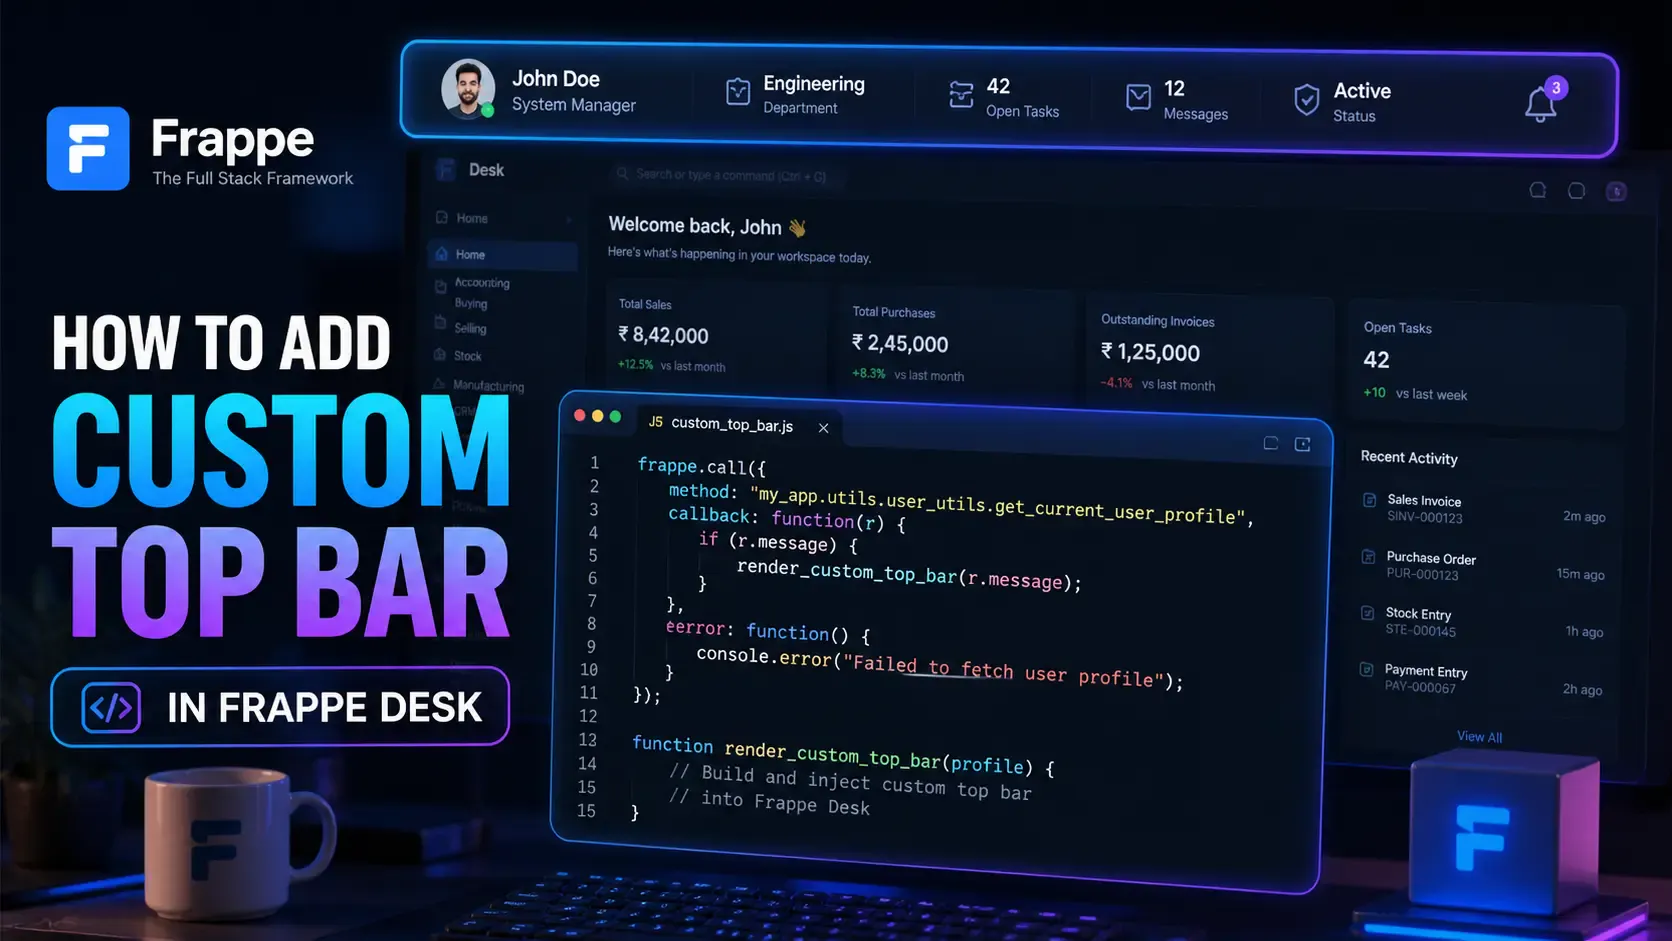
Sometimes you need to display crucial user or document information right at the top of the Frappe Desk UI. Whether it's a logged-in user's profile summary, their department, role, or real-time status, having contextual data at a glance is a massive UX win! 🏆
While Frappe doesn't offer a native drag-and-drop setting for a global top bar, its powerful architecture allows us to add one cleanly using a small custom JavaScript script, a sprinkle of CSS, and an optional whitelisted Python method.
In this guide, I’ll walk you through injecting a custom top bar into Frappe Desk like a pro. Let's dive in! 🚀
💡 Pro Tip: This guide uses generic field names and DocTypes. Make sure to swap them out with your own app name, DocType names, and field names as you follow along.
~20-30 Minutes
hooks.py.frappe.call.Before writing a single line of code, let’s map out our architecture. To add this UI customization in Frappe, we need to accomplish four main things:
hooks.py using app_include_js and app_include_css.Because the top bar isn't attached to a standard form field, it’s a custom HTML element injected directly into the Desk page.
1️⃣ Frappe Desk loads
        ↓
2️⃣ hooks.py injects our custom JS and CSS
        ↓
3️⃣ JavaScript listens for Desk/page events (like page loads or resizes)
        ↓
4️⃣ JavaScript fetches user or document data via a backend call
        ↓
5️⃣ JavaScript builds and injects the custom HTML bar
        ↓
6️⃣ CSS visually positions the bar below the standard Desk header
        ↓
7️⃣ Layout automatically recalculates on page change, resize, scroll, or sidebar toggle
my_app/
├── hooks.py
├── public/
│   ├── js/
│   │   └── custom_top_bar.js
│   └── css/
│       └── custom_top_bar.css
└── utils/
    └── user_utils.py
Sound good? Let’s start building! 👷♂️
hooks.pyIn your custom Frappe app, open the hooks.py file. This is the nervous system of your app!
We need to register our CSS and JS files using app_include_css and app_include_js so Frappe knows to load them globally in Desk.
# In hooks.py
app_include_css = [
    "/assets/my_app/css/custom_top_bar.css",
]

app_include_js = [
    "/assets/my_app/js/custom_top_bar.js",
]
(Don't forget to replace my_app with your actual app name!)
After saving the hooks.py file, apply the changes by running:
bench build --app my_app
bench restart
If you are actively developing, you might also want to clear the cache so the browser picks up the new files immediately:
bench clear-cache
If your top bar only relies on the current form's data, you can skip this backend step. But if you want to display information about the logged-in user across all screens, we need a reliable backend method.
Create a new file: my_app/utils/user_utils.py
import frappe

@frappe.whitelist()
def get_current_user_profile():
    user = frappe.session.user

    # We don't want to show this for Guests
    if user == "Guest":
        return None

    # Fetch the linked profile name
    profile_name = frappe.db.get_value(
        "Employee Profile",
        {"user": user},
        "name",
    )

    if not profile_name:
        return None

    return profile_name
This method securely grabs the document name of the profile linked to the current user session. Customize "Employee Profile" and {"user": user} to match your specific schema (e.g., {"email": user} or {"user_id": user}).
Create the main brain of our frontend UI: my_app/public/js/custom_top_bar.js
This script will detect if Frappe Desk is ready, fetch the data, render the bar, and handle layout updates smoothly.
function setup_custom_top_bar() {
  // Grab the main content wrapper
  const $contentWrapper = $(
    ".page-container:visible .layout-main-section-wrapper"
  ).first();

  if (!$contentWrapper.length) {
    return; // Stop if the main section isn't visible yet
  }

  // Fetch data and pass our render function as the callback
  fetch_current_user_top_bar_data(render_custom_top_bar);
}
Since Frappe is a dynamic SPA powered by Vue and jQuery, scripts often run before the DOM is fully constructed. Querying .page-container:visible .layout-main-section-wrapper ensures we only attach our bar when the main content area is truly ready.
Next, let's implement the data fetching logic inside the same JS file.
function fetch_current_user_top_bar_data(callback) {
  // Use a simple window cache to prevent spamming the backend on every page click!
  if (window.custom_top_bar_data) {
    callback(window.custom_top_bar_data);
    return;
  }

  frappe.call({
    method: "my_app.utils.user_utils.get_current_user_profile",
    callback: function (response) {
      const profileName = response.message;

      if (!profileName) {
        callback(null);
        return;
      }

      // Fetch the full document securely
      frappe.db
        .get_doc("Employee Profile", profileName)
        .then(function (doc) {
          window.custom_top_bar_data = build_top_bar_data_from_doc(doc);
          callback(window.custom_top_bar_data);
        })
        .catch(function () {
          callback(null);
        });
    },
  });
}
Key Takeaways:
frappe.call() connects the frontend to our whitelisted Python method.frappe.db.get_doc() fetches the full document data cleanly.window.custom_top_bar_data as a lightweight cache is a huge performance boost! ⚡Never push raw backend documents directly into the UI! Instead, extract only exactly what you need. This keeps the code clean and prevents exposing unnecessary fields in the browser.
function build_top_bar_data_from_doc(doc) {
  if (!doc || !doc.name) {
    return null;
  }

  // Return a clean, tailored object
  return {
    id: doc.name,
    title: doc.full_name,
    designation: doc.designation,
    department: doc.department,
    location: doc.location,
    status: doc.status,
  };
}
Now for the fun part—building the visual component!
function render_custom_top_bar(data) {
  if (!data) {
    clear_custom_top_bar();
    return;
  }

  // 🛡️ SECURITY FIRST: Always escape HTML variables!
  const esc = function (value) {
    return frappe.utils.escape_html(value || "");
  };

  const leftText = [data.id, data.title].filter(Boolean).join(" - ");

  const details = [
    data.designation,
    data.department,
    data.location,
    data.status,
  ].filter(Boolean);

  const detailHtml = details
    .map(function (value) {
      return `<span class="custom-top-bar-detail">${esc(value)}</span>`;
    })
    .join('<span class="custom-top-bar-separator">|</span>');

  const bar = `
        <div id="custom-top-bar">
            <div class="custom-top-bar-section custom-top-bar-left">
                <span class="custom-top-bar-main">${esc(leftText)}</span>
            </div>

            <div class="custom-top-bar-section custom-top-bar-right">
                ${detailHtml}
            </div>
        </div>
    `;

  // Remove any existing bar before injecting a new one to avoid duplicates
  $("#custom-top-bar").remove();
  $("body").append(bar);

  schedule_custom_top_bar_layout_update();
}
⚠️ Crucial Security Note: Always use
frappe.utils.escape_html()when rendering values from the database. This prevents Cross-Site Scripting (XSS) attacks and broken HTML rendering.
We also need a reliable way to remove the bar when necessary (e.g., if a user logs out).
function clear_custom_top_bar() {
  $("#custom-top-bar").remove();

  $(".custom-top-bar-offset")
    .removeClass("custom-top-bar-offset")
    .css("padding-top", "");
}
Because the custom bar uses position: fixed, it lives outside the standard DOM flow. We have to meticulously calculate its position to ensure it aligns perfectly with Frappe's main content area.
function update_custom_top_bar_layout() {
  const $bar = $("#custom-top-bar");
  const $contentWrapper = $(
    ".page-container:visible .layout-main-section-wrapper"
  ).first();
  const $pageHead = $(".page-container:visible .page-head").first();

  if (!$bar.length || !$contentWrapper.length) {
    return;
  }

  const contentRect = $contentWrapper[0].getBoundingClientRect();

  // Calculate top offset dynamically
  const top =
    ($pageHead.length
      ? $pageHead[0].getBoundingClientRect().bottom
      : $(".navbar").outerHeight()) || 0;

  const barHeight = $bar.outerHeight() || 40;

  // Apply perfectly calculated styles
  $bar.css({
    top: `${top}px`,
    left: `${contentRect.left}px`,
    width: `${contentRect.width}px`,
  });

  // Push the actual page content down so it isn't hidden underneath the bar
  $contentWrapper
    .addClass("custom-top-bar-offset")
    .css("padding-top", `${barHeight + 12}px`);
}
Calculating these values dynamically is vital. Frappe's layout flexes constantly when users open sidebars, resize windows, or shift to mobile view! 📱
Because SPAs render asynchronously, standard setup calls can sometimes trigger slightly before the UI fully snaps into place. A staggered update ensures the bar always finds its mark.
function schedule_custom_top_bar_layout_update() {
  requestAnimationFrame(update_custom_top_bar_layout);

  setTimeout(update_custom_top_bar_layout, 50);
  setTimeout(update_custom_top_bar_layout, 150);
  setTimeout(update_custom_top_bar_layout, 350);
}
For a smooth experience, the top bar needs to react to what the user does in Desk. We bind our functions to Frappe's global page events.
$(document).on("app_ready", setup_custom_top_bar);

$(document).on("page-change", function () {
  setTimeout(setup_custom_top_bar, 0);
});

$(document).on("form-refresh", setup_custom_top_bar);
$(document).on("sidebar-expand", schedule_custom_top_bar_layout_update);

$(document).on(
  "click",
  ".sidebar-toggle-btn, .collapse-sidebar-link",
  schedule_custom_top_bar_layout_update
);

frappe.after_ajax(function () {
  setup_custom_top_bar();
});

$(window).on("resize scroll", schedule_custom_top_bar_layout_update);

if (window.visualViewport) {
  window.visualViewport.addEventListener(
    "resize",
    schedule_custom_top_bar_layout_update
  );
}
Fixed elements love to accidentally overlap popovers and dropdown menus. We can cleverly lower the z-index of our bar whenever a menu is active to keep Frappe's UI usable.
function update_custom_top_bar_menu_state() {
  const hasOpenMenu = Boolean(
    document.querySelector(".dropdown-menu.show, .popover.show, .tooltip.show")
  );

  $("#custom-top-bar").toggleClass("custom-top-bar-under-menu", hasOpenMenu);
}

$(document).on(
  "shown.bs.dropdown hidden.bs.dropdown shown.bs.popover hidden.bs.popover",
  function () {
    setTimeout(update_custom_top_bar_menu_state, 0);
  }
);

$(document).on("click keyup", function () {
  setTimeout(update_custom_top_bar_menu_state, 0);
});
For those who want to copy-paste the final masterpiece, here is the complete custom_top_bar.js file:
function setup_custom_top_bar() {
  const $contentWrapper = $(
    ".page-container:visible .layout-main-section-wrapper"
  ).first();

  if (!$contentWrapper.length) {
    return;
  }

  fetch_current_user_top_bar_data(render_custom_top_bar);
}

function fetch_current_user_top_bar_data(callback) {
  if (window.custom_top_bar_data) {
    callback(window.custom_top_bar_data);
    return;
  }

  frappe.call({
    method: "my_app.utils.user_utils.get_current_user_profile",
    callback: function (response) {
      const profileName = response.message;

      if (!profileName) {
        callback(null);
        return;
      }

      frappe.db
        .get_doc("Employee Profile", profileName)
        .then(function (doc) {
          window.custom_top_bar_data = build_top_bar_data_from_doc(doc);
          callback(window.custom_top_bar_data);
        })
        .catch(function () {
          callback(null);
        });
    },
  });
}

function build_top_bar_data_from_doc(doc) {
  if (!doc || !doc.name) {
    return null;
  }

  return {
    id: doc.name,
    title: doc.full_name,
    designation: doc.designation,
    department: doc.department,
    location: doc.location,
    status: doc.status,
  };
}

function render_custom_top_bar(data) {
  if (!data) {
    clear_custom_top_bar();
    return;
  }

  const esc = function (value) {
    return frappe.utils.escape_html(value || "");
  };

  const leftText = [data.id, data.title].filter(Boolean).join(" - ");

  const details = [
    data.designation,
    data.department,
    data.location,
    data.status,
  ].filter(Boolean);

  const detailHtml = details
    .map(function (value) {
      return `<span class="custom-top-bar-detail">${esc(value)}</span>`;
    })
    .join('<span class="custom-top-bar-separator">|</span>');

  const bar = `
        <div id="custom-top-bar">
            <div class="custom-top-bar-section custom-top-bar-left">
                <span class="custom-top-bar-main">${esc(leftText)}</span>
            </div>

            <div class="custom-top-bar-section custom-top-bar-right">
                ${detailHtml}
            </div>
        </div>
    `;

  $("#custom-top-bar").remove();
  $("body").append(bar);

  schedule_custom_top_bar_layout_update();
}

function clear_custom_top_bar() {
  $("#custom-top-bar").remove();

  $(".custom-top-bar-offset")
    .removeClass("custom-top-bar-offset")
    .css("padding-top", "");
}

function update_custom_top_bar_layout() {
  const $bar = $("#custom-top-bar");
  const $contentWrapper = $(
    ".page-container:visible .layout-main-section-wrapper"
  ).first();
  const $pageHead = $(".page-container:visible .page-head").first();

  if (!$bar.length || !$contentWrapper.length) {
    return;
  }

  const contentRect = $contentWrapper[0].getBoundingClientRect();

  const top =
    ($pageHead.length
      ? $pageHead[0].getBoundingClientRect().bottom
      : $(".navbar").outerHeight()) || 0;

  const barHeight = $bar.outerHeight() || 40;

  $bar.css({
    top: `${top}px`,
    left: `${contentRect.left}px`,
    width: `${contentRect.width}px`,
  });

  $contentWrapper
    .addClass("custom-top-bar-offset")
    .css("padding-top", `${barHeight + 12}px`);
}

function schedule_custom_top_bar_layout_update() {
  requestAnimationFrame(update_custom_top_bar_layout);

  setTimeout(update_custom_top_bar_layout, 50);
  setTimeout(update_custom_top_bar_layout, 150);
  setTimeout(update_custom_top_bar_layout, 350);
}

function update_custom_top_bar_menu_state() {
  const hasOpenMenu = Boolean(
    document.querySelector(".dropdown-menu.show, .popover.show, .tooltip.show")
  );

  $("#custom-top-bar").toggleClass("custom-top-bar-under-menu", hasOpenMenu);
}

// 🎧 Event Listeners
$(document).on("app_ready", setup_custom_top_bar);

$(document).on("page-change", function () {
  setTimeout(setup_custom_top_bar, 0);
});

$(document).on("form-refresh", setup_custom_top_bar);

$(document).on("sidebar-expand", schedule_custom_top_bar_layout_update);

$(document).on(
  "click",
  ".sidebar-toggle-btn, .collapse-sidebar-link",
  schedule_custom_top_bar_layout_update
);

$(document).on(
  "shown.bs.dropdown hidden.bs.dropdown shown.bs.popover hidden.bs.popover",
  function () {
    setTimeout(update_custom_top_bar_menu_state, 0);
  }
);

$(document).on("click keyup", function () {
  setTimeout(update_custom_top_bar_menu_state, 0);
});

frappe.after_ajax(function () {
  setup_custom_top_bar();
});

$(window).on("resize scroll", schedule_custom_top_bar_layout_update);

if (window.visualViewport) {
  window.visualViewport.addEventListener(
    "resize",
    schedule_custom_top_bar_layout_update
  );
}
Sometimes you may want the bar to contextually show information from the currently opened document instead of the logged-in user. You can easily do this by checking window.cur_frm.
function get_current_form_top_bar_data() {
  if (!window.cur_frm || !cur_frm.doc) {
    return null;
  }

  if (cur_frm.doctype !== "Employee Profile") {
    return null;
  }

  return build_top_bar_data_from_doc(cur_frm.doc);
}
Then, just slightly adjust your setup function to prioritize the form data:
function setup_custom_top_bar() {
  const $contentWrapper = $(
    ".page-container:visible .layout-main-section-wrapper"
  ).first();

  if (!$contentWrapper.length) {
    return;
  }

  const currentFormData = get_current_form_top_bar_data();

  if (currentFormData) {
    render_custom_top_bar(currentFormData);
    return;
  }

  fetch_current_user_top_bar_data(render_custom_top_bar);
}
This is a killer pattern for context-aware headers! 🕵️♂️
Finally, create my_app/public/css/custom_top_bar.css and style it using Frappe's native CSS variables. Using variables guarantees your custom bar looks gorgeous in both Light and Dark themes! 🌗
#custom-top-bar {
  position: fixed;
  z-index: 1;
  min-height: 40px;
  background-color: var(--fg-color);
  border-bottom: 1px solid var(--border-color);
  box-shadow: 0 1px 4px rgba(0, 0, 0, 0.08);
  display: flex;
  align-items: center;
  justify-content: space-between;
  gap: 16px;
  padding: 0 16px;
  overflow: hidden;
  color: var(--text-color);
  font-size: 15px;
  line-height: 1.35;
}

/* Drops the z-index when a Frappe dropdown menu opens */
#custom-top-bar.custom-top-bar-under-menu {
  z-index: 0;
}

.custom-top-bar-section {
  display: flex;
  align-items: center;
  gap: 10px;
  min-width: 0;
  white-space: nowrap;
}

.custom-top-bar-left {
  flex: 1 1 auto;
  overflow: hidden;
}

.custom-top-bar-right {
  flex: 0 1 auto;
  justify-content: flex-end;
  overflow: hidden;
  color: var(--text-muted);
  font-size: 13px;
}

.custom-top-bar-section span {
  min-width: 0;
  overflow: hidden;
  text-overflow: ellipsis;
}

.custom-top-bar-main {
  font-weight: 600;
}

.custom-top-bar-detail {
  max-width: 220px;
}

.custom-top-bar-separator {
  color: var(--text-muted);
  flex: 0 0 auto;
  opacity: 0.55;
}

/* Mobile Responsiveness */
@media (max-width: 767px) {
  #custom-top-bar {
    align-items: flex-start;
    flex-direction: column;
    gap: 4px;
    padding: 8px 12px;
  }

  .custom-top-bar-section {
    width: 100%;
  }

  .custom-top-bar-right {
    justify-content: flex-start;
  }

  .custom-top-bar-detail {
    max-width: 100%;
  }
}
hooks.py and run bench build and bench clear-cache. Open your browser console to check for rogue JS syntax errors.custom-top-bar-offset padding to the $contentWrapper.$("#custom-top-bar").remove(); is firing inside your render function before it appends the new HTML.Adding a custom top bar in Frappe is a masterclass in understanding how Desk renders dynamically. The golden rule is remembering that Frappe operates without full browser reloads. You must hook into app_ready, page-change, and form-refresh to ensure your UI elements persist correctly.
Once you grasp this SPA injection pattern, the sky is the limit! You can create custom user banners, global workflow status bars, emergency system warning strips, or quick context panels.
Happy coding, and go build some beautiful Frappe apps! 💻🔥

A step-by-step guide to calling Frappe's REST API from React/Next.js, handling session and API-key auth correctly, and wiring up live updates with Socket.IO

Learn how to add Stripe and Razorpay subscription billing to a custom Frappe app — whitelisted APIs, webhook signature verification, and scheduler-based renewals.
Stop fighting the built-in resource API for complex business logic. Here's how to expose your own Python functions as clean, secure REST endpoints in Frappe