How to Auto-Animate Keyboard Overlays in DaVinci Fusion (No Keyframes!)
Stop wasting time on manual keyframes. 🚀
In this guide, you’ll build a smart, reusable keyboard overlay in DaVinci Resolve Fusion that animates itself automatically using Anim Curves.
No keyframes. No repetitive work. Just clean, procedural motion you can reuse forever.
⏱️ Time to complete: ~10–12 minutes
🎯 What you’ll achieve:
🧠 You should already know:
➡️ Best next steps after this guide:
First things first, let's set up our composition. We need a clean base to work with.
1. Start Fresh
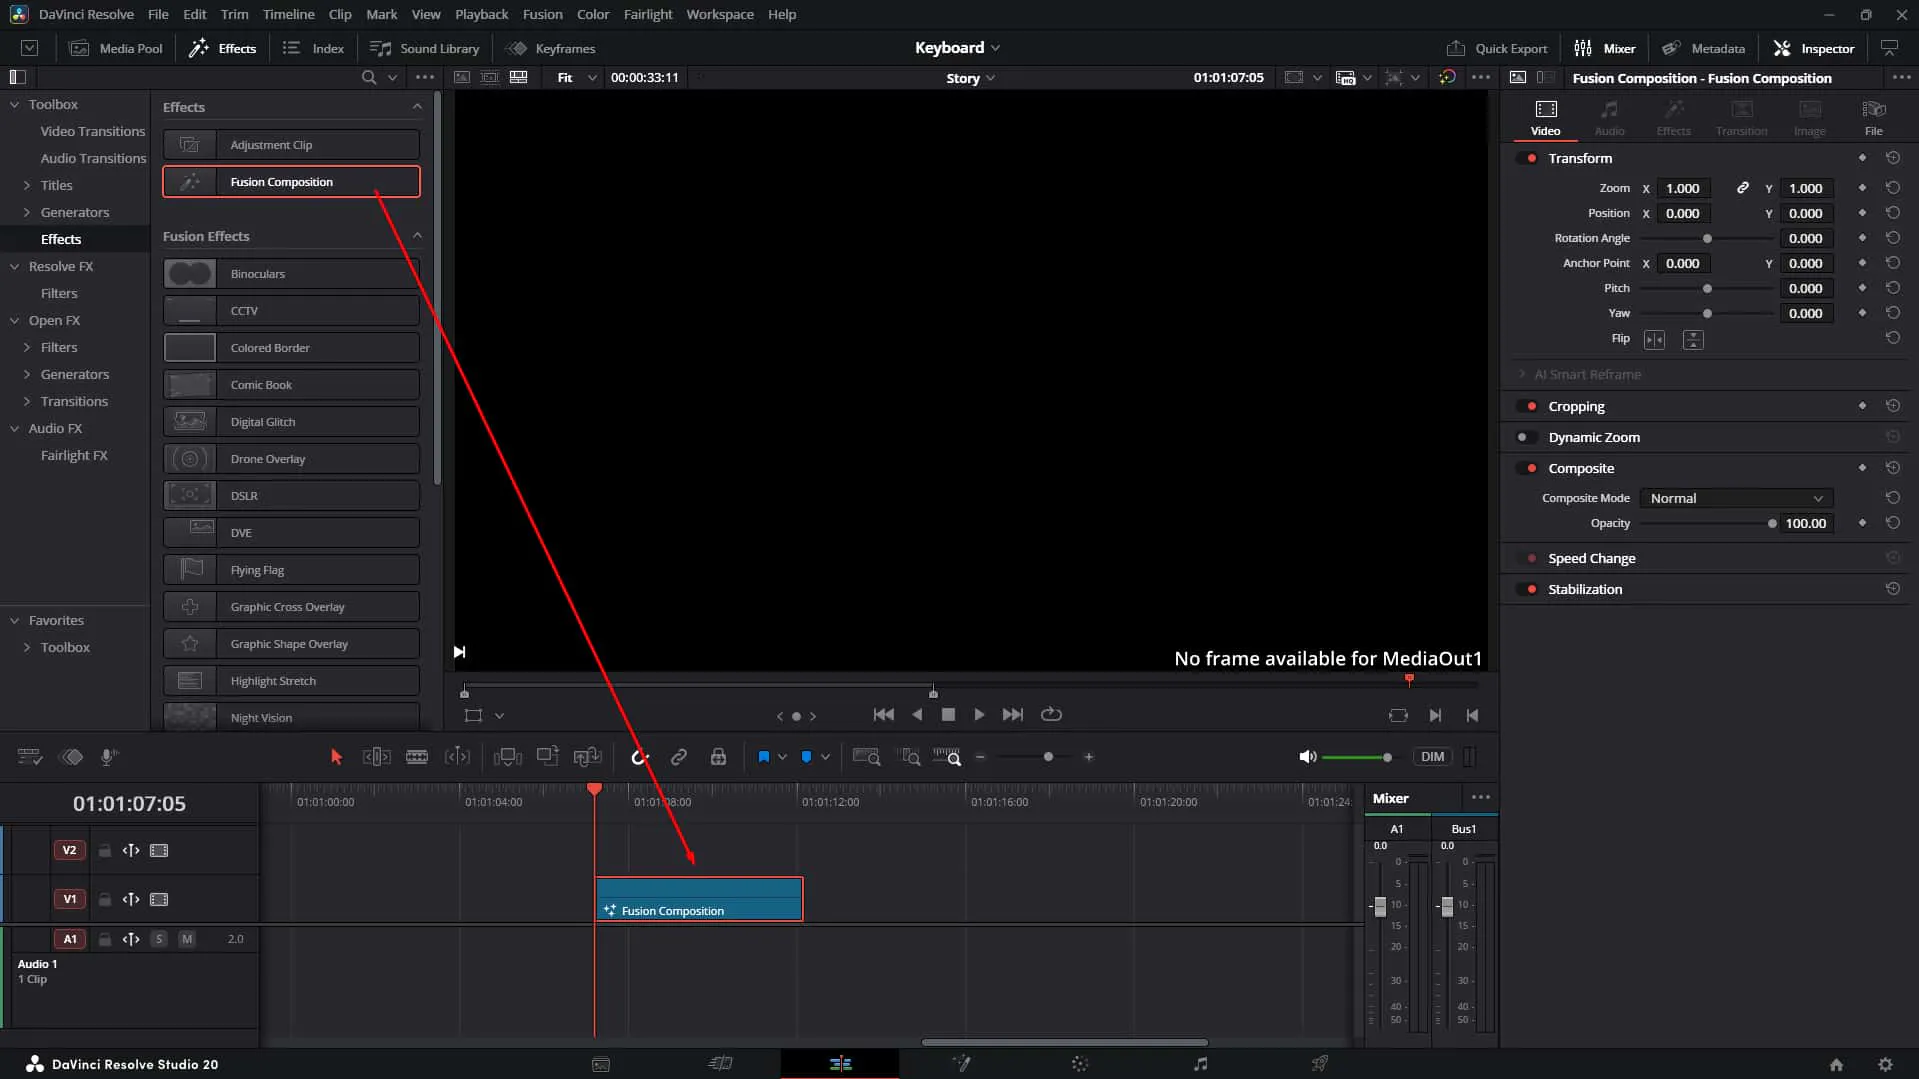 Fire up Fusion and create a new composition. This is where the magic happens.
2. Bring in the Assets
Add your MediaIn node. This will be the base image of your key (or whatever graphic you're animating). Connect it to MediaOut to see what you're doing.
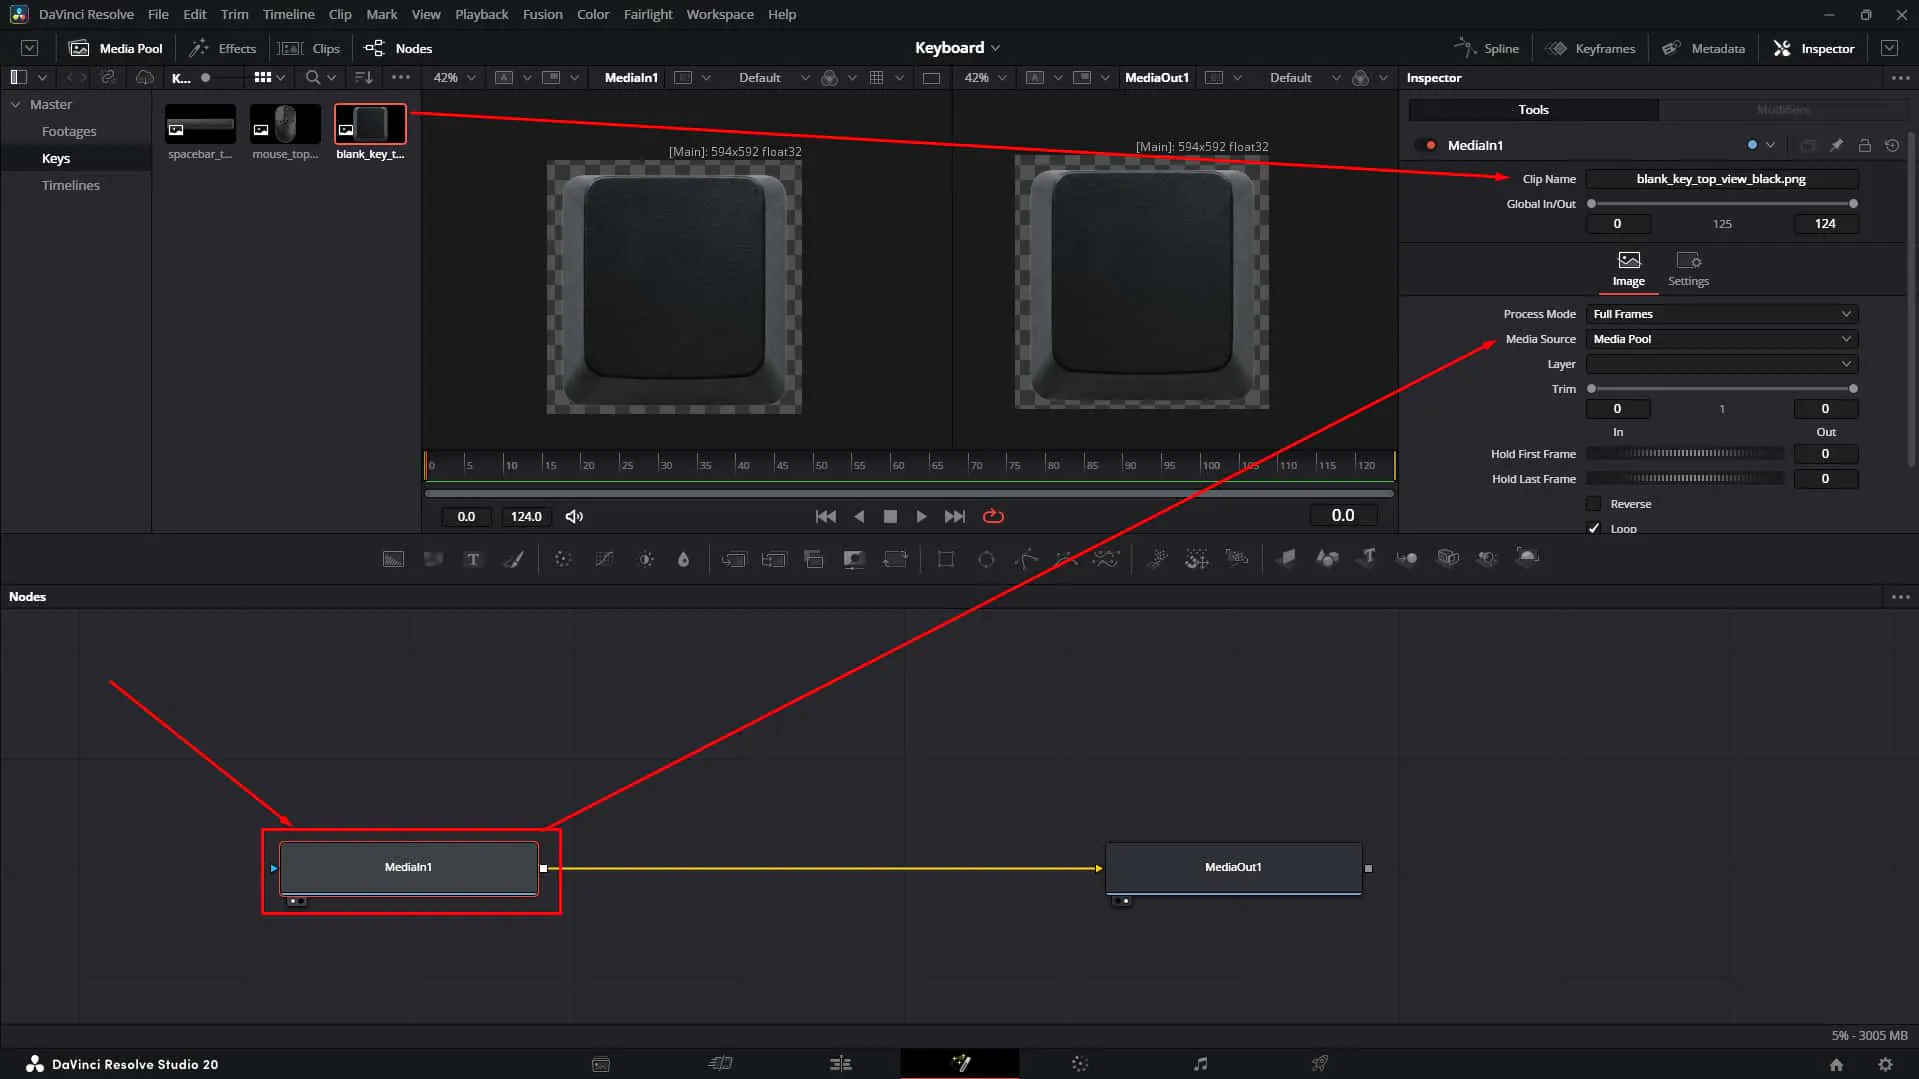
3. Check Dimensions
Make sure your output screen dimension matches your input image. Consistency is key! 🔑
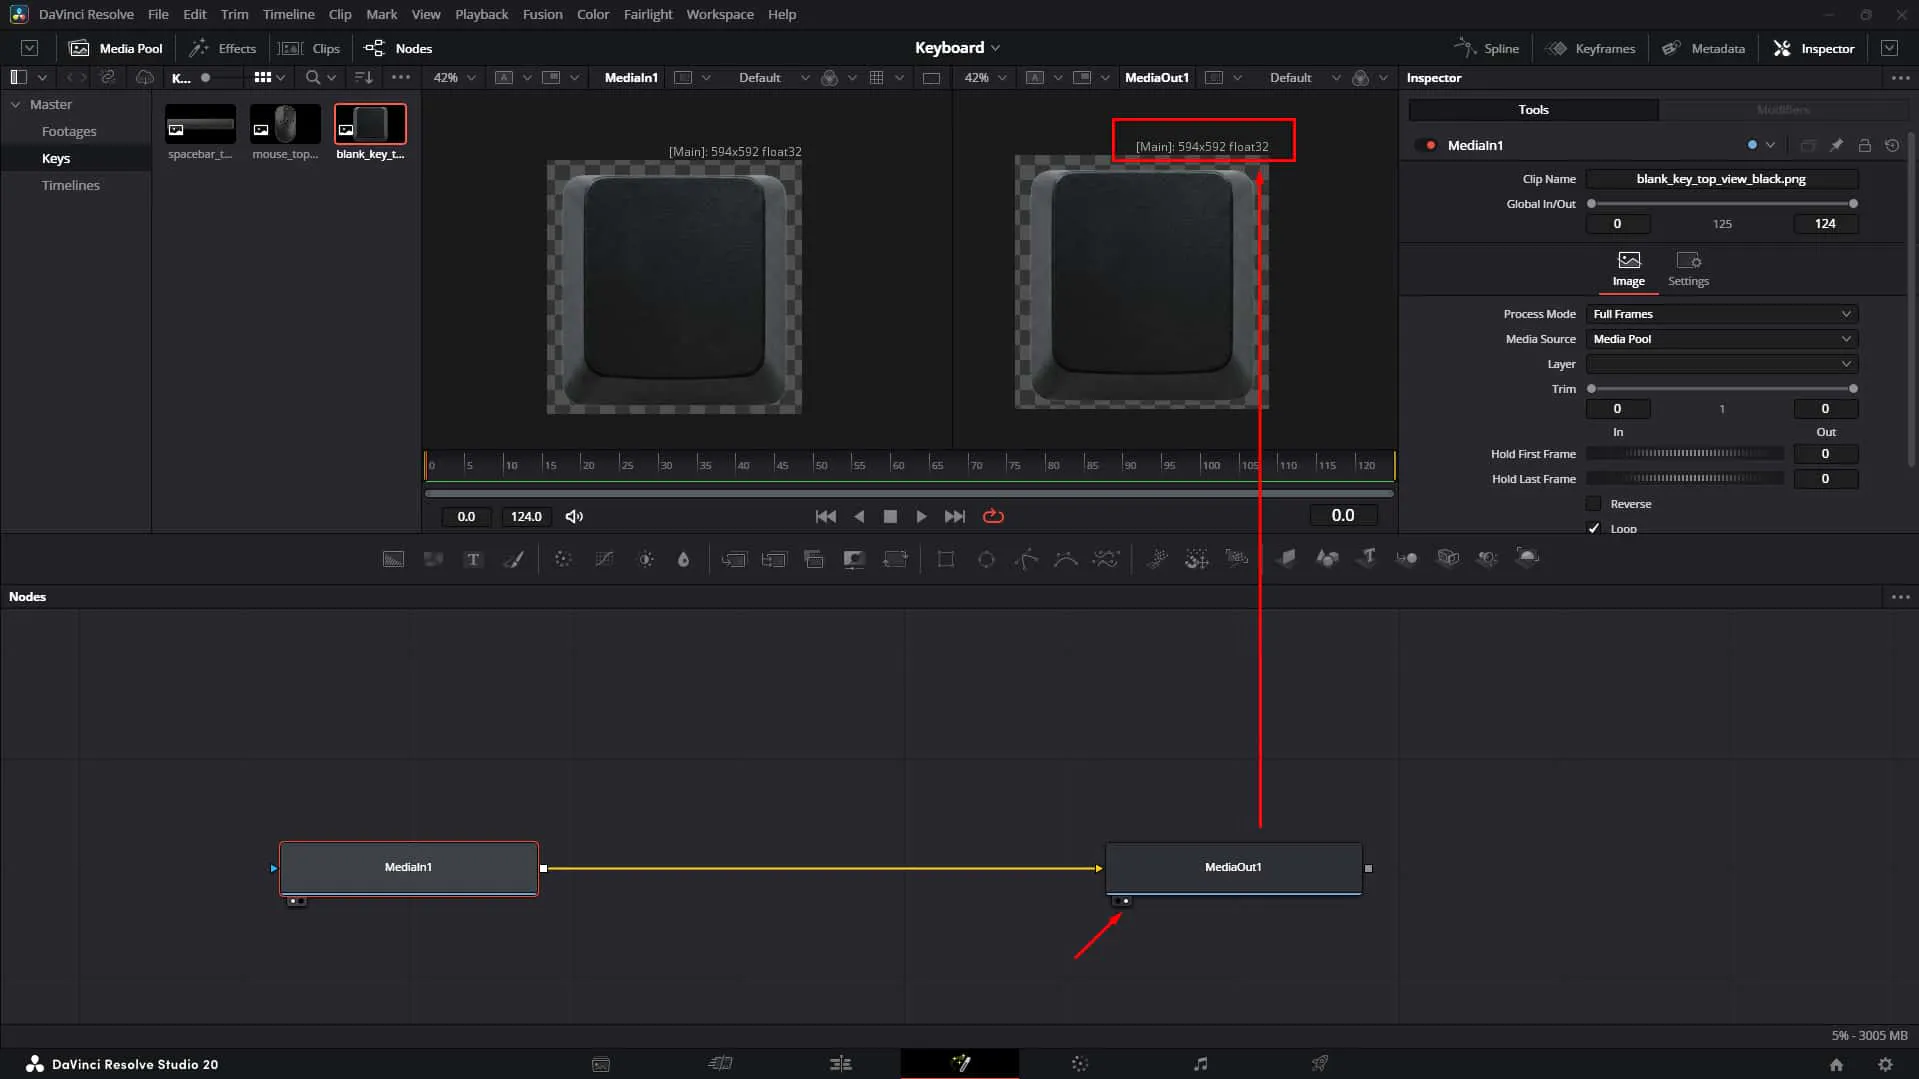
4. Create the Canvas
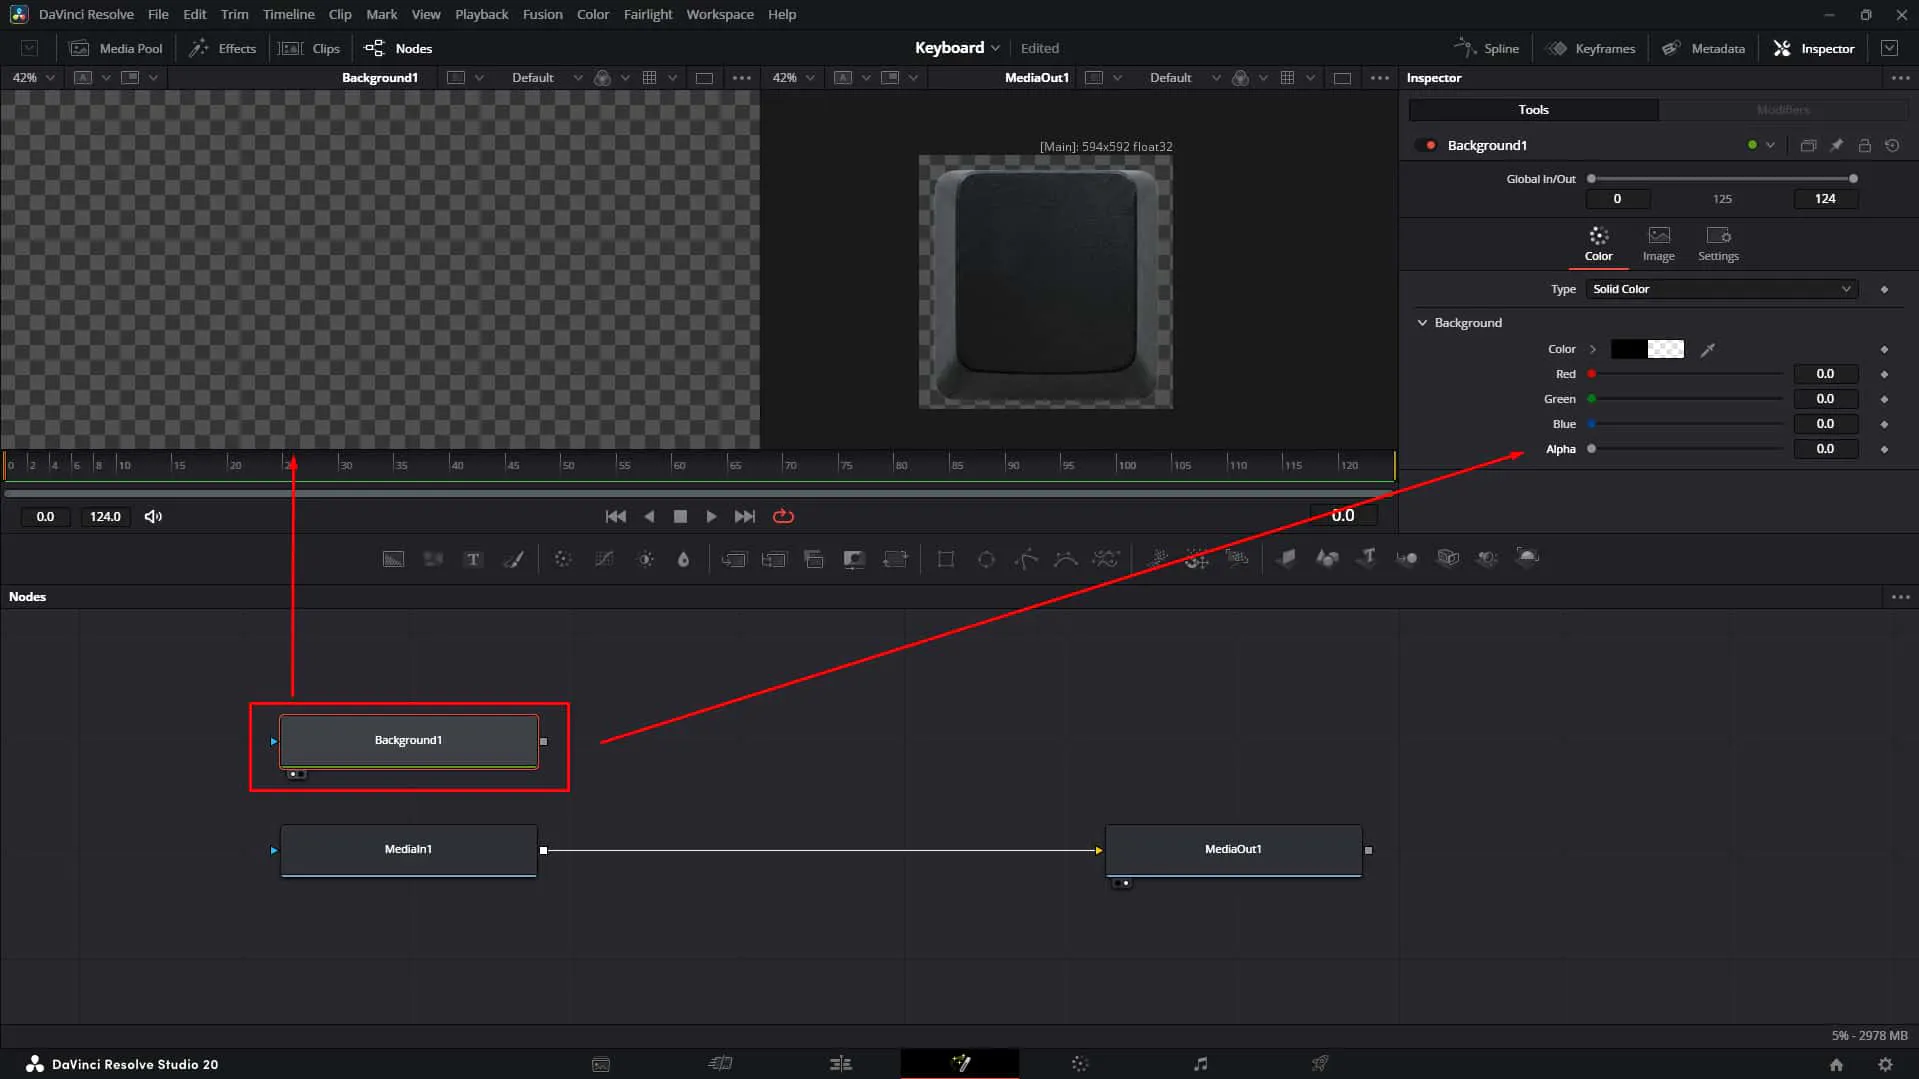
Add a Background node. Pro Tip: Set the Alpha to Zero (0). This creates a transparent canvas that matches your project resolution without adding a solid color background. 🕵️♂️
5. The Merge
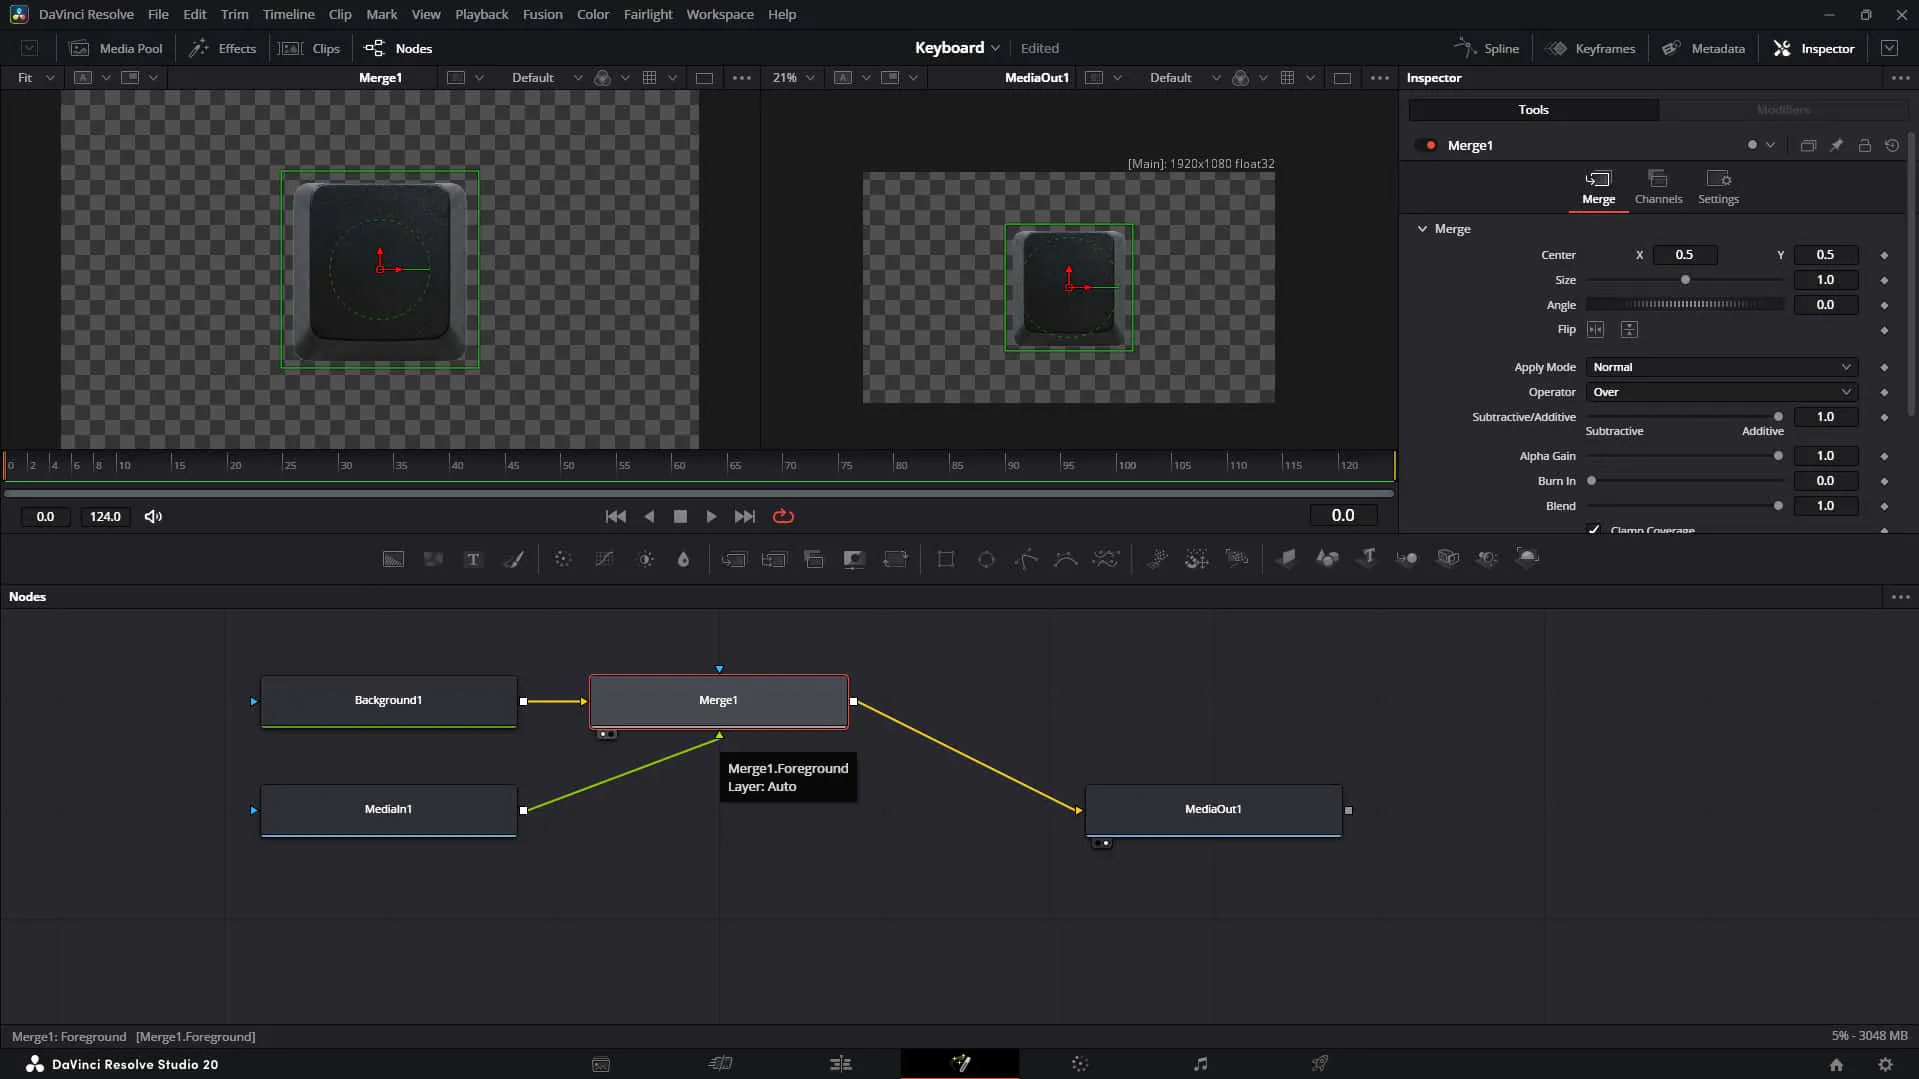
Merge your MediaIn (foreground) over the transparent Background.
6. Verify the Comp
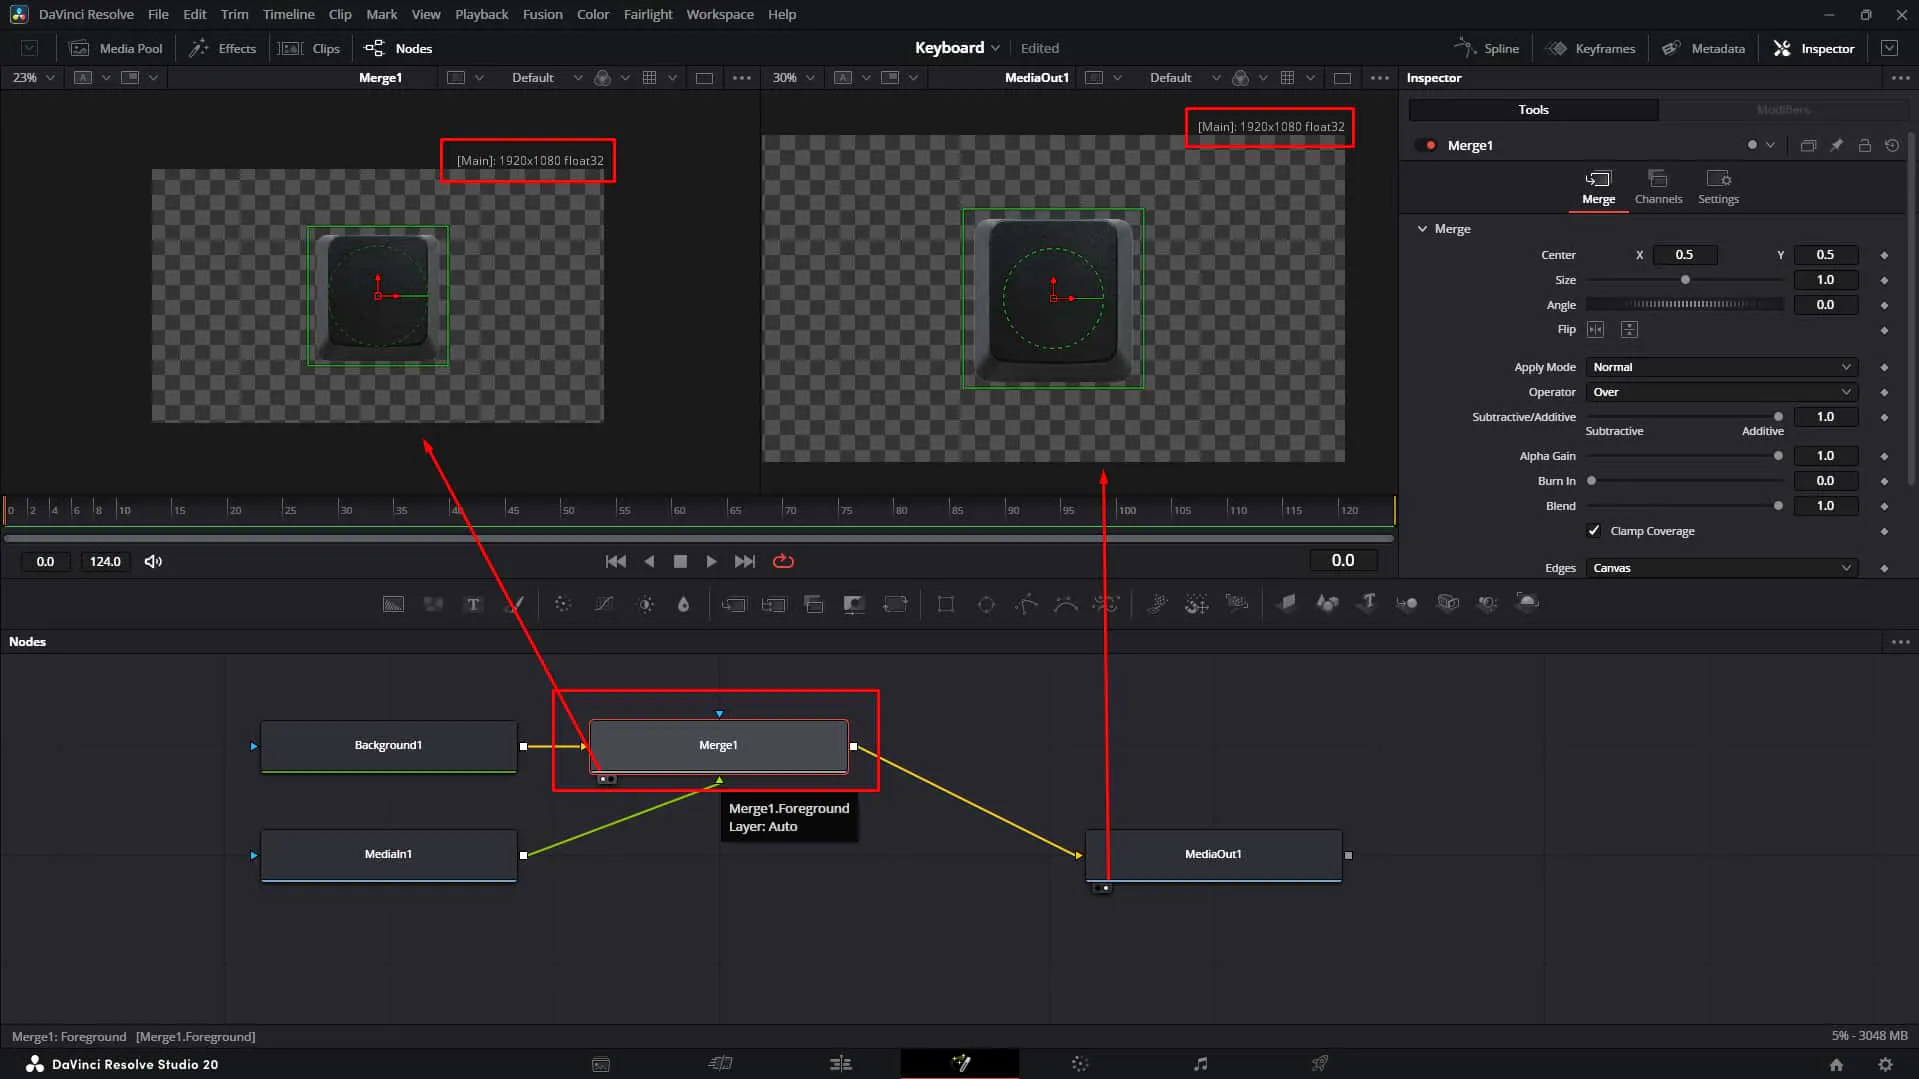
Check that your Merge node output now respects the screen dimensions from the background node. This ensures your animation lives in the correct project space. 📐
Now for the fun part. We're going to automate the movement.
7. Organize
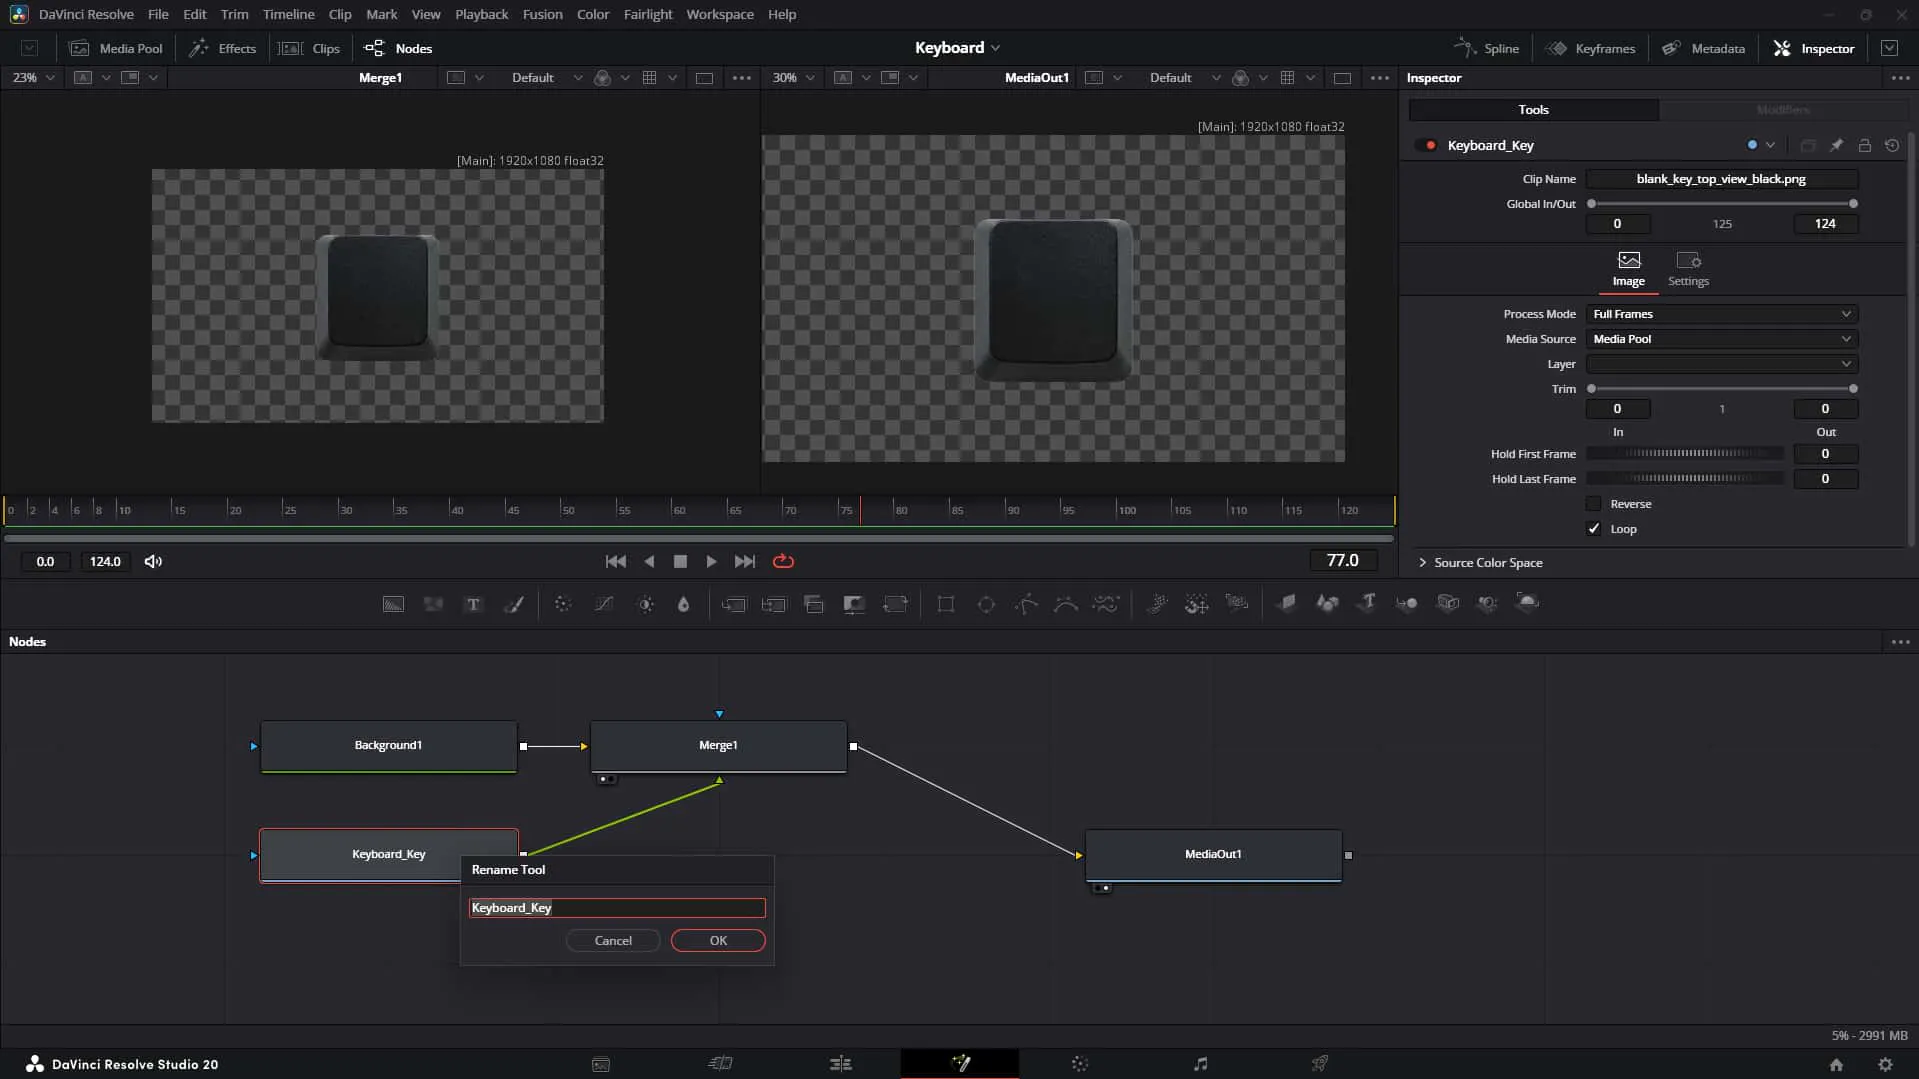
Rename your MediaIn node to something logical like "Keyboard Key". Good naming conventions save lives (and sanity)! 🏷️
8. Add a Transform
Drop a Transform node after the Merge. This will handle our positioning.
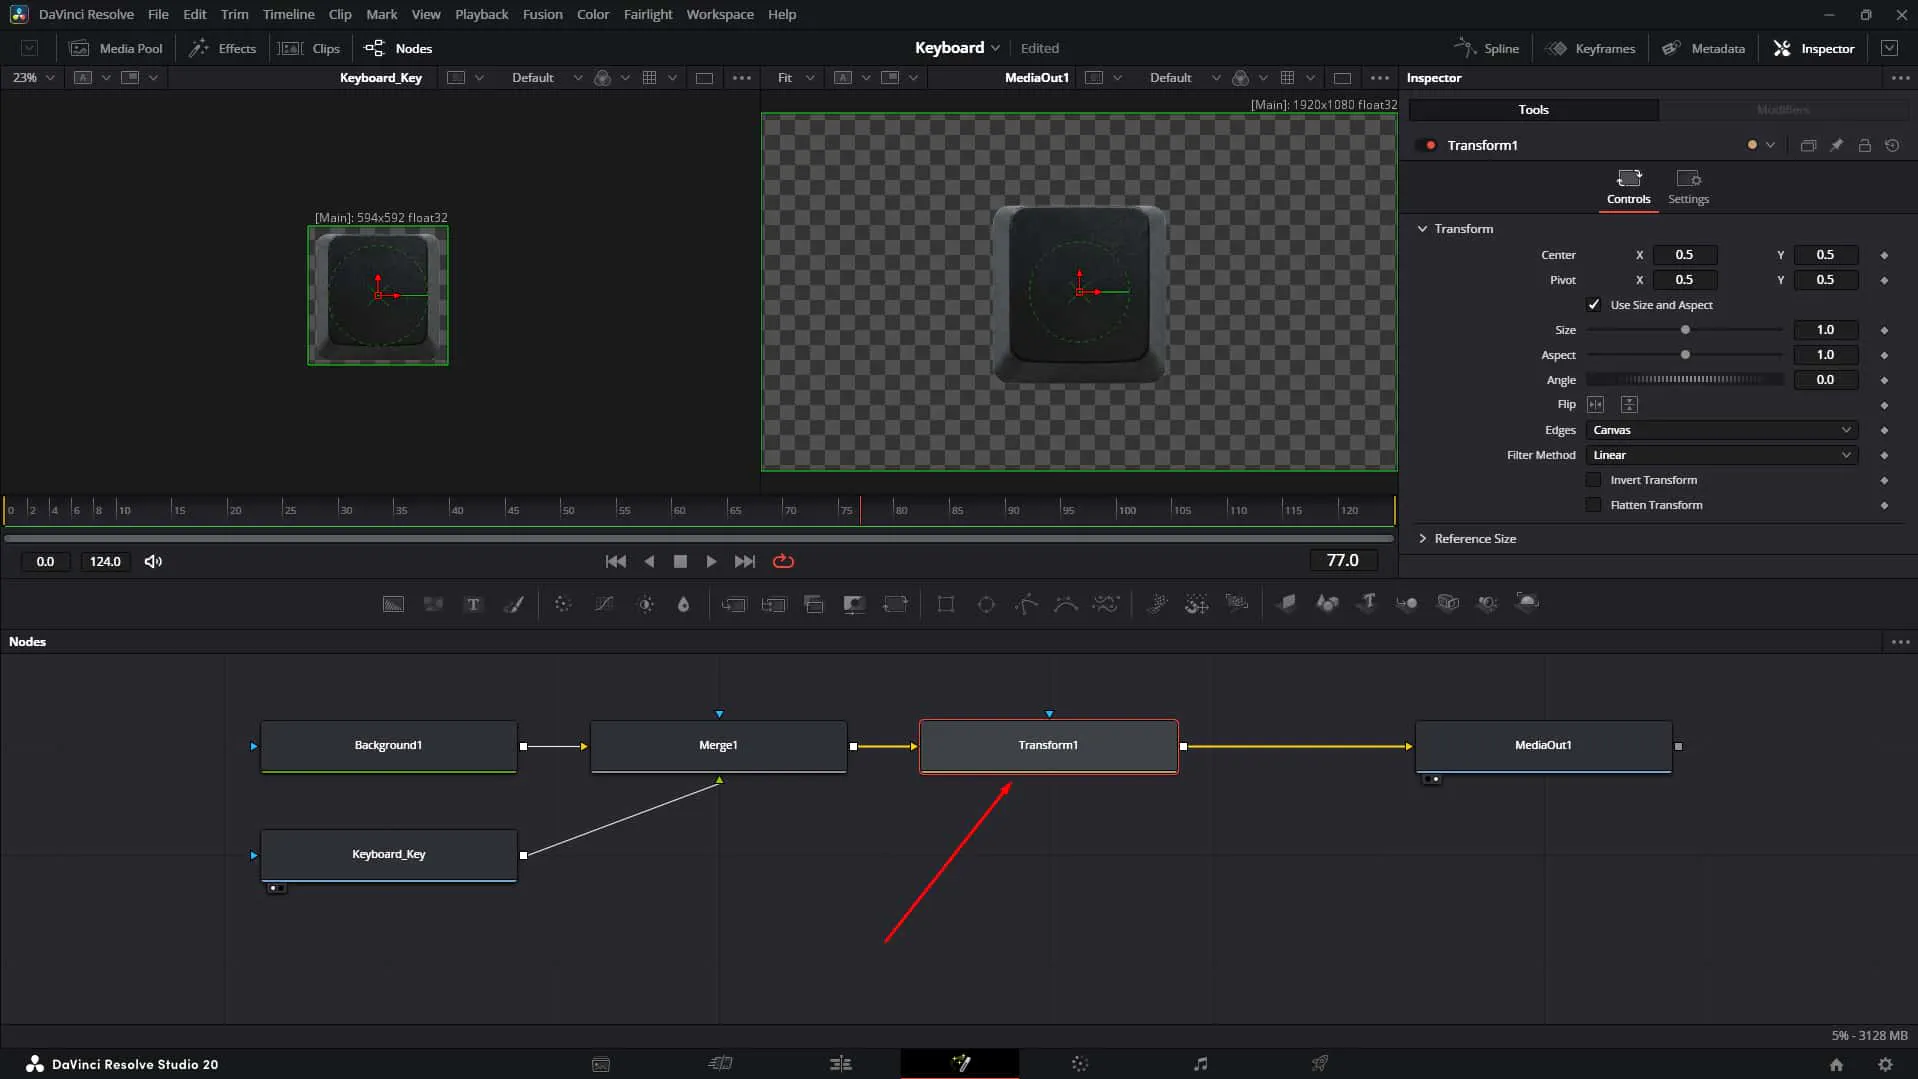
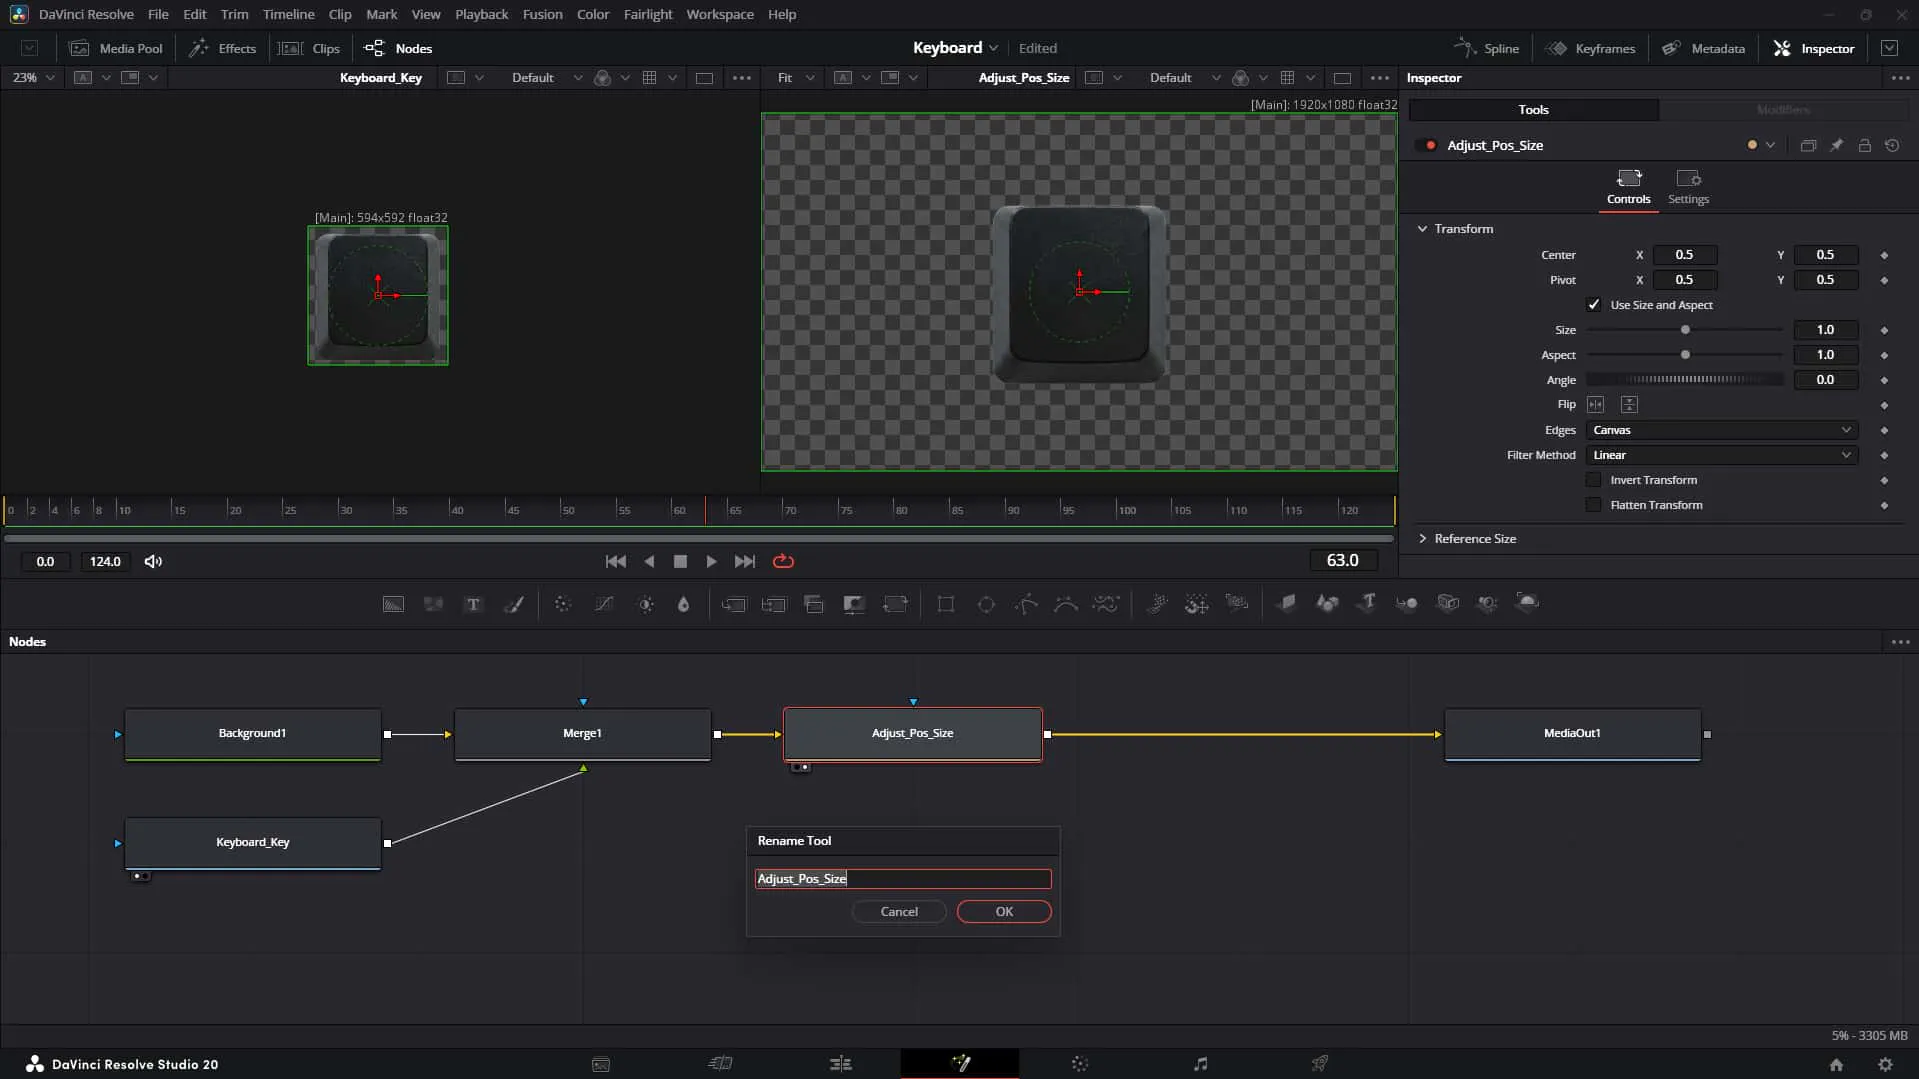
9. Label It
Rename this Transform node to "Adjust Pos & Size". We'll use this to place the key later without messing up the animation.
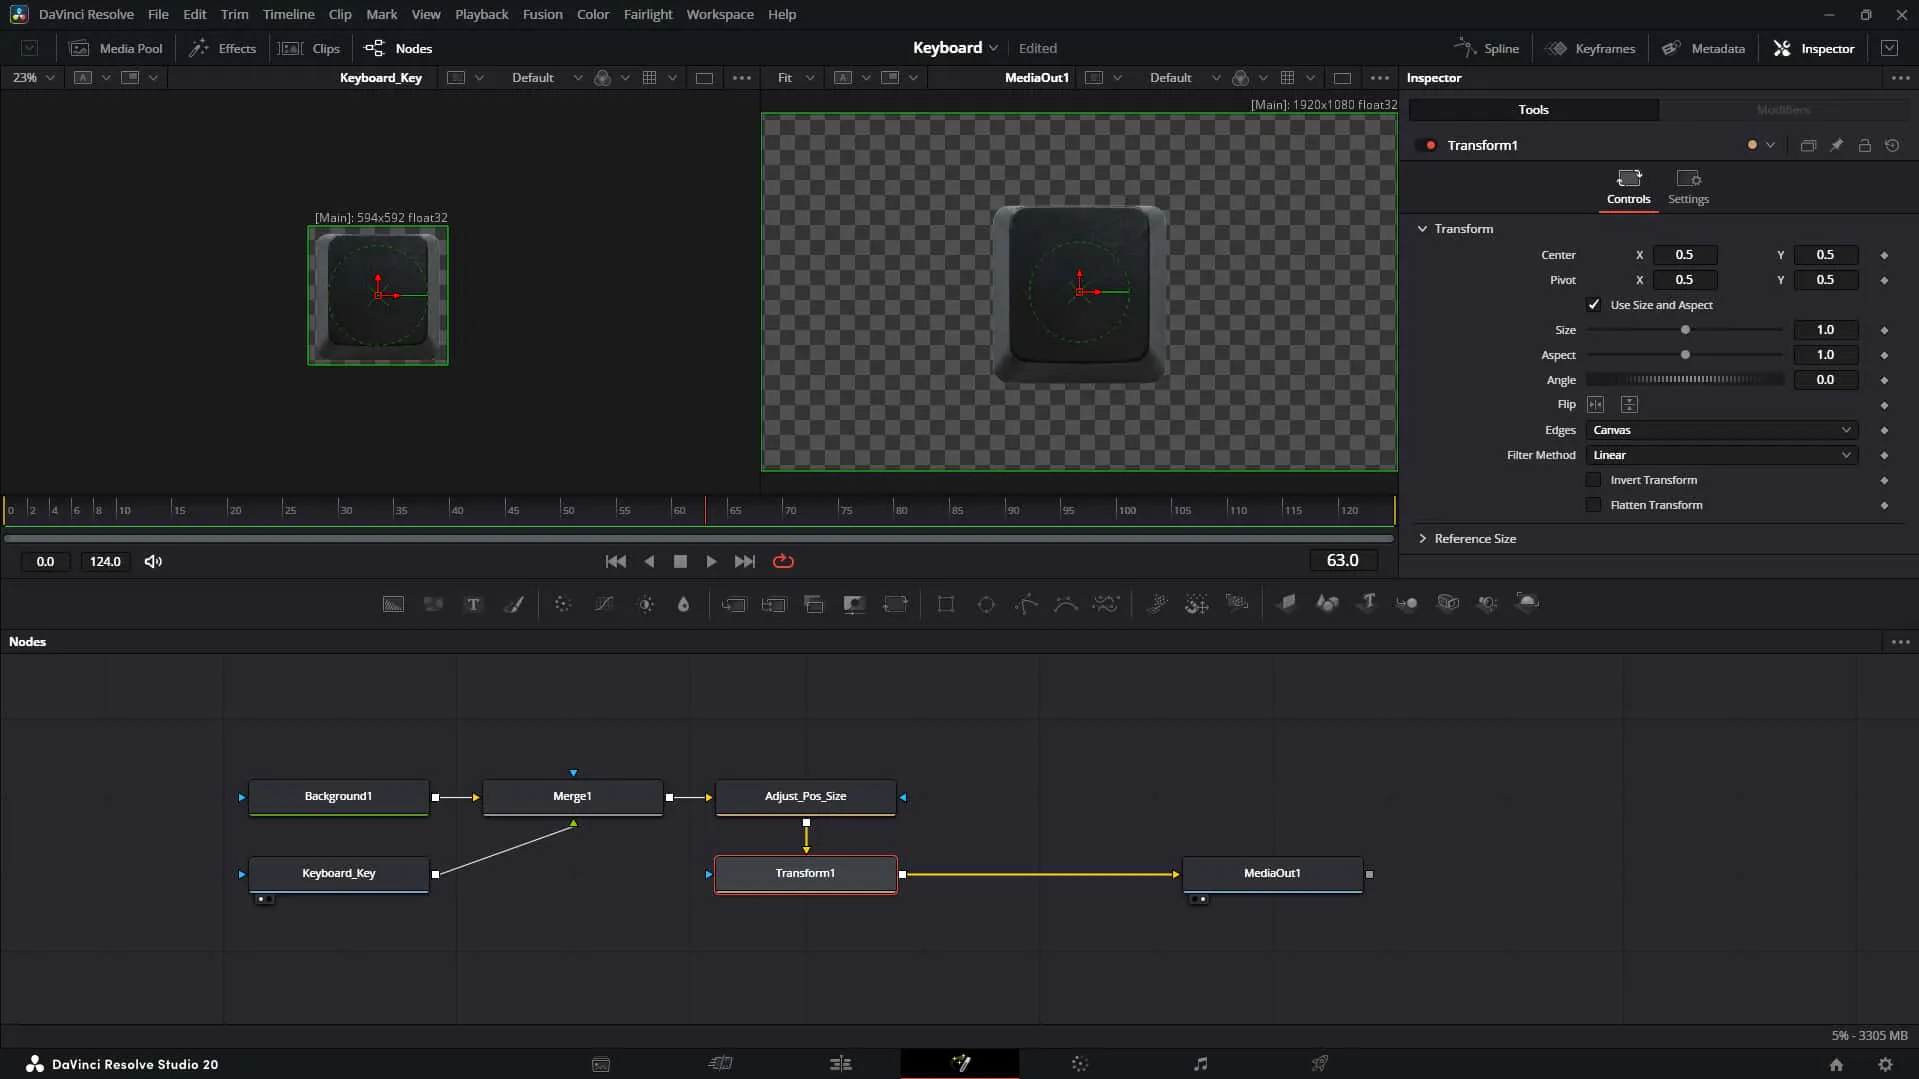
10. The Animation Node
Add another Transform node after the previous one. This one is dedicated purely to the animation logic.
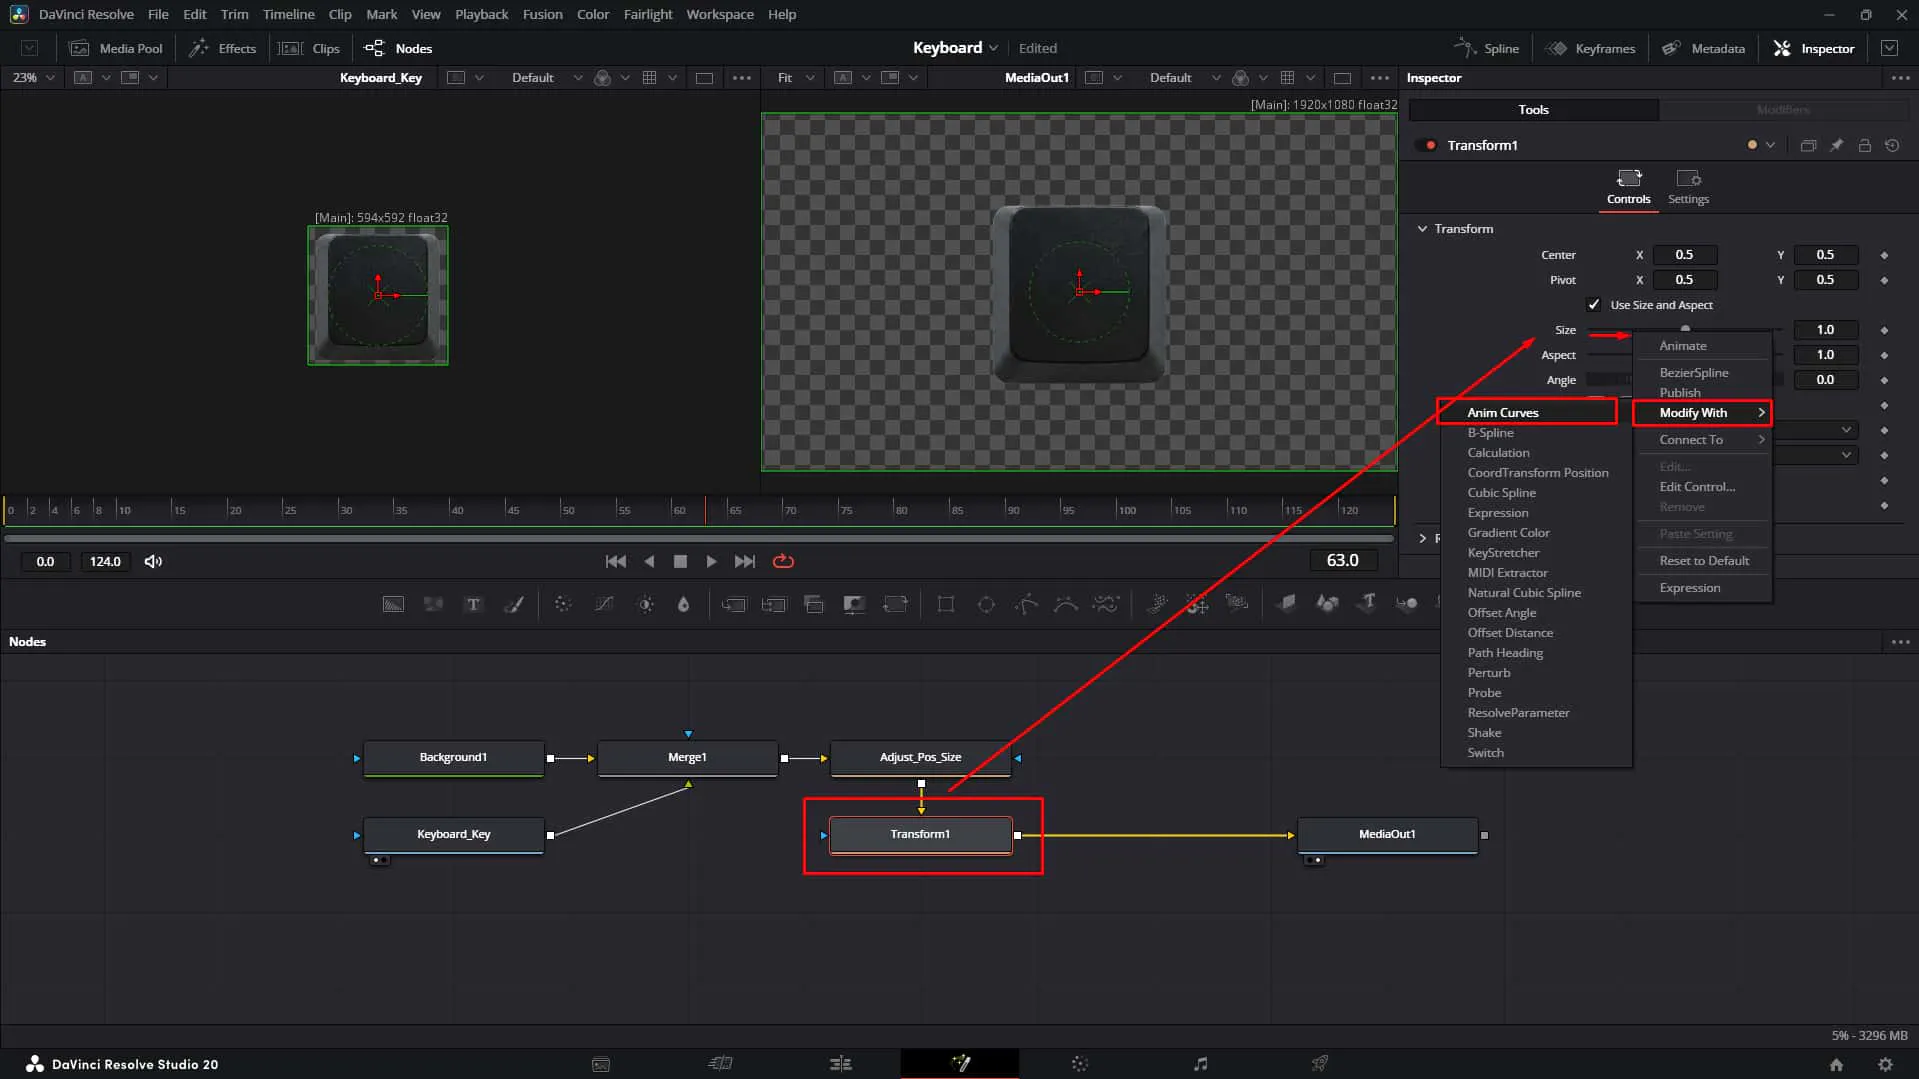
11. Unleash Anim Curves
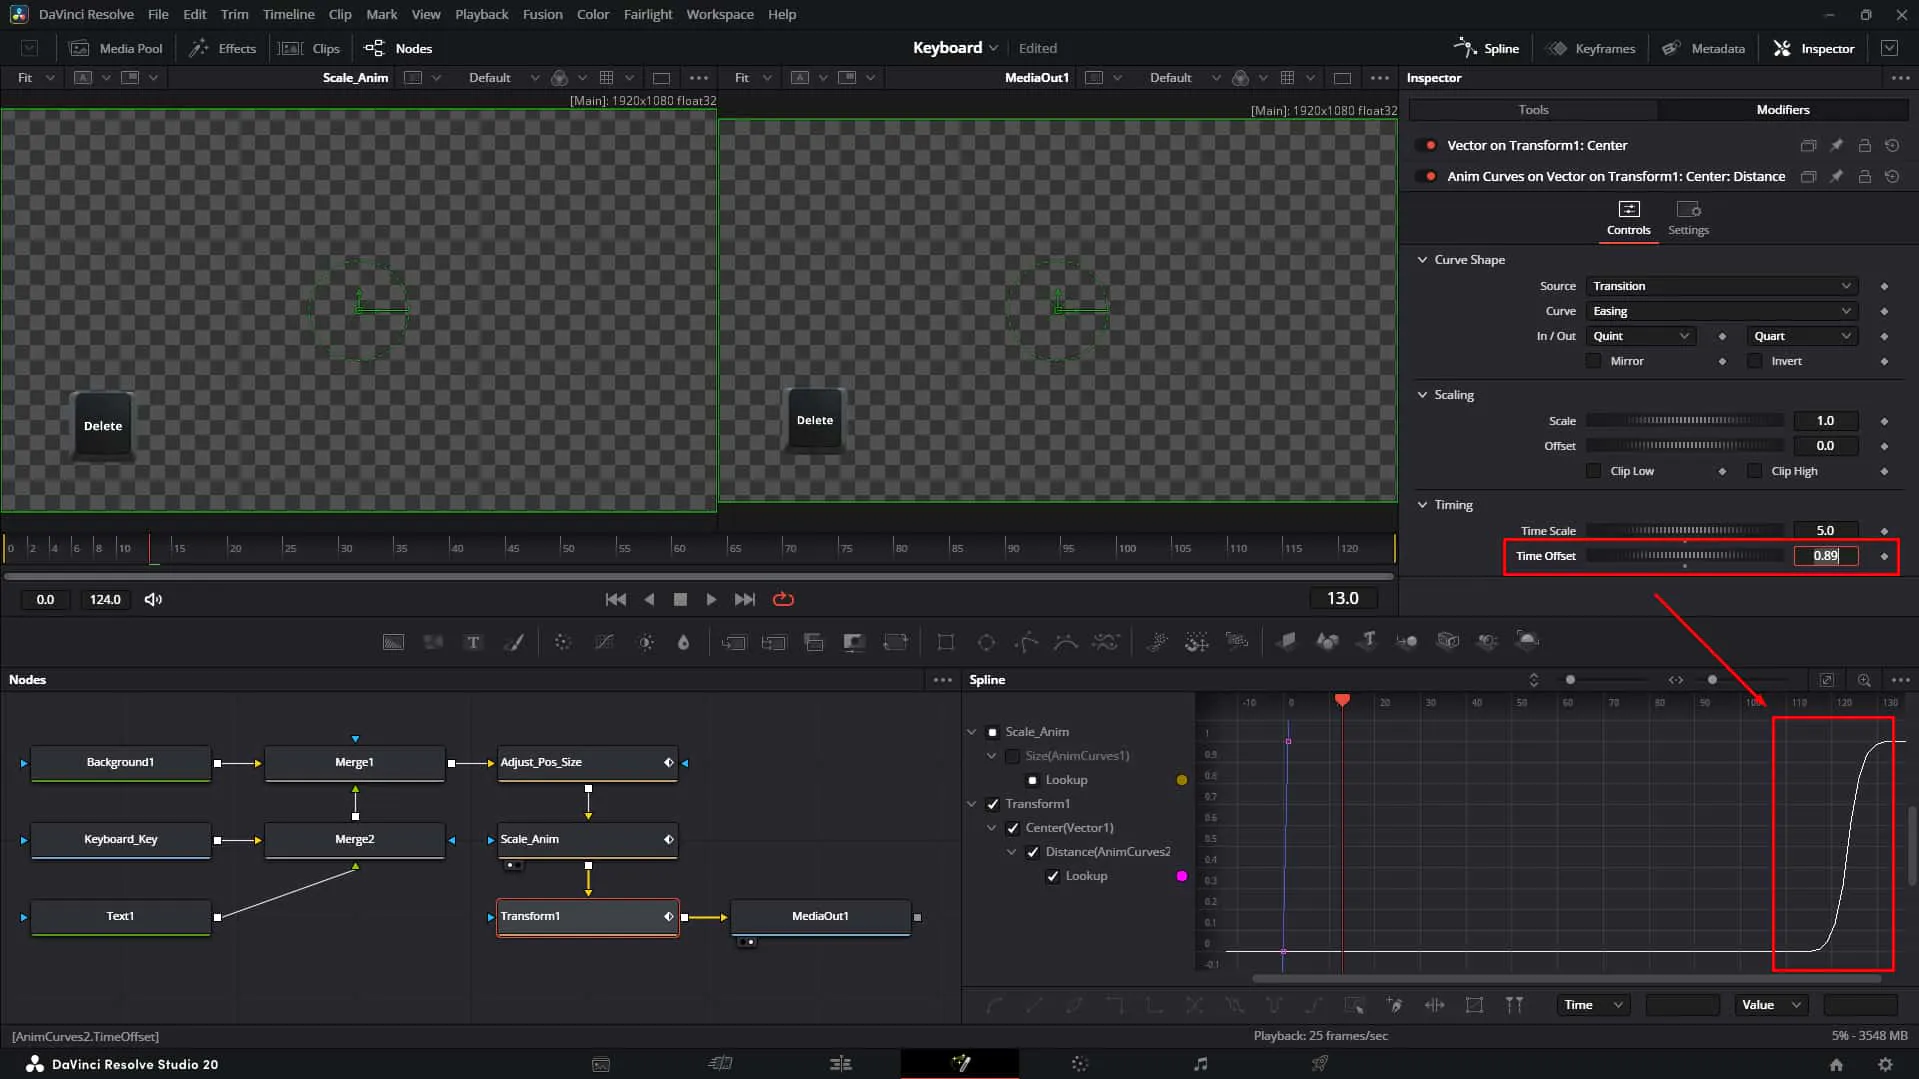
Right-click on the Size parameter in the Inspector and select "Modify With > Anim Curves". This is the secret sauce! 🥫 It tells Fusion to drive this parameter automatically based on the clip's duration.
12. Automatic Motion
You'll notice the Size now animates across the entire timeline automatically. No diamond keyframes required! 💎🚫
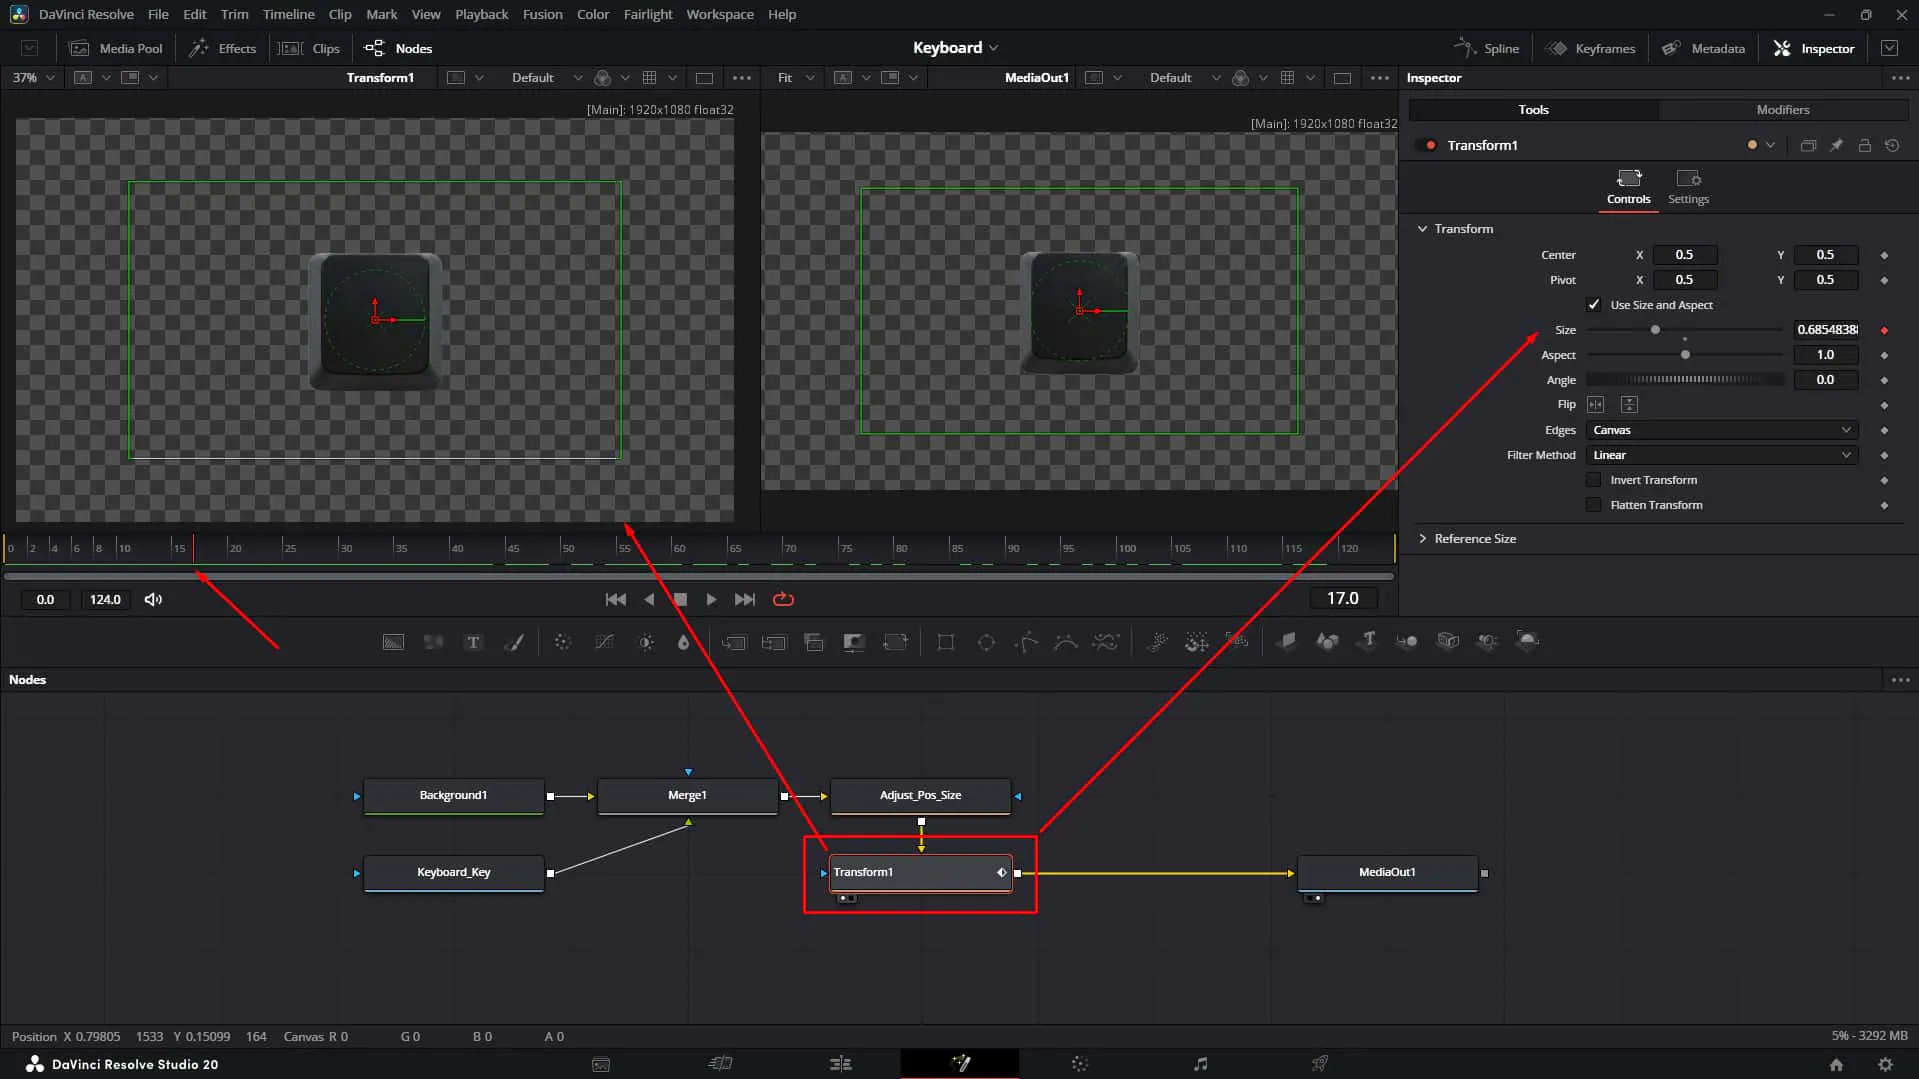
13. Visualizing the Curve
Open the Spline editor. You can see the animation curve that Fusion generated for the Size. Smooth, right? 📈
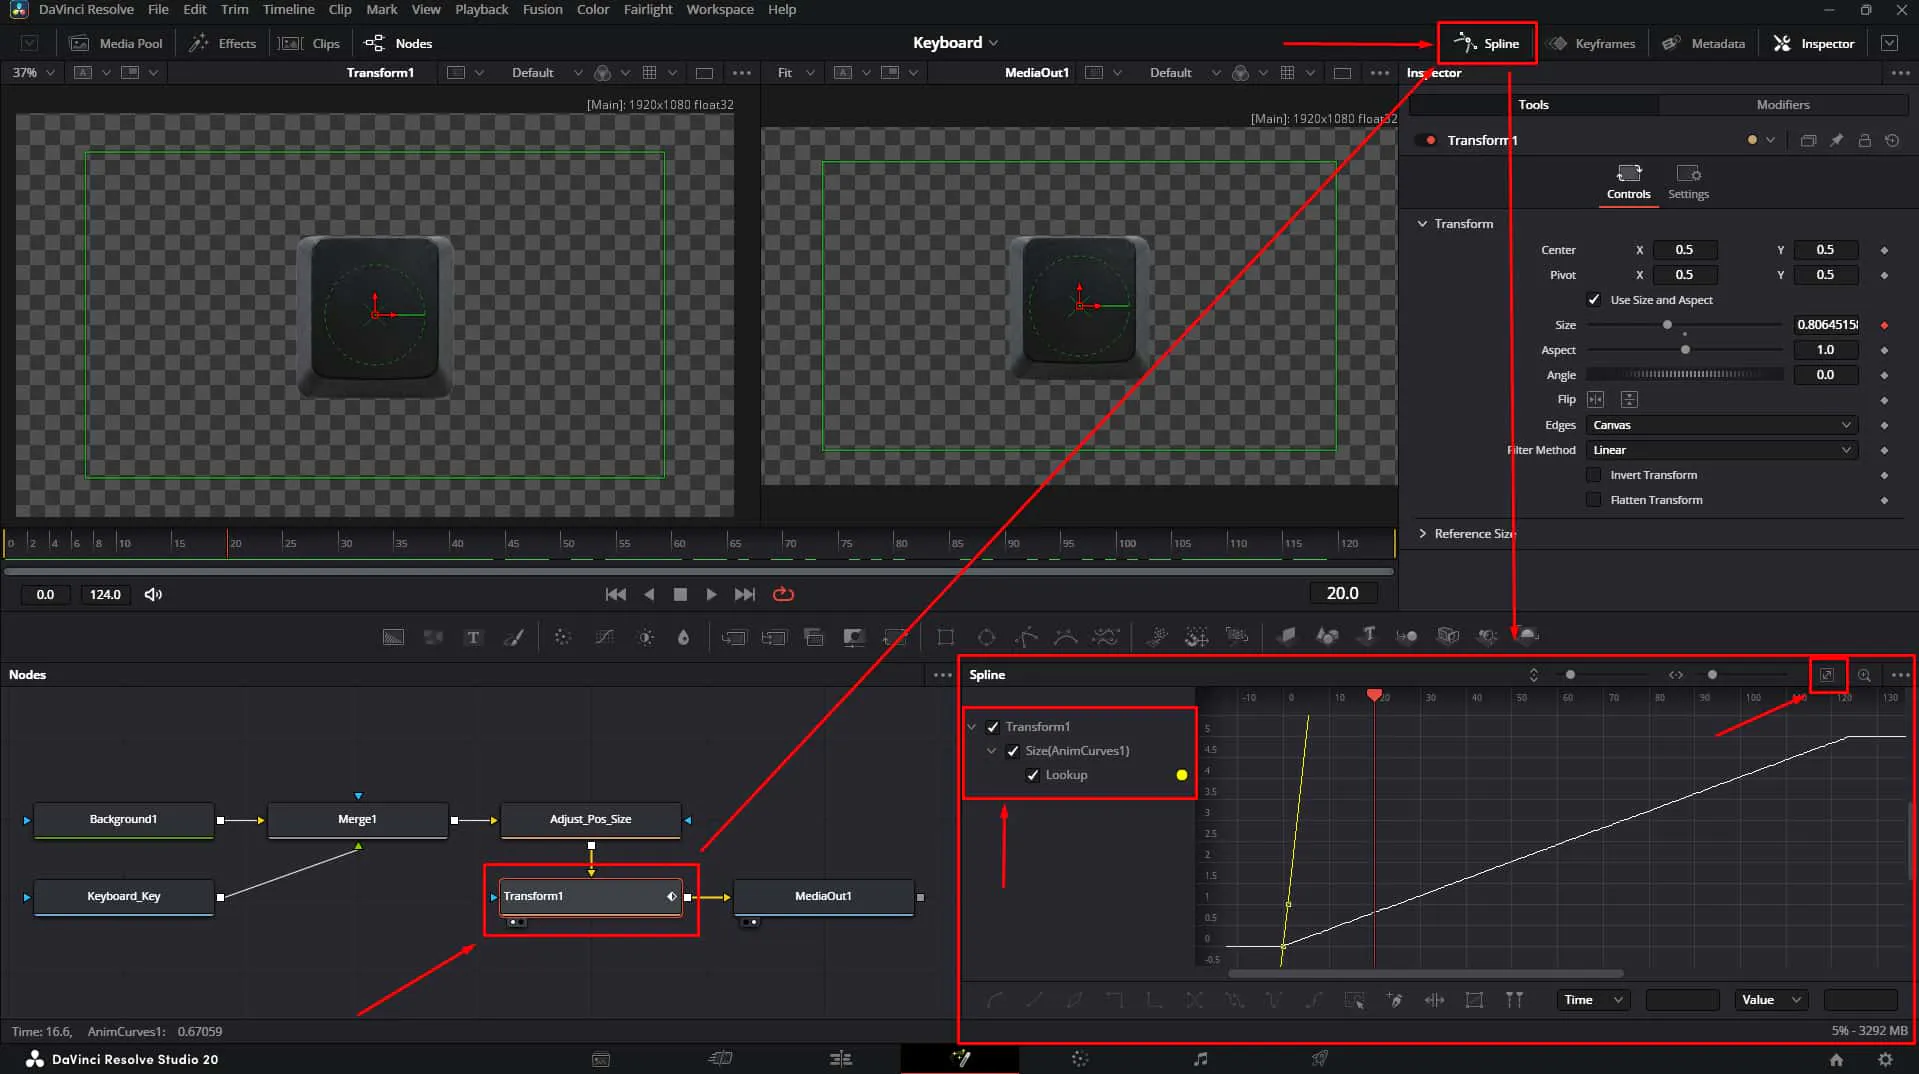
14. Tuning the Modifier
Go to the Modifiers tab to tweak the Anim Curves settings. This is where we control the "feel" of the pop-up.
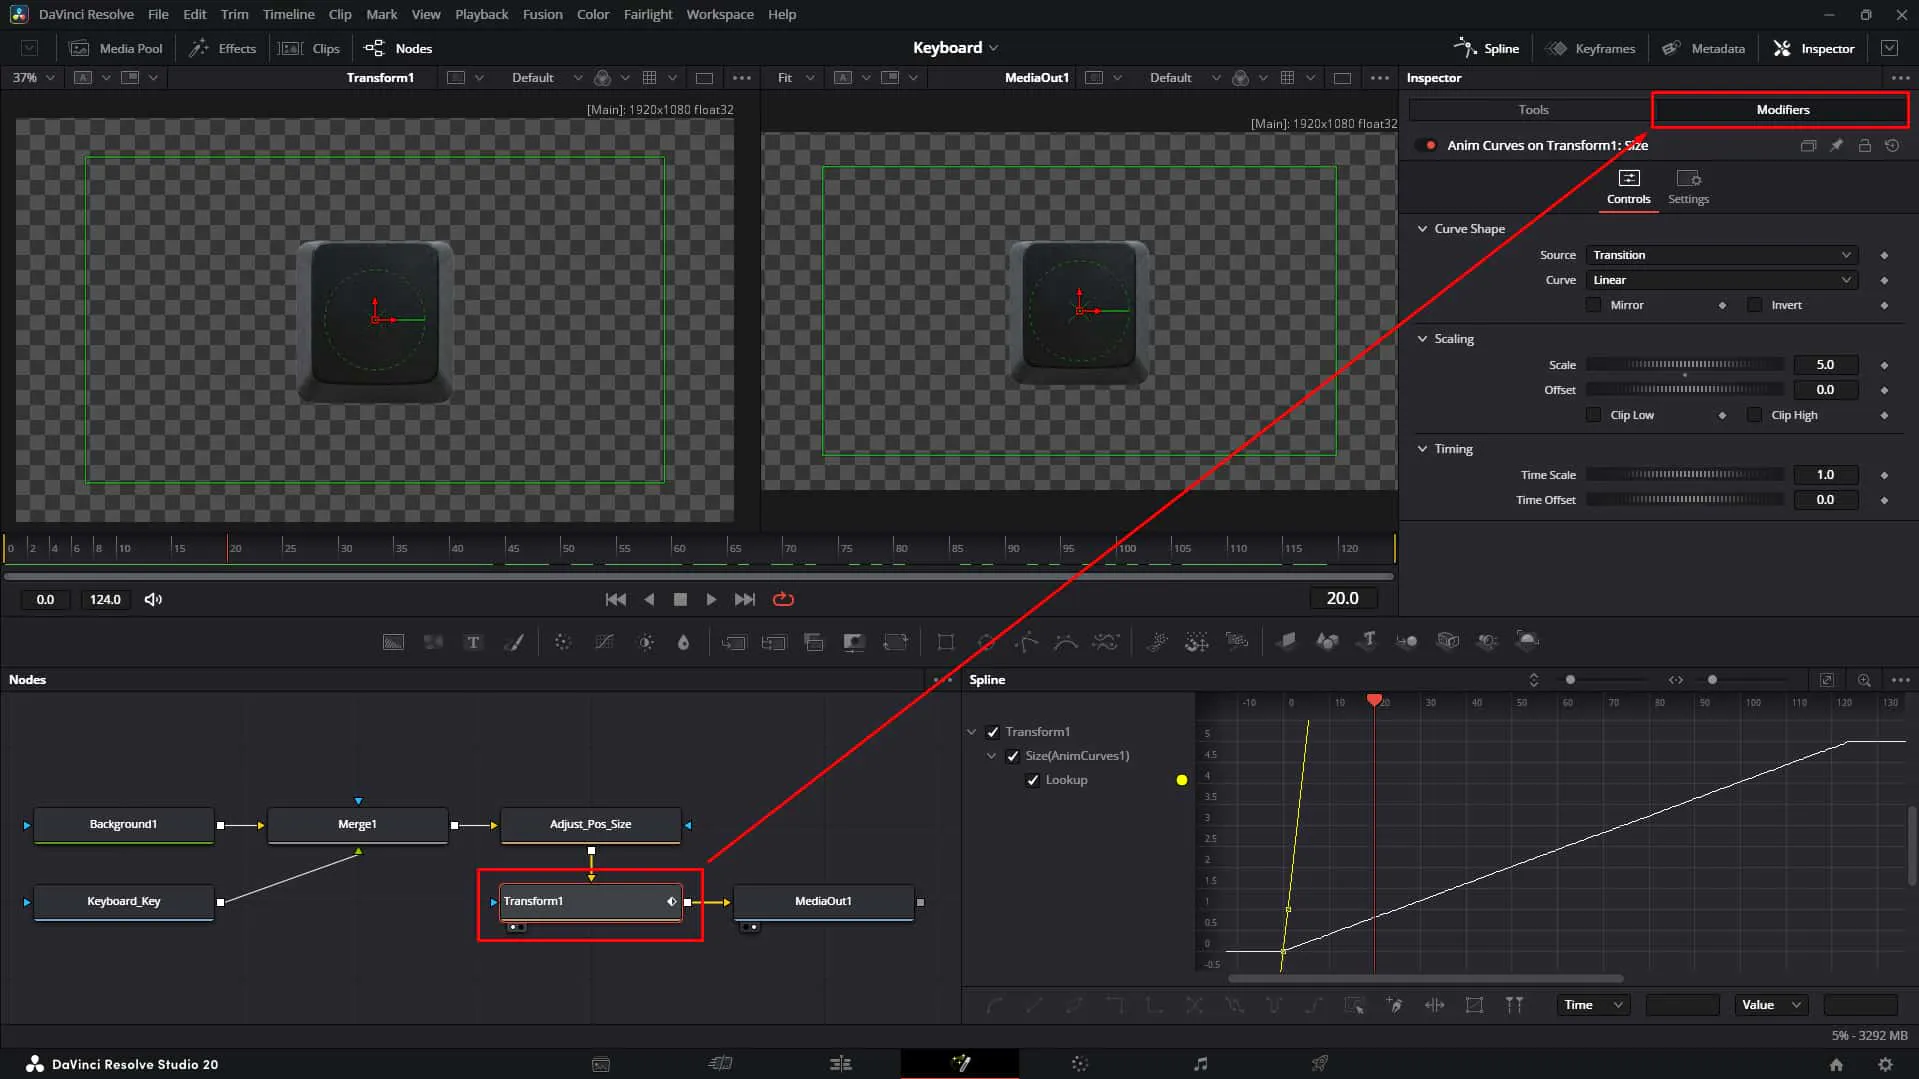
15. Scale Check
Observe how the Scale parameter affects the curve. It controls the intensity of the value change.
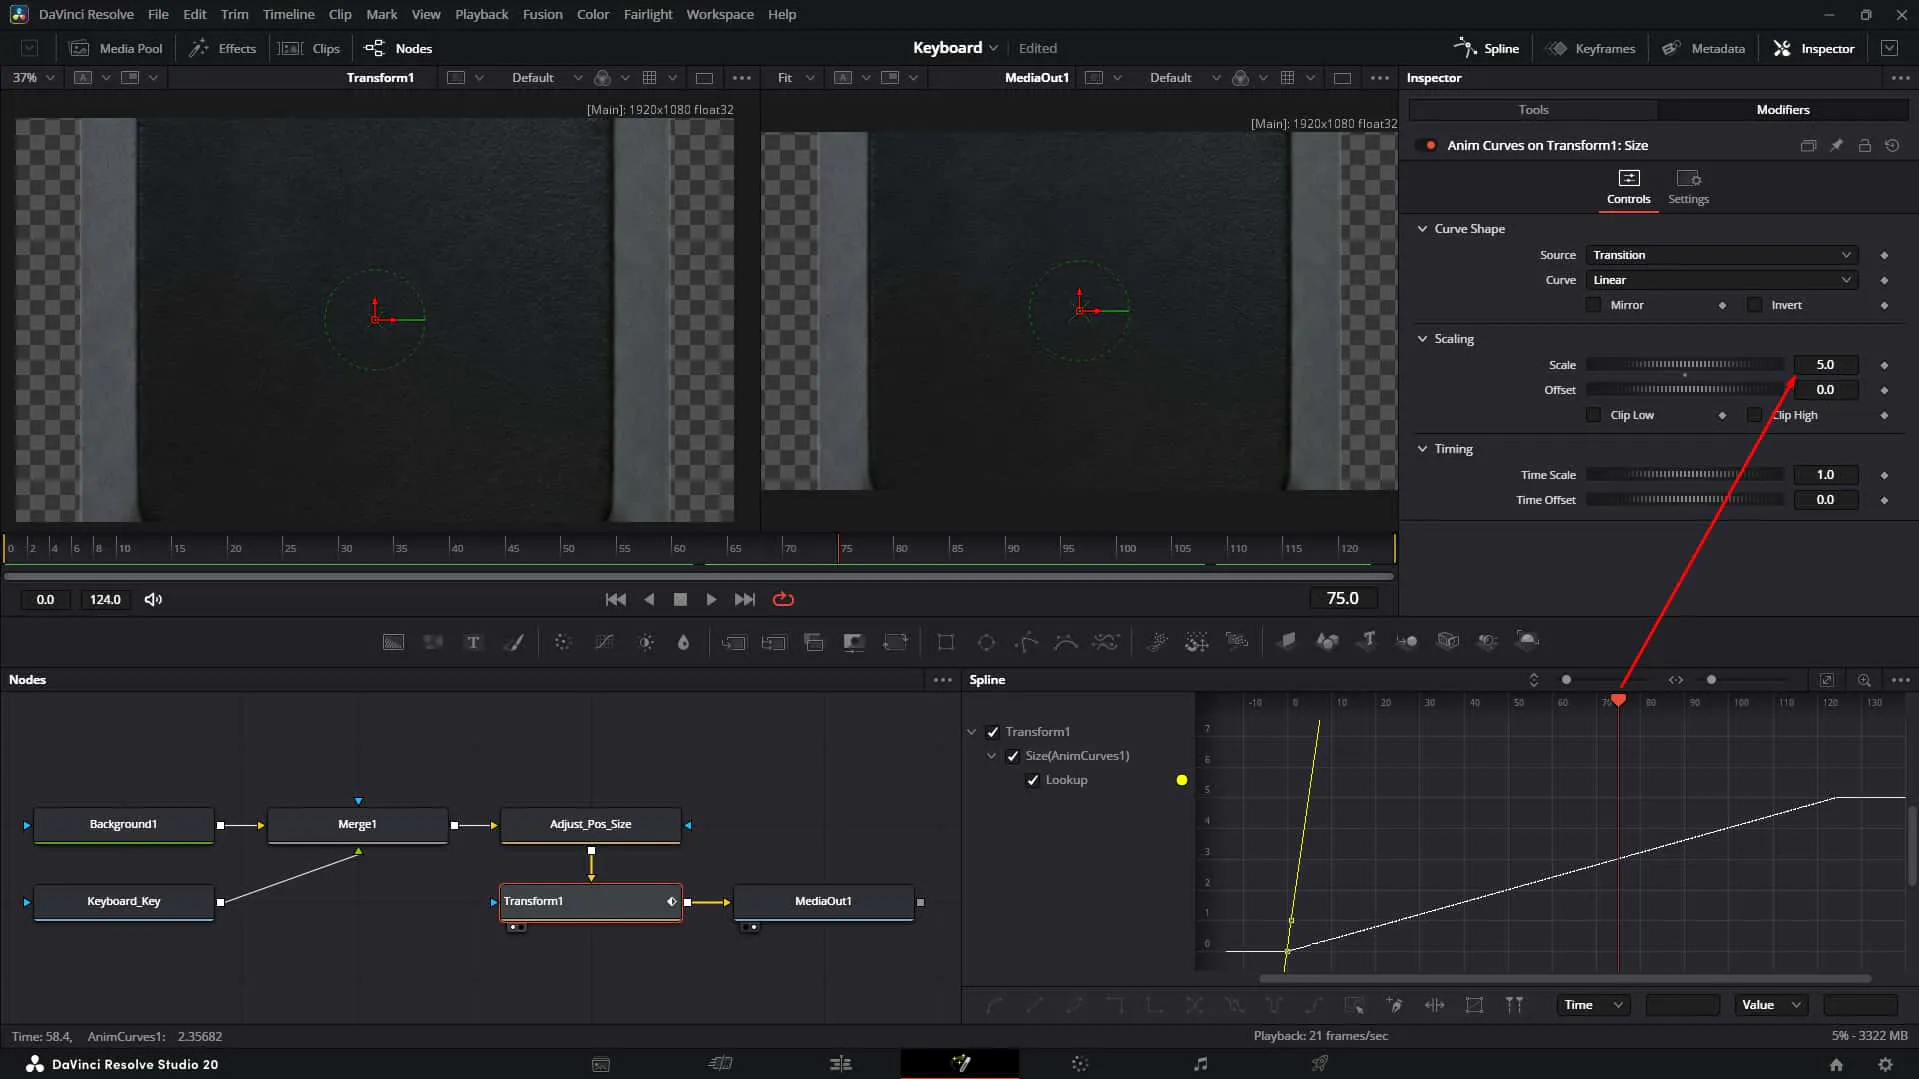
16. Dial it Down
Reduce the Scale parameter. We want a subtle pop, not an explosion! 💥 -> 🎈
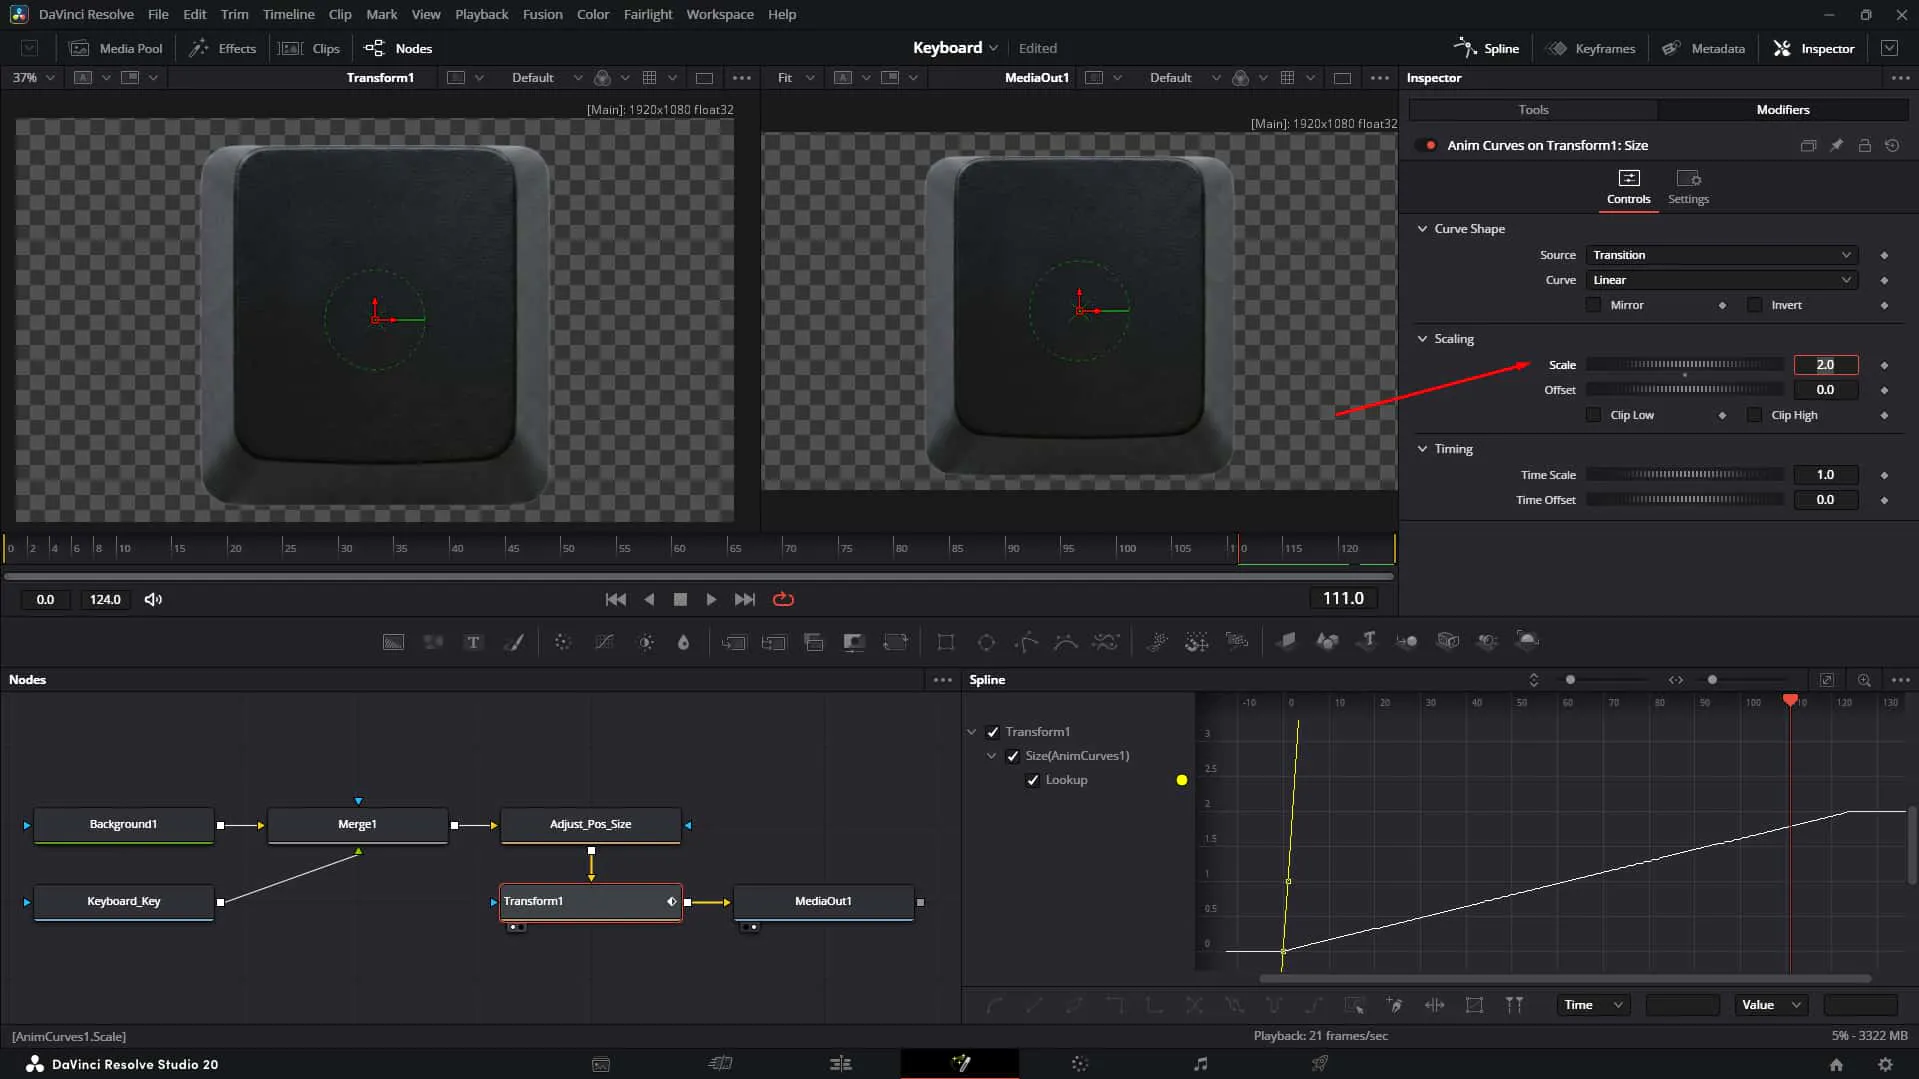
17. Custom Curves
Change the Source to "Custom" (or Apply Curve) and define your In & Out curves. This lets you create that snappy "pop-in" easing.
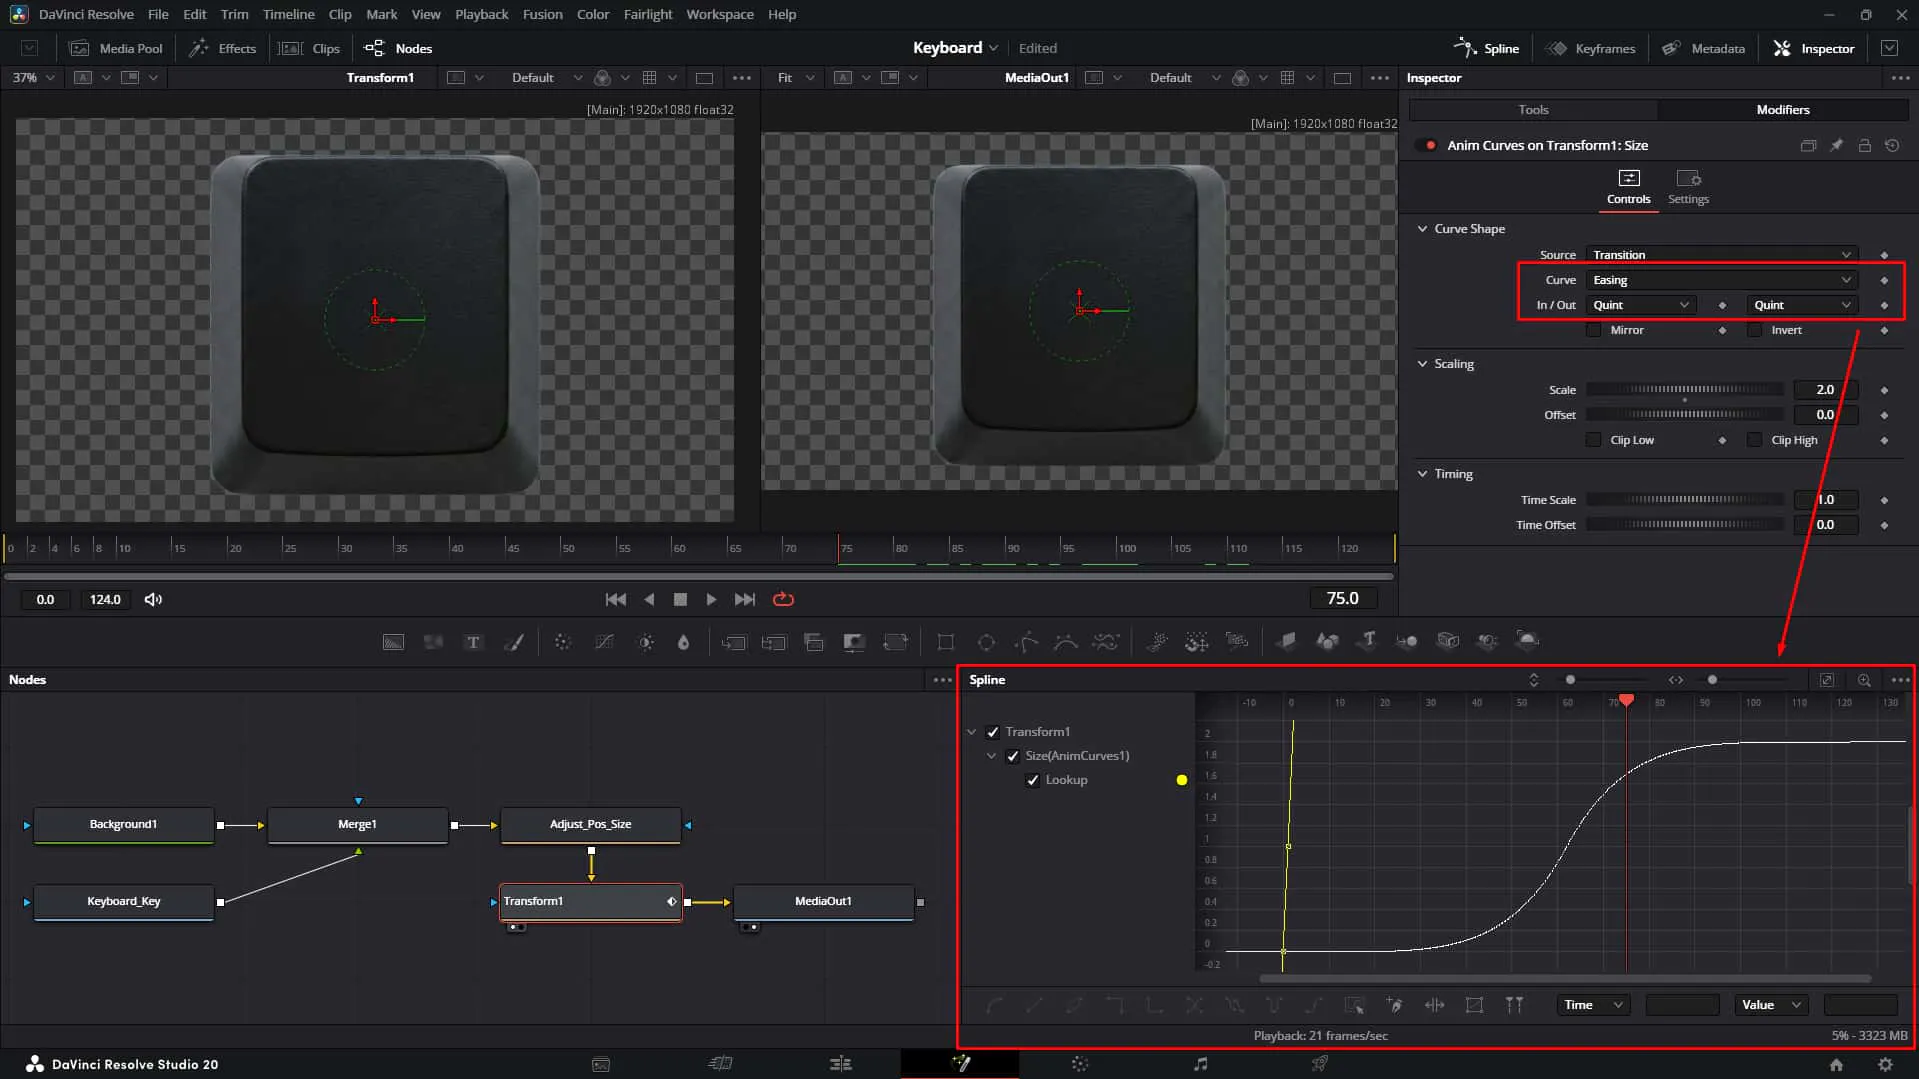
18. Time Scaling
Adjust the Time Scale. This compresses the animation so it happens quickly at the start, rather than taking the whole clip duration.
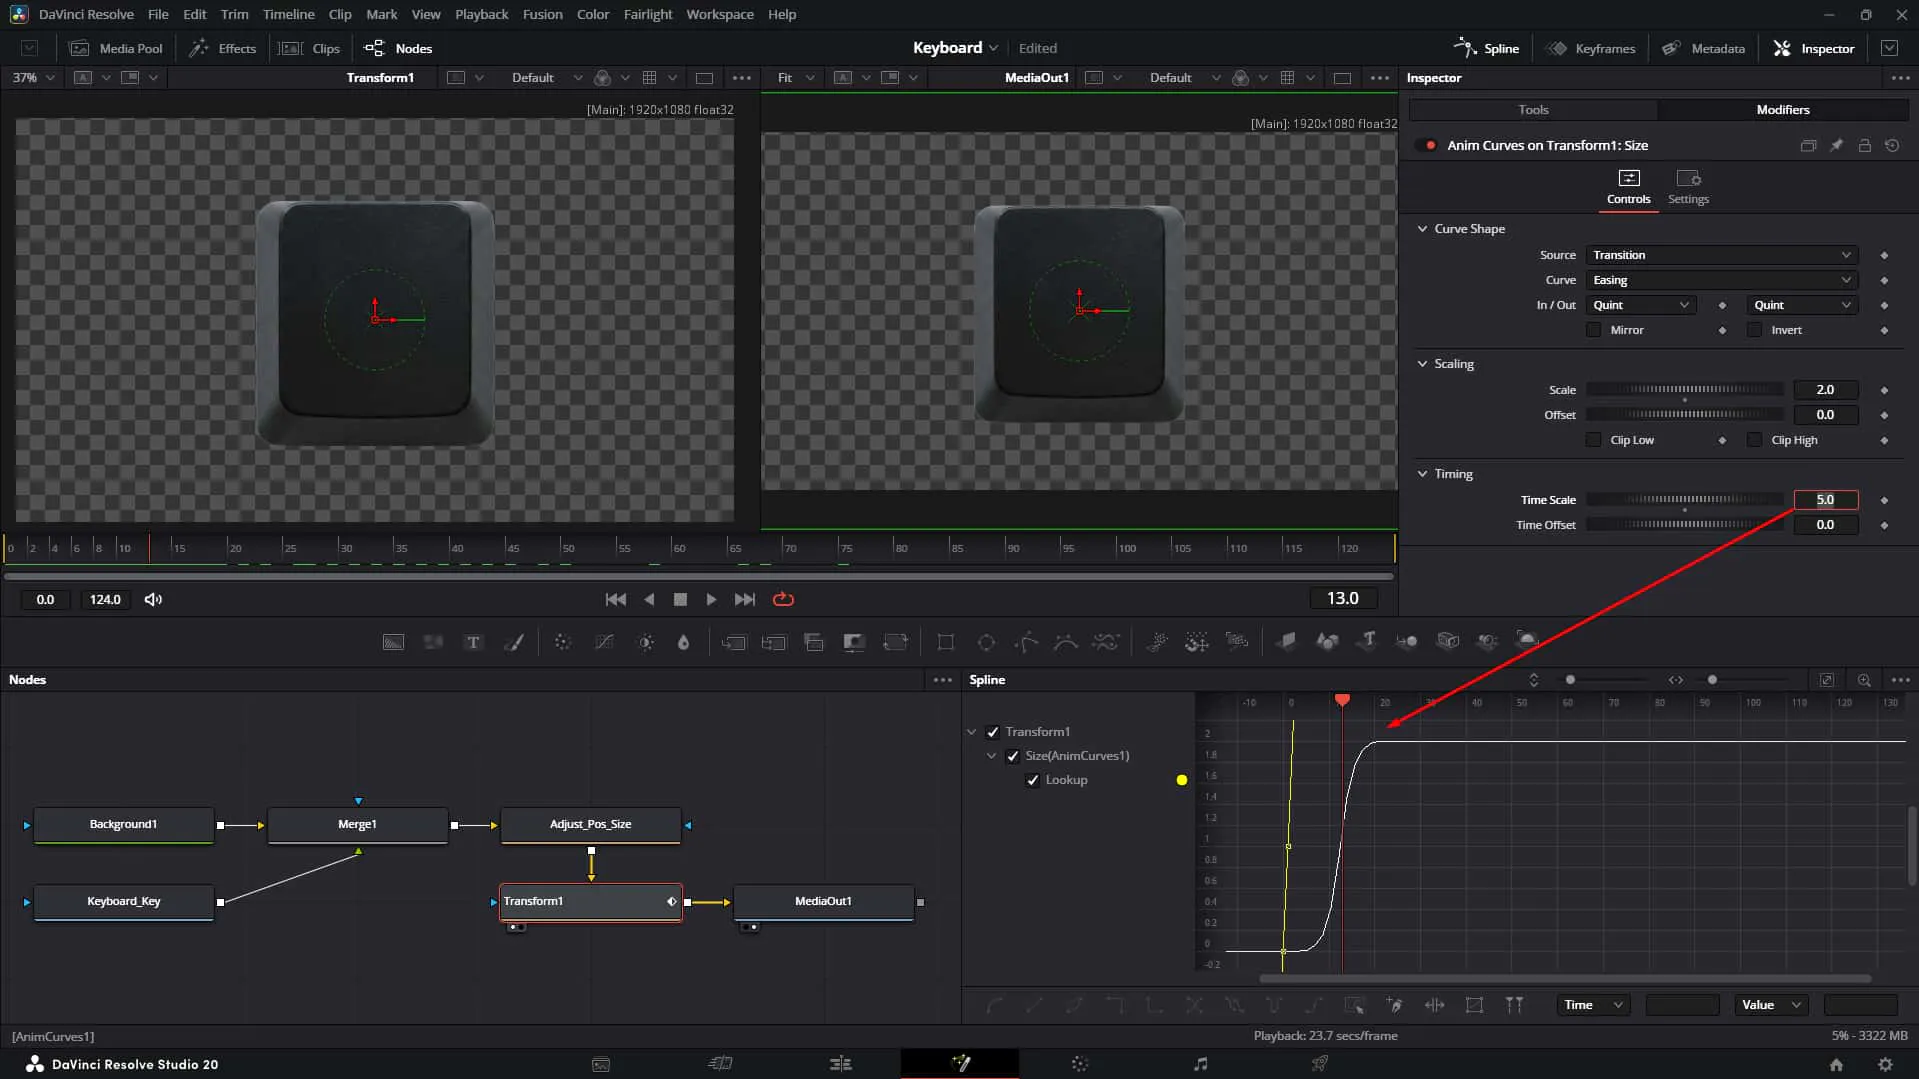
19. Final Size Tweak
Reduce the Scale again if needed to keep the image size minimal and realistic.
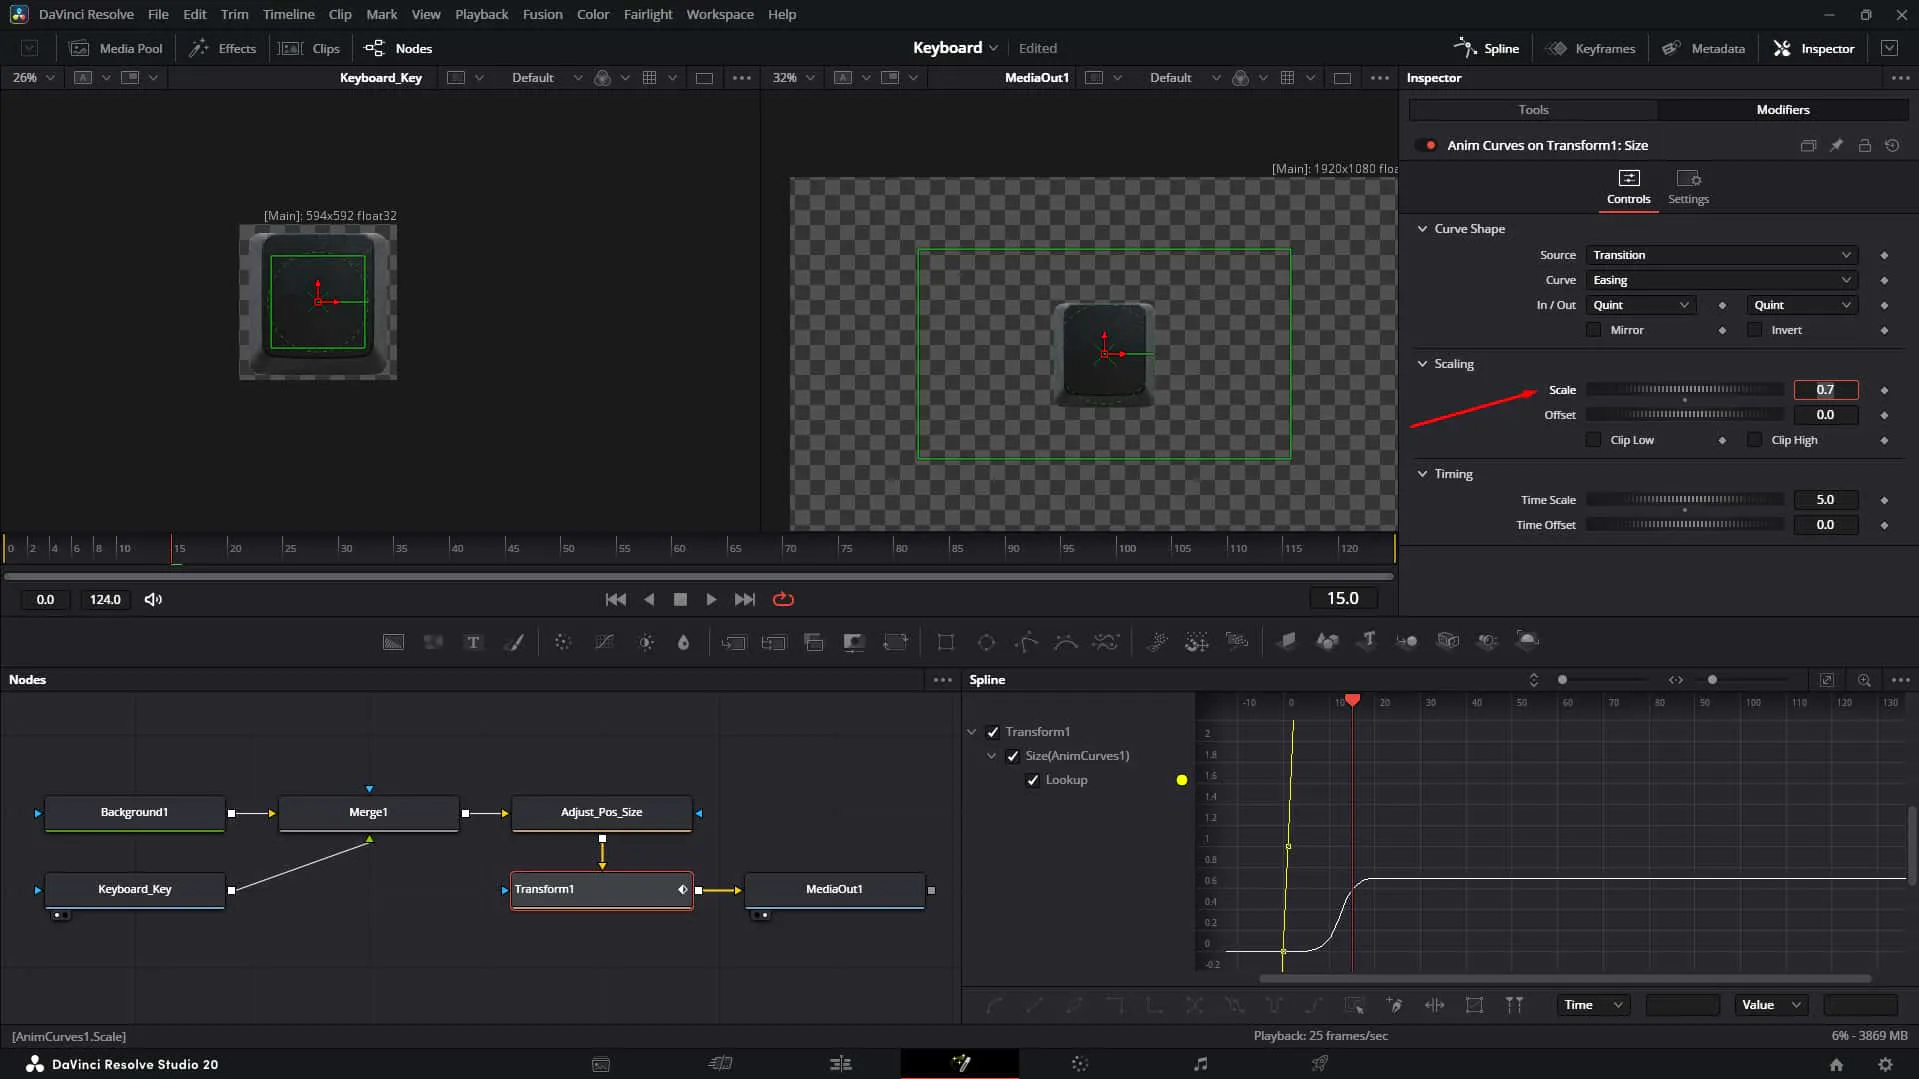
Let's add the letter and make the animation respond to where the key is on screen.
20. Add the Label
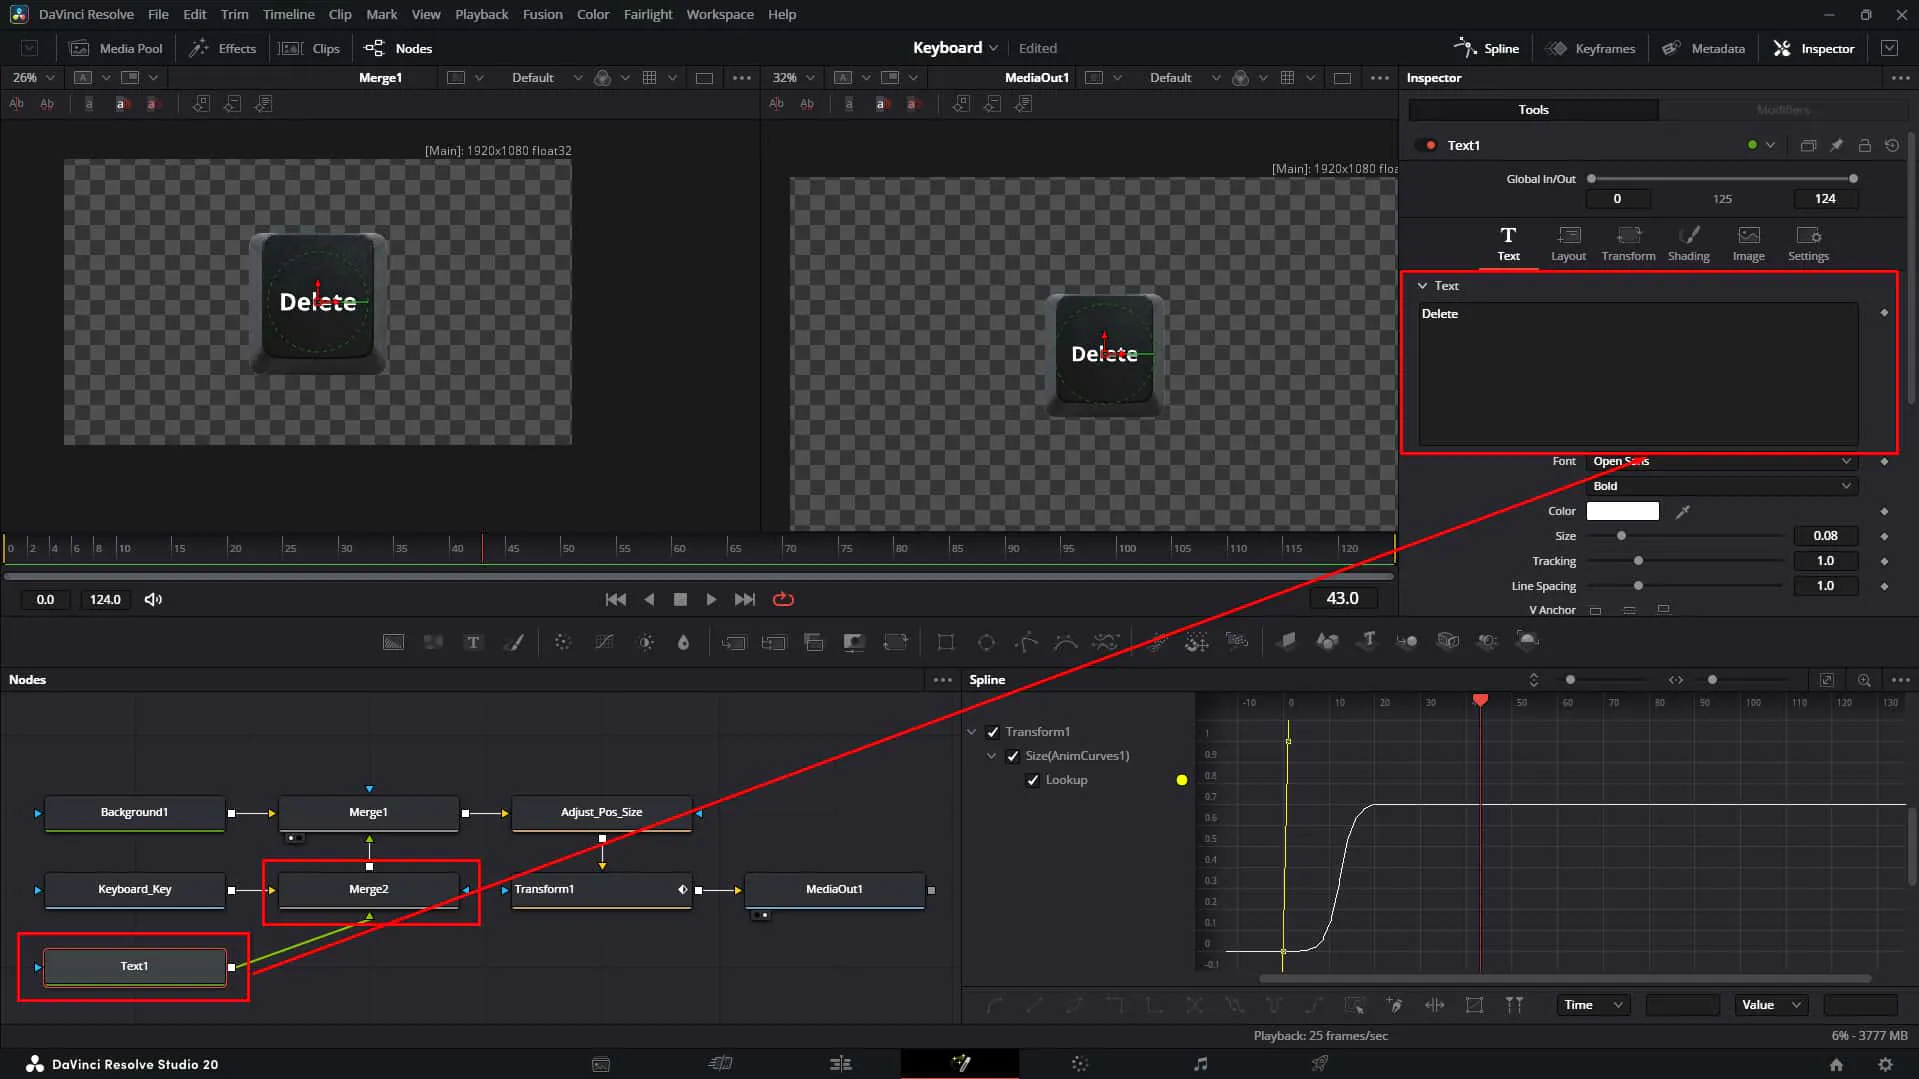
Add a Text node and a Merge node to place the key name (e.g., "A", "Ctrl") on top of the key graphic.
21. Testing Position
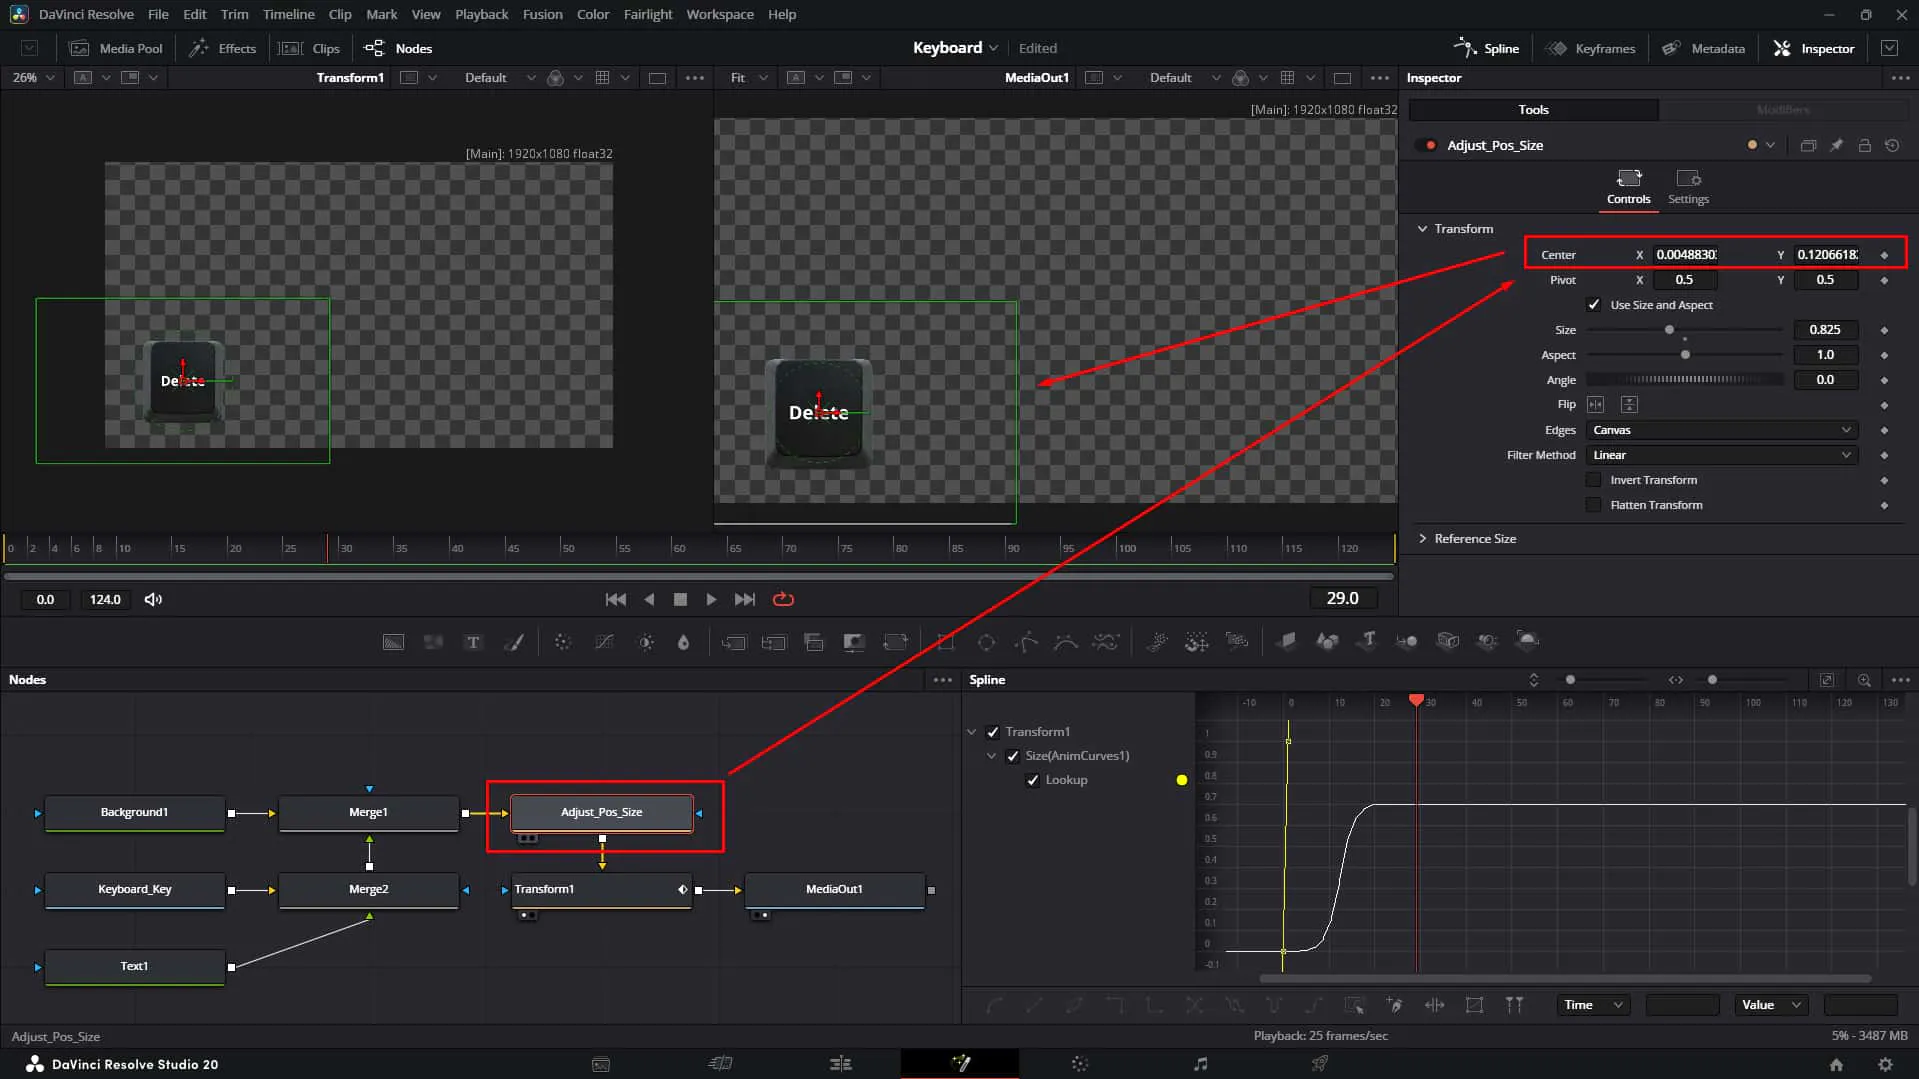
Move the Center of your "Adjust Pos Size" node. Watch how the animation travels with it? Good, but we can do better.
22. Behavior Check
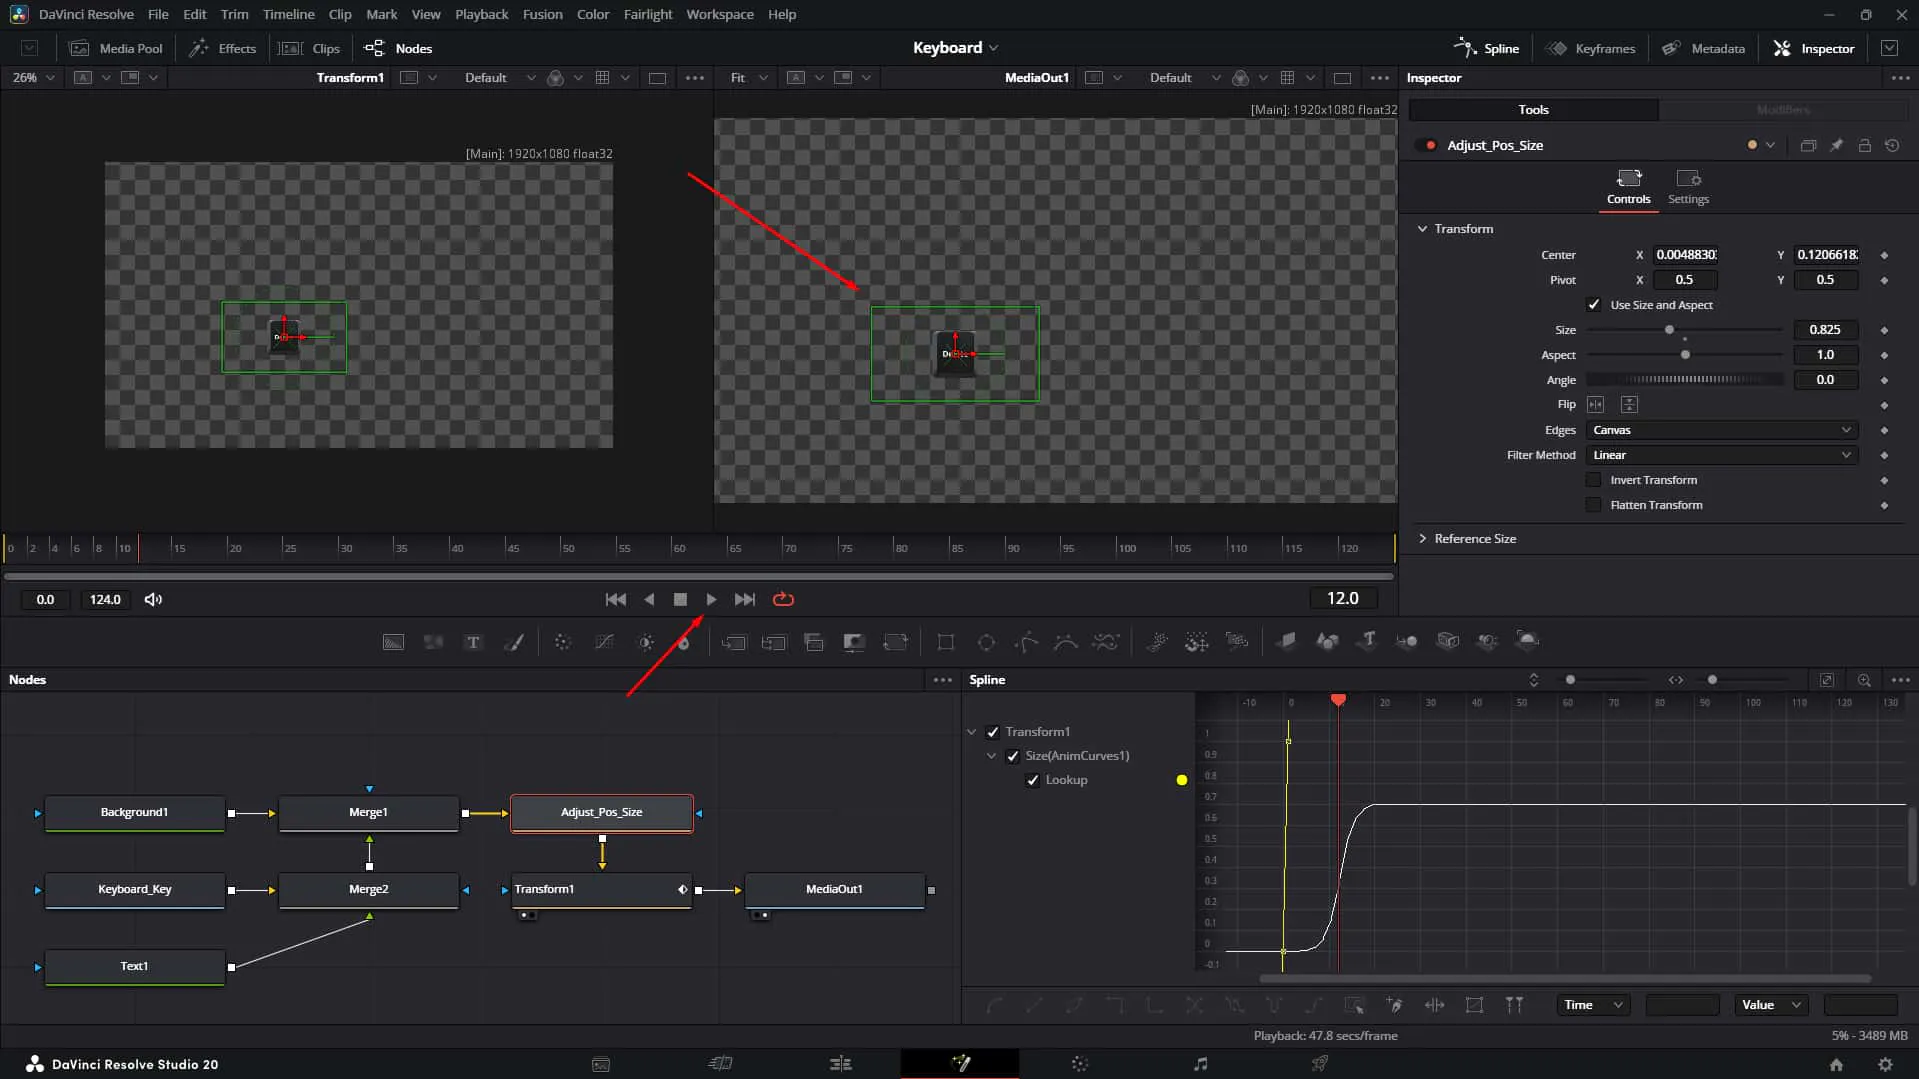
Observe the animation behavior. Does it scale from the center of the key, or the center of the screen? 🤔
23. Publish the Center
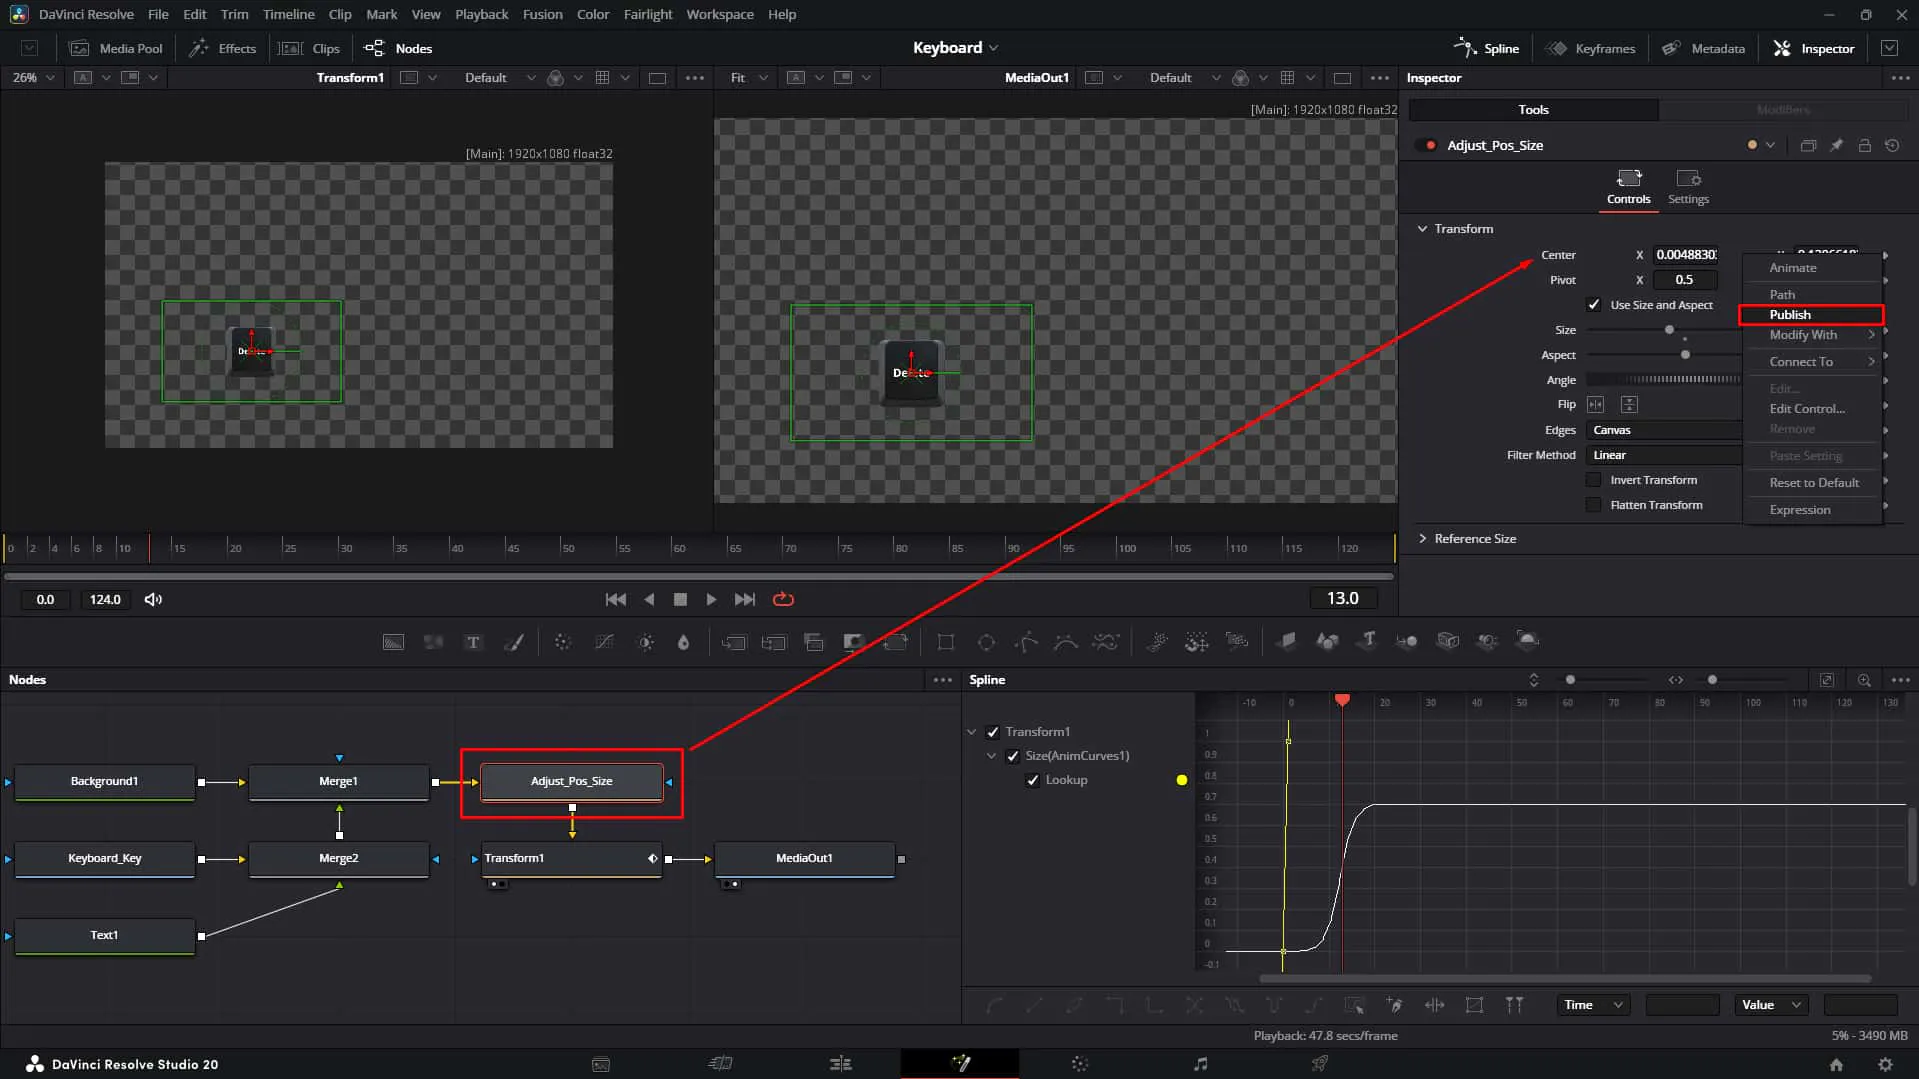
Right-click the Center parameter of your positioning node and calculate/publish it. This makes the coordinate data available to other nodes! 📡
24. Link the Pivot
On your Animation Transform node, connect the Pivot to the published Center value. This ensures the key always scales from its own center, no matter where you move it on screen! 🎯
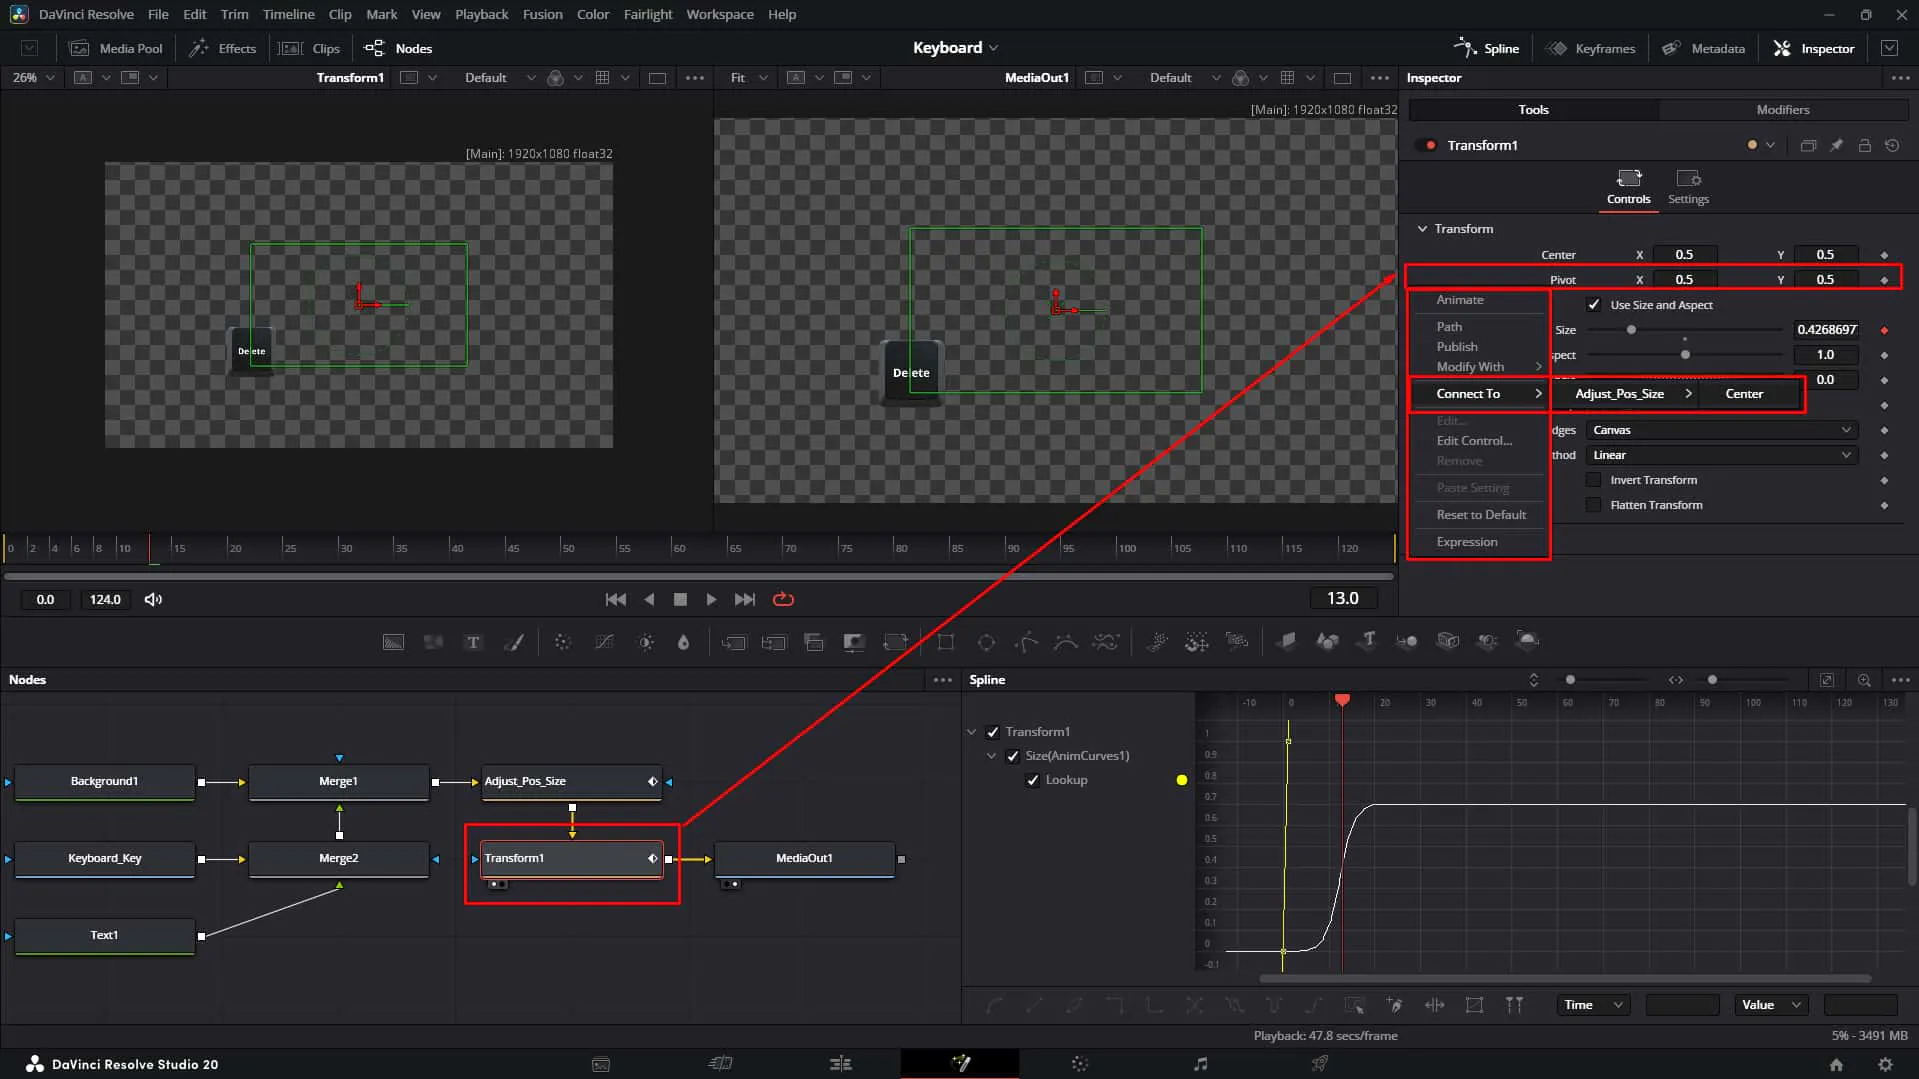
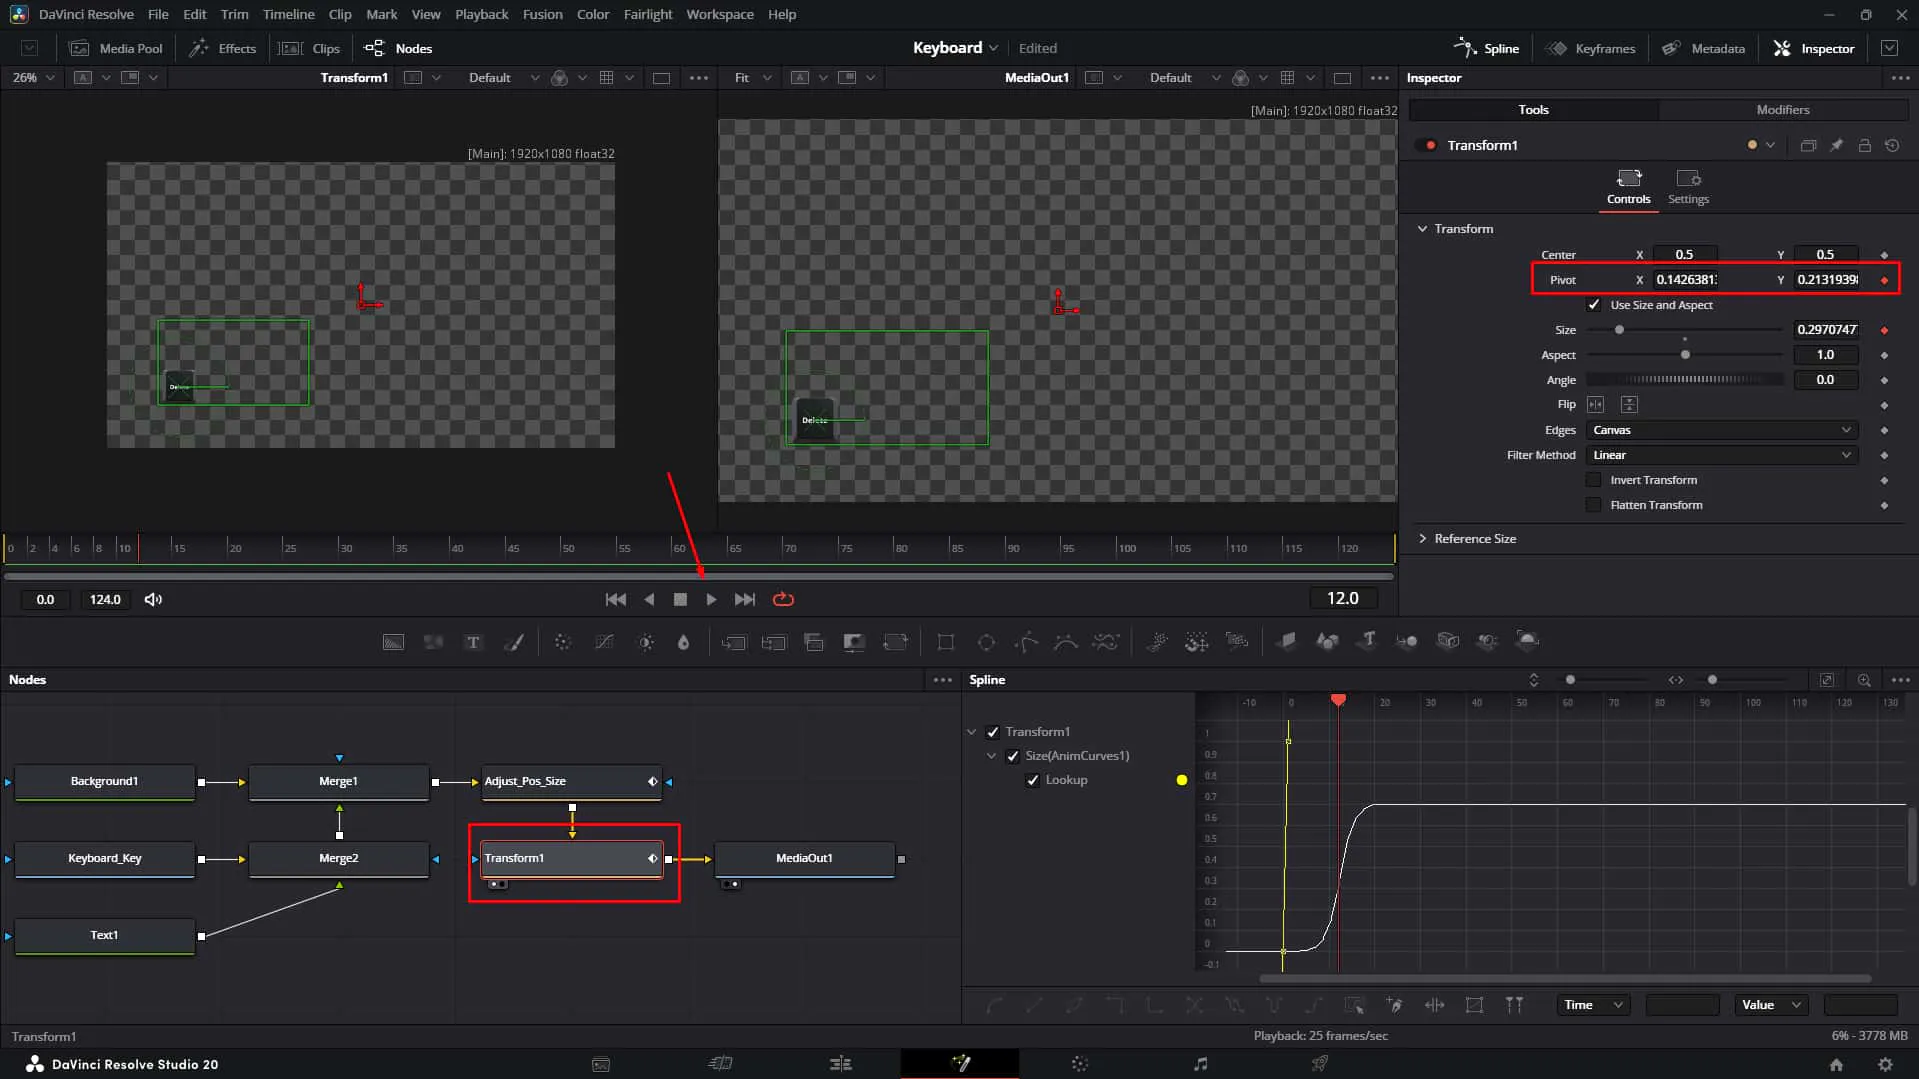
25. Verify Dynamic Pivot
Move the key around. The "pop" animation should now stick perfectly to the key's location. Success! ✅
What goes up must come down. Let's animate the exit using Vectors.
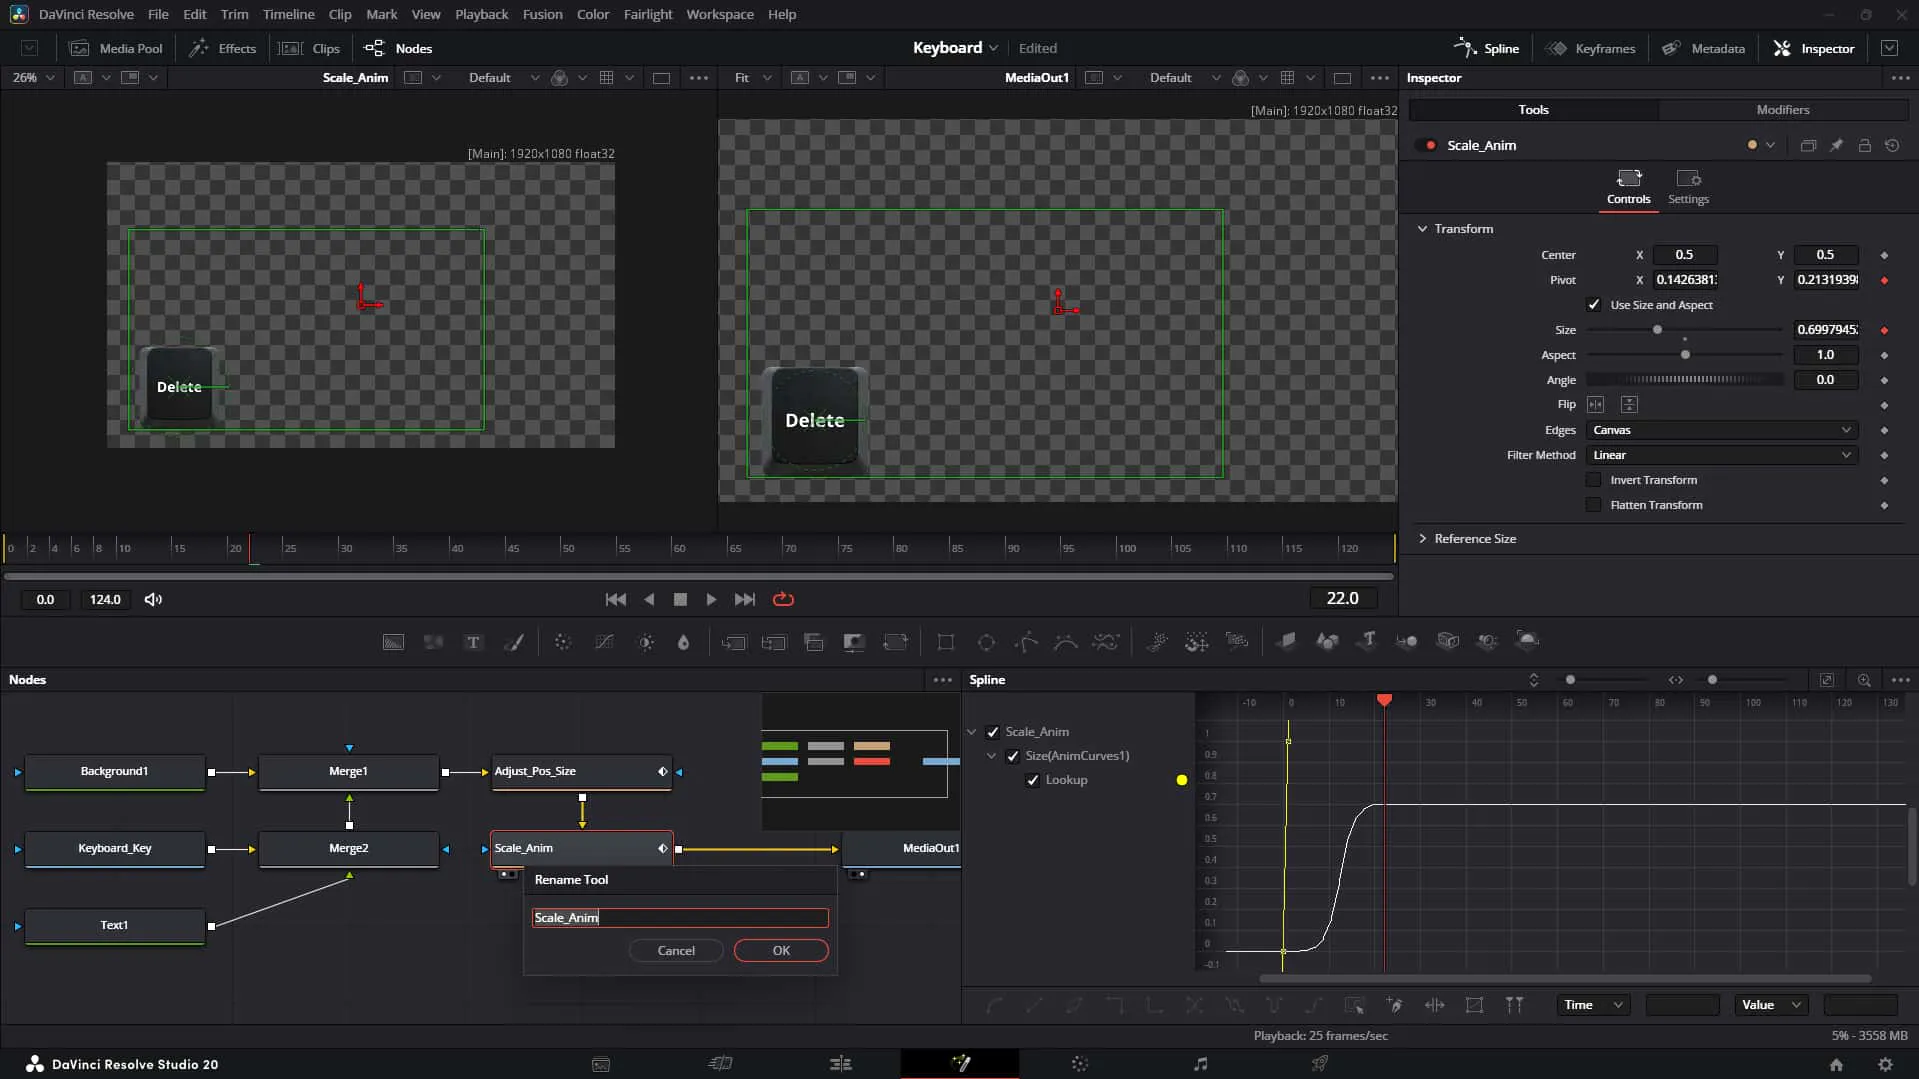
26. Name the Animator
Rename your animation transform node to "Scale_Anim" to keep things clear.
27. Vector Transform
Add another Transform node after "Scale_Anim". We'll use this for the outro motion. Connect the Vector Result to the center properties if you want to drive position, or prepare to animate the Distance.
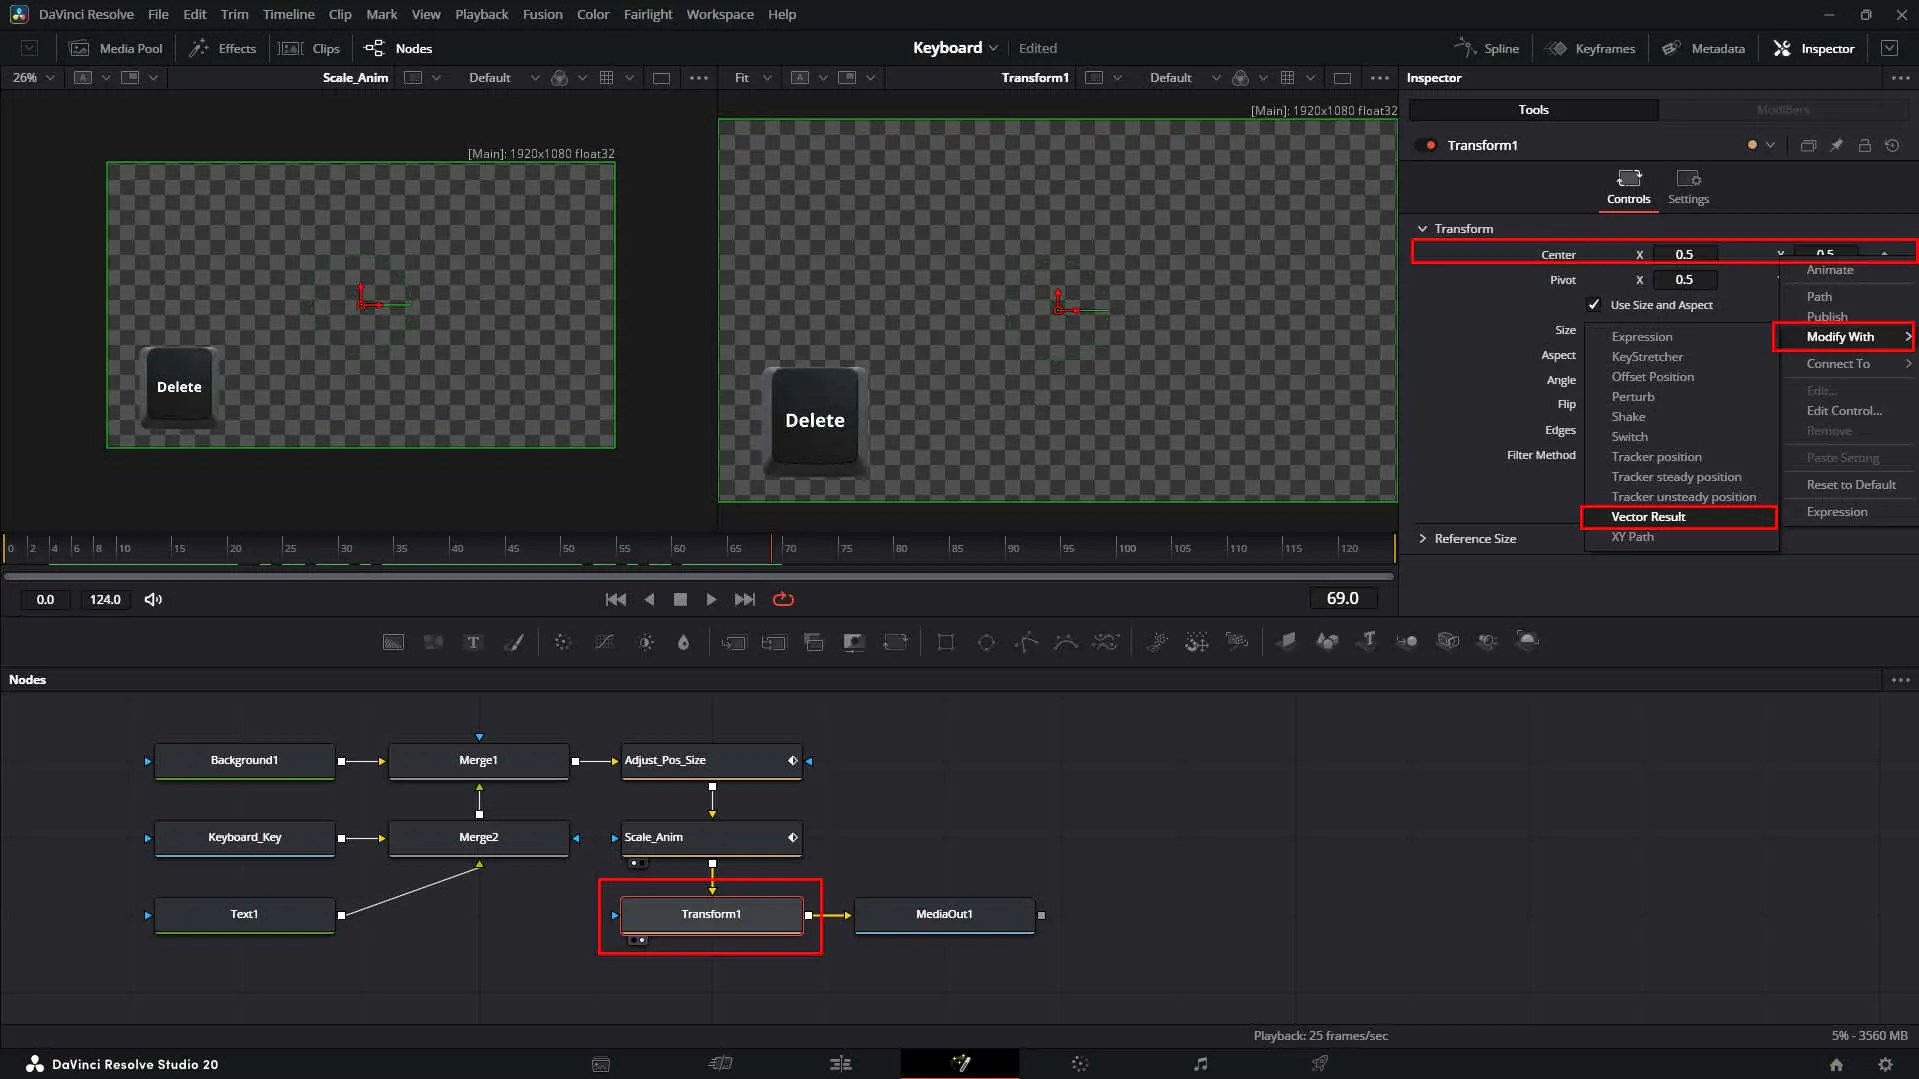
28. Distance Modifier
In the Transform settings, look at the Vector modifiers. Specifically, the Distance value. This controls how far the object moves from its origin.
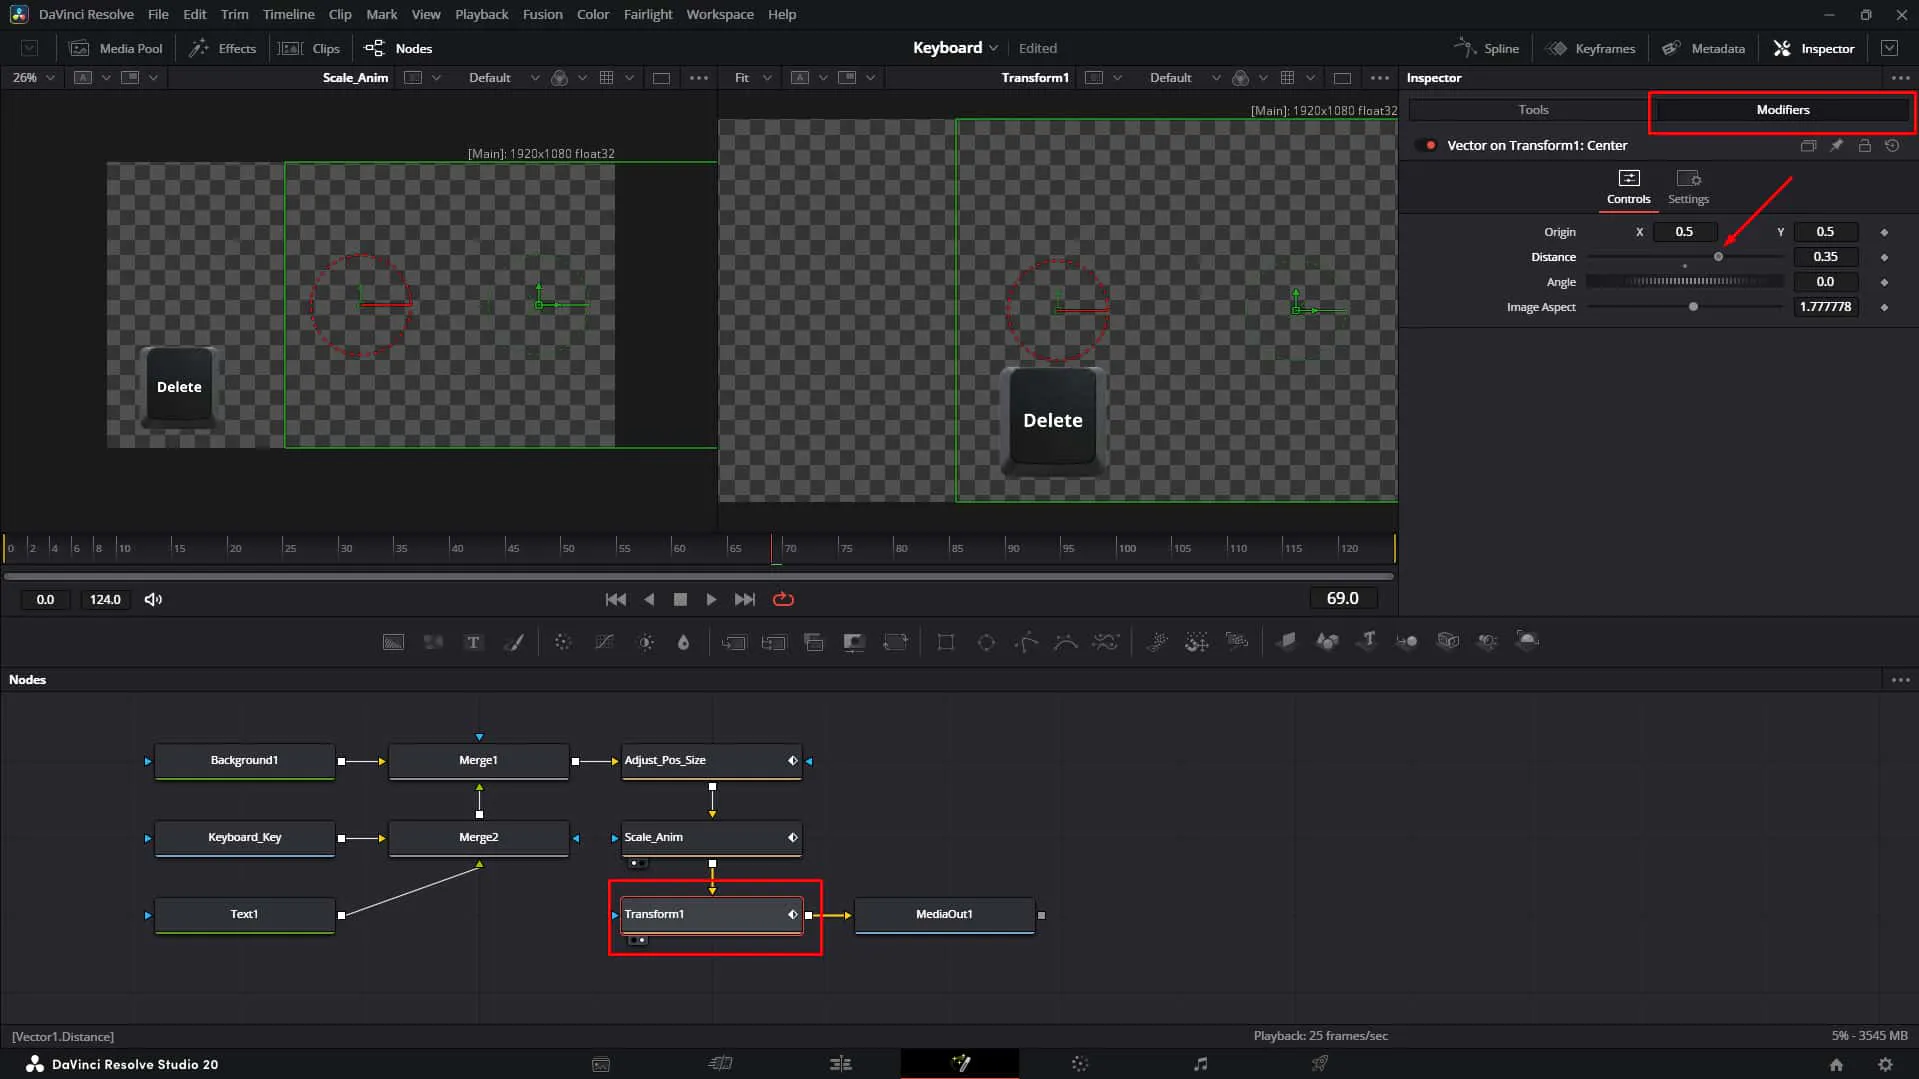
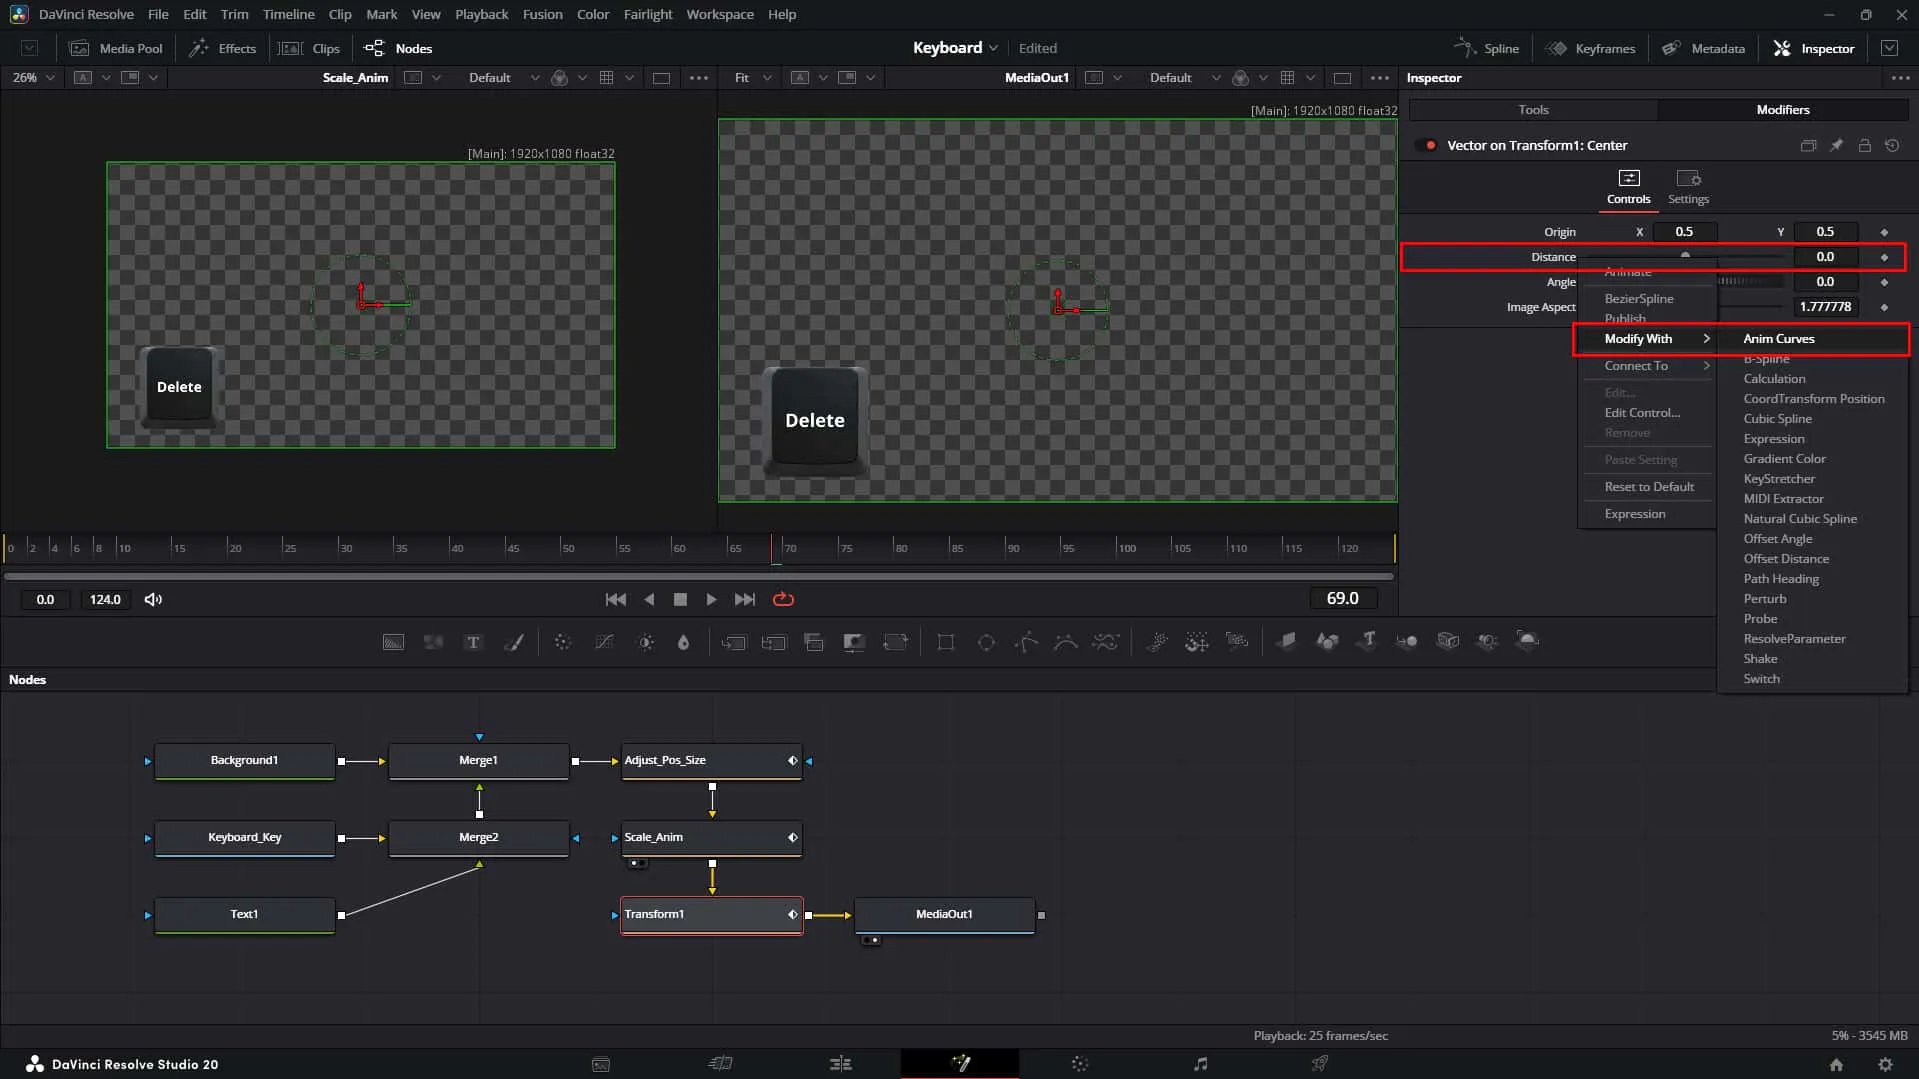
29. Animate Distance
Right-click Distance and add an Anim Curve. We're doing it again! This time, to drive the key away or fade it out dynamically at the end.
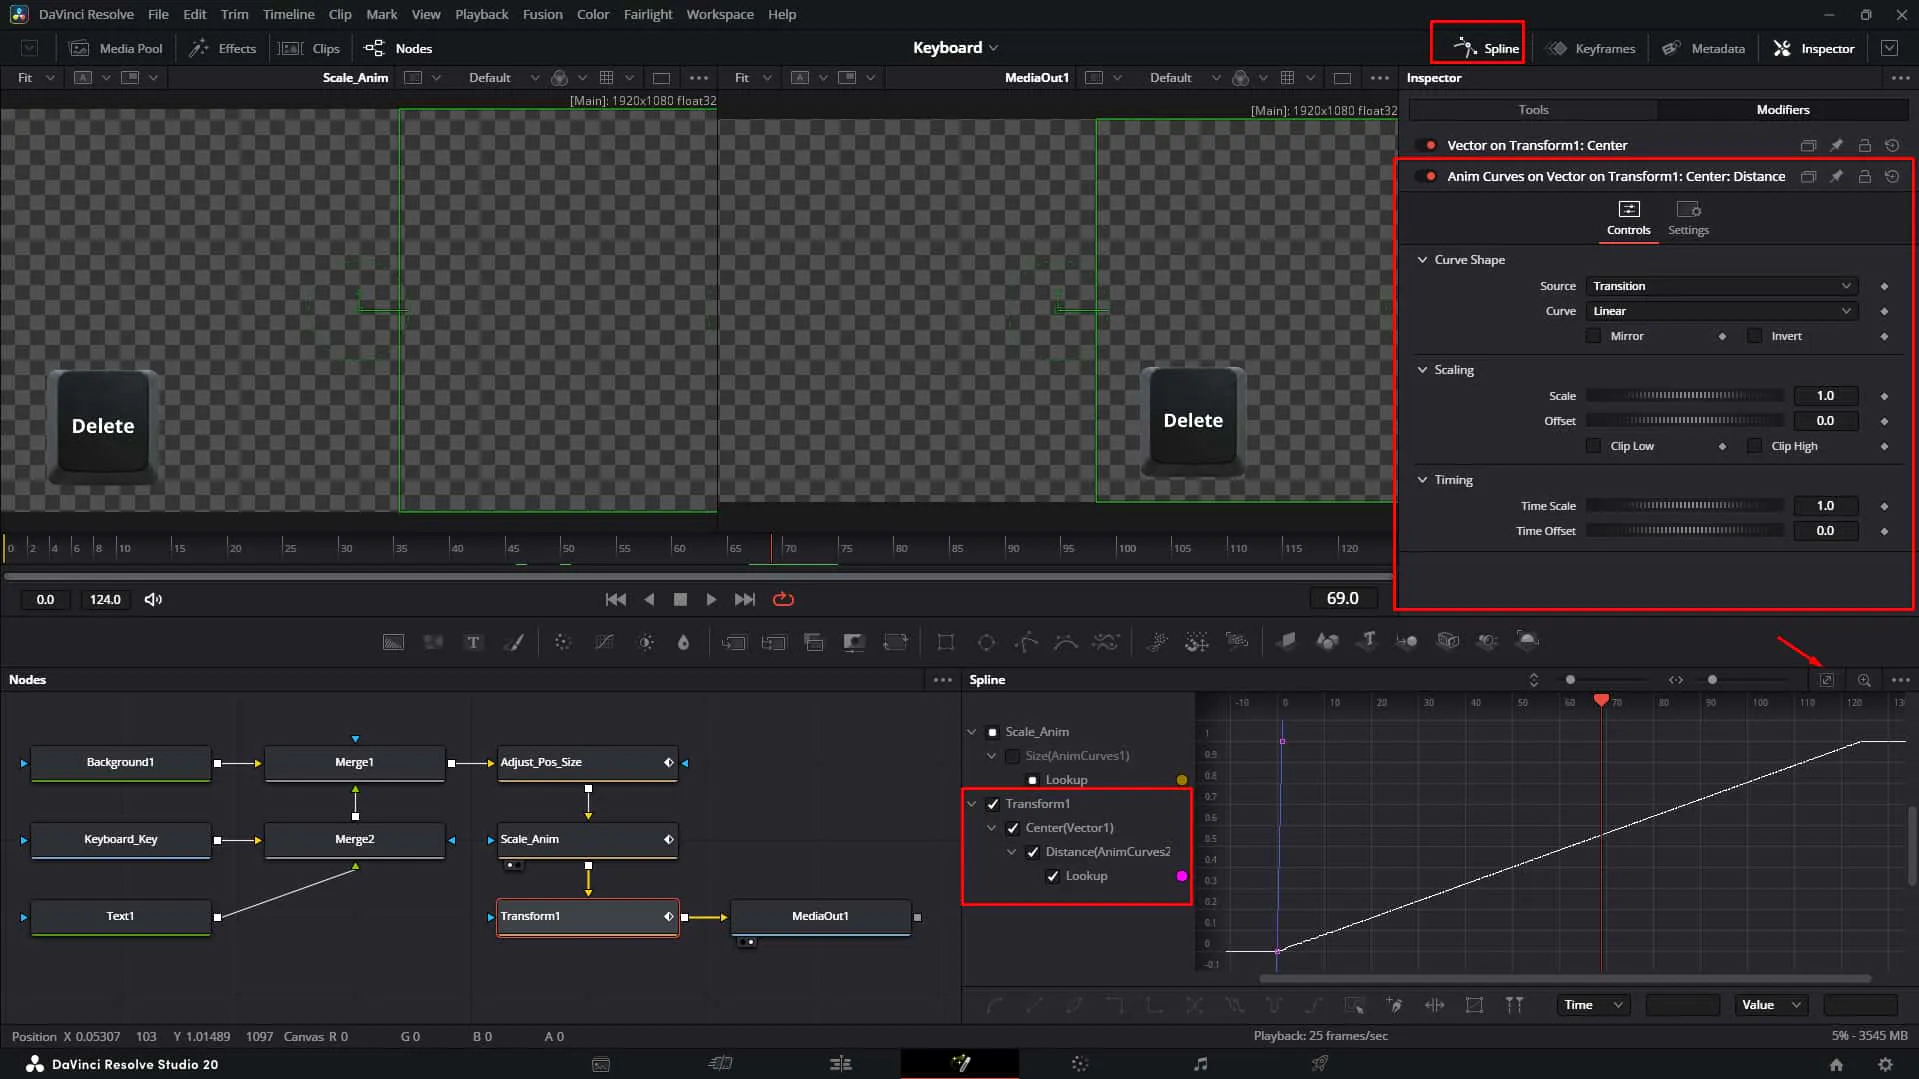
30. Check the Spline
Open the Spline window to visualize the Distance curve.
31. Offset for Outro
We don't want the exit to happen at the same time as the entrance. Adjust the Time Scale and use Time Offset on the Anim Curve.
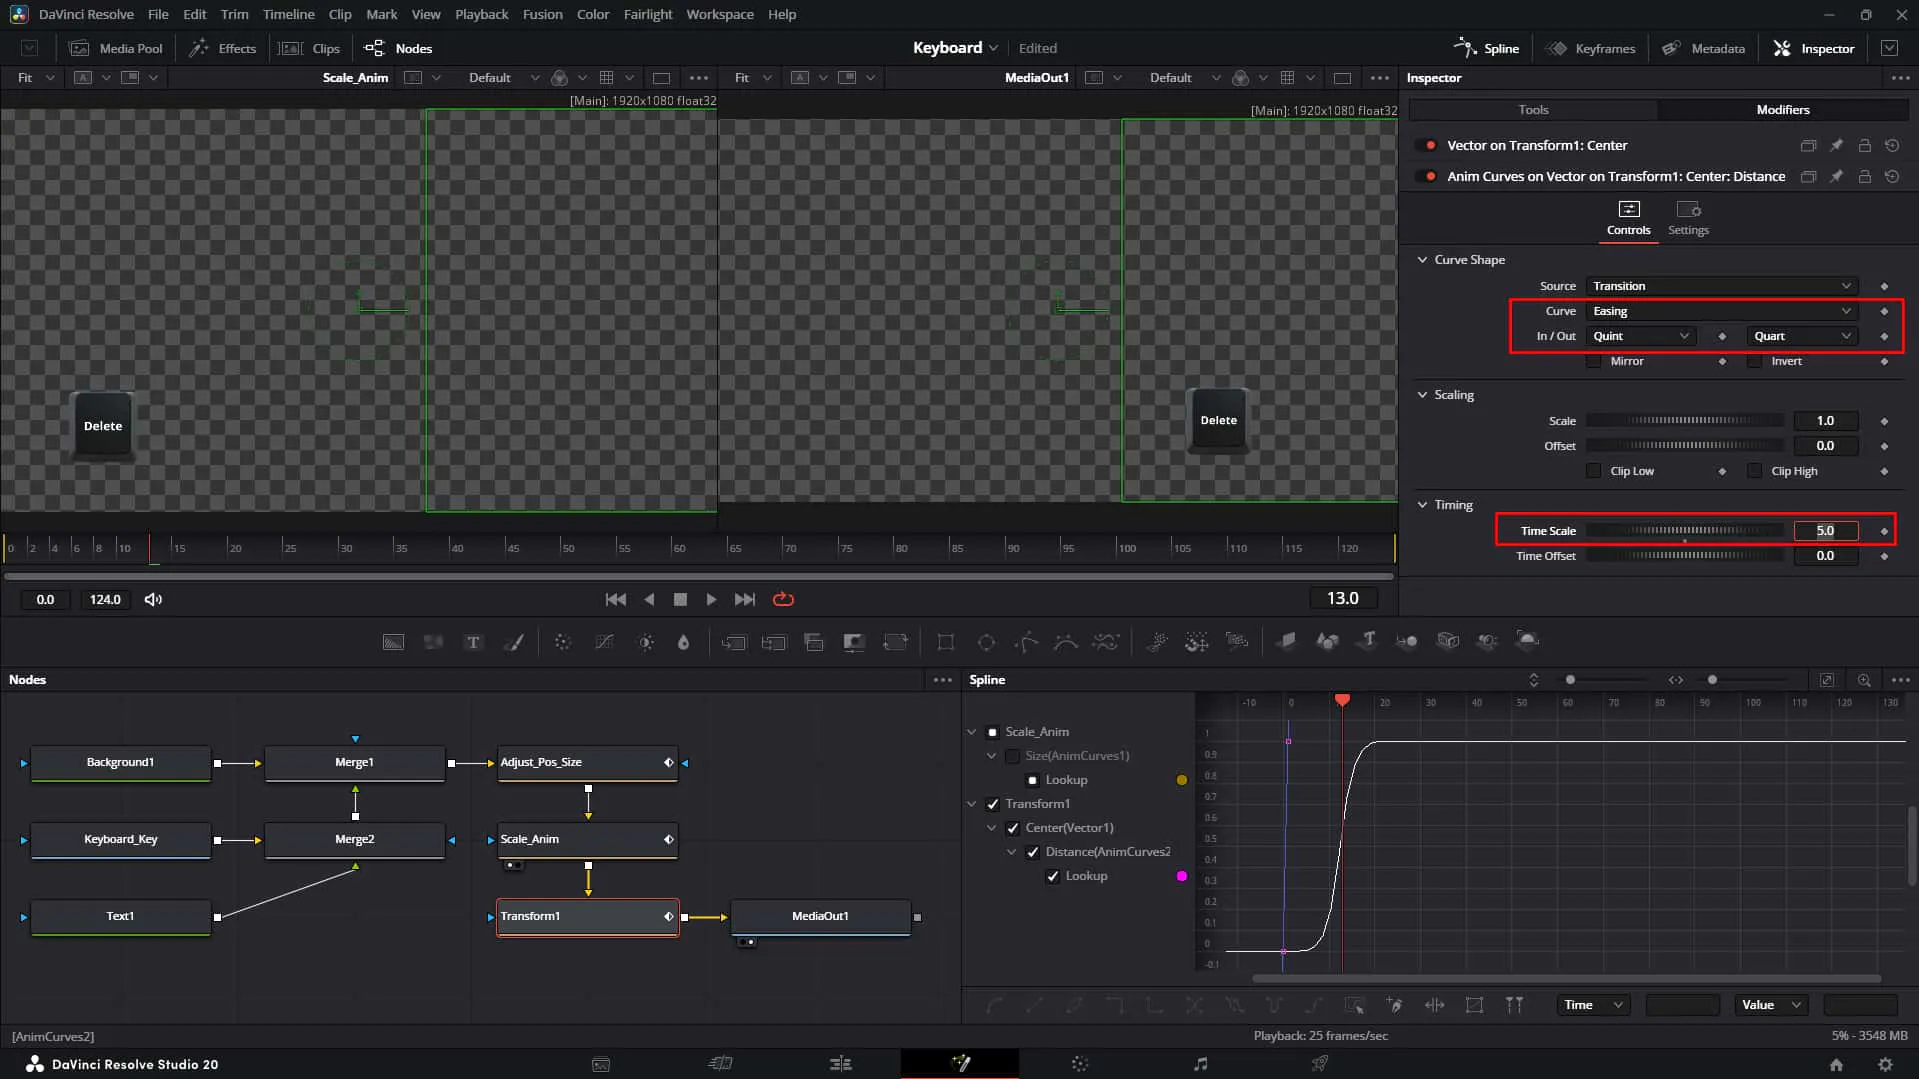
32. Final Polish
Tweak the Time Offset so the outro animation triggers exactly when you want the key to disappear. Now you have a key that pops in, stays, and zooms out—all without a single manual keyframe! 🏃♂️💨
And there you have it! You've just built a robust, reusable motion graphics asset in DaVinci Resolve. By using Anim Curves and Published Parameters, you've created a workflow that is faster, smarter, and way more fun than dragging keyframes around.
Happy Formatting! 💻✂️
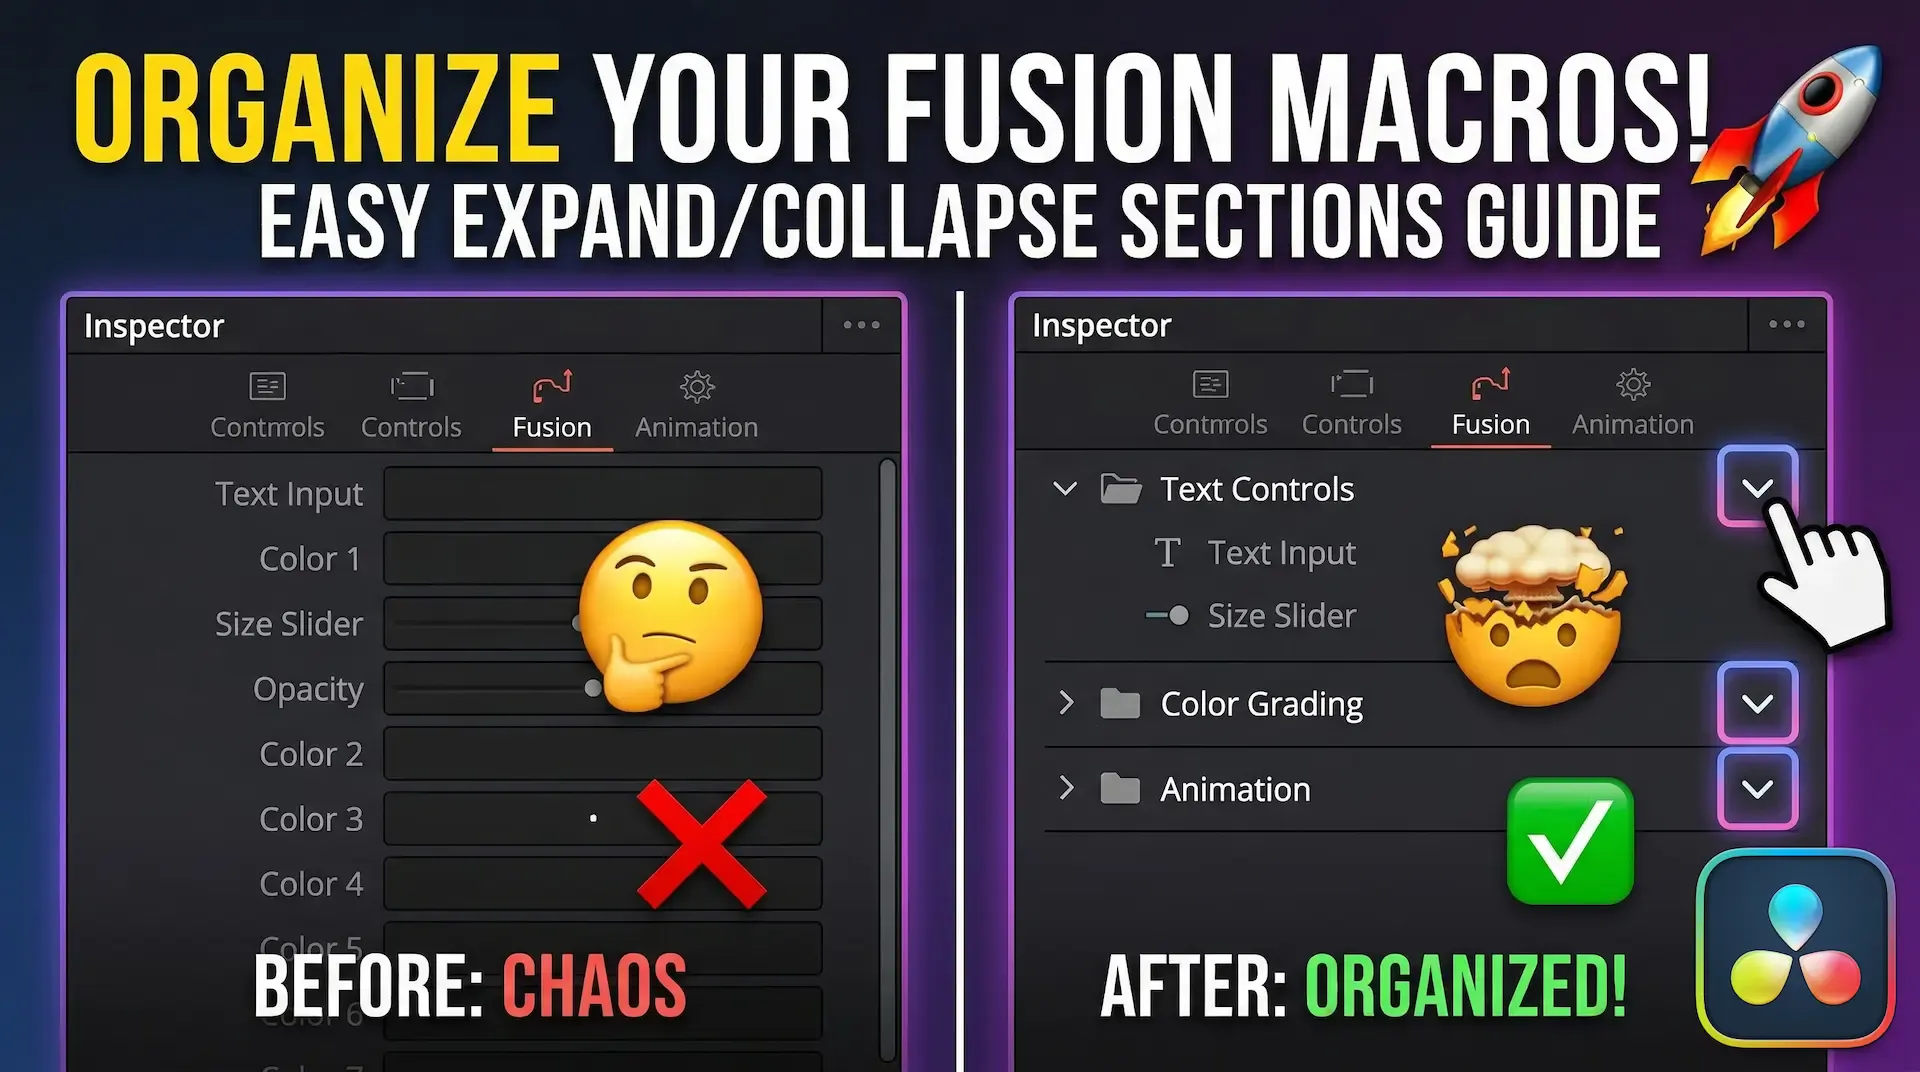
Discover how to group your controls into neat, drop-down accordion sections in DaVinci Resolve Fusion. Stop scrolling and start organizing today
Learn how to create dynamic, character-by-character text animations in DaVinci Resolve Fusion using the Follower modifier, Path keys, and Spline tool
Stop sharing raw .setting files! Discover the professional way to bundles your DaVinci Resolve transitions, effects, and titles into a single, easy-to-install .drfx file